Rainy day photography – Why not?

Wet leaves in black and white  Deep green & Rain  Wet green leaf   Perfect raindrops Green rain drops  Rose kinda soft  Grass

What does a photographer do on a rainy day?  This photographer’s options don’t include getting his clothes and equipment wet. When the rain outside has filled the paths with puddles I try to fine momentary instances when the sky lightens up for some shooting and then creating with Photoshop.

After two hot and dry summer months dark clouds rolled in seemingly out of nowhere and the rain came down. The damp, cool, afternoon breeze was a nice refreshing change, but I had just set my camera bag and tripod on the porch and was planning to make an afternoon drive to a local waterfall when it began to pour. Well, that excursion was out.

What does a photographer do? I suppose I could have turned on some music and picked up the unfinished novel I have been trying to get back to. There were some silly movies on the television, and I could have snuggled up on the couch and watched one or two, or (and I liked this one the least) I could have pushed my way into my messy workshop to continue the never-ending job of cleaning up. However, none of those seemed all that interesting as I stood looking at the rain falling on the garden out the front door.

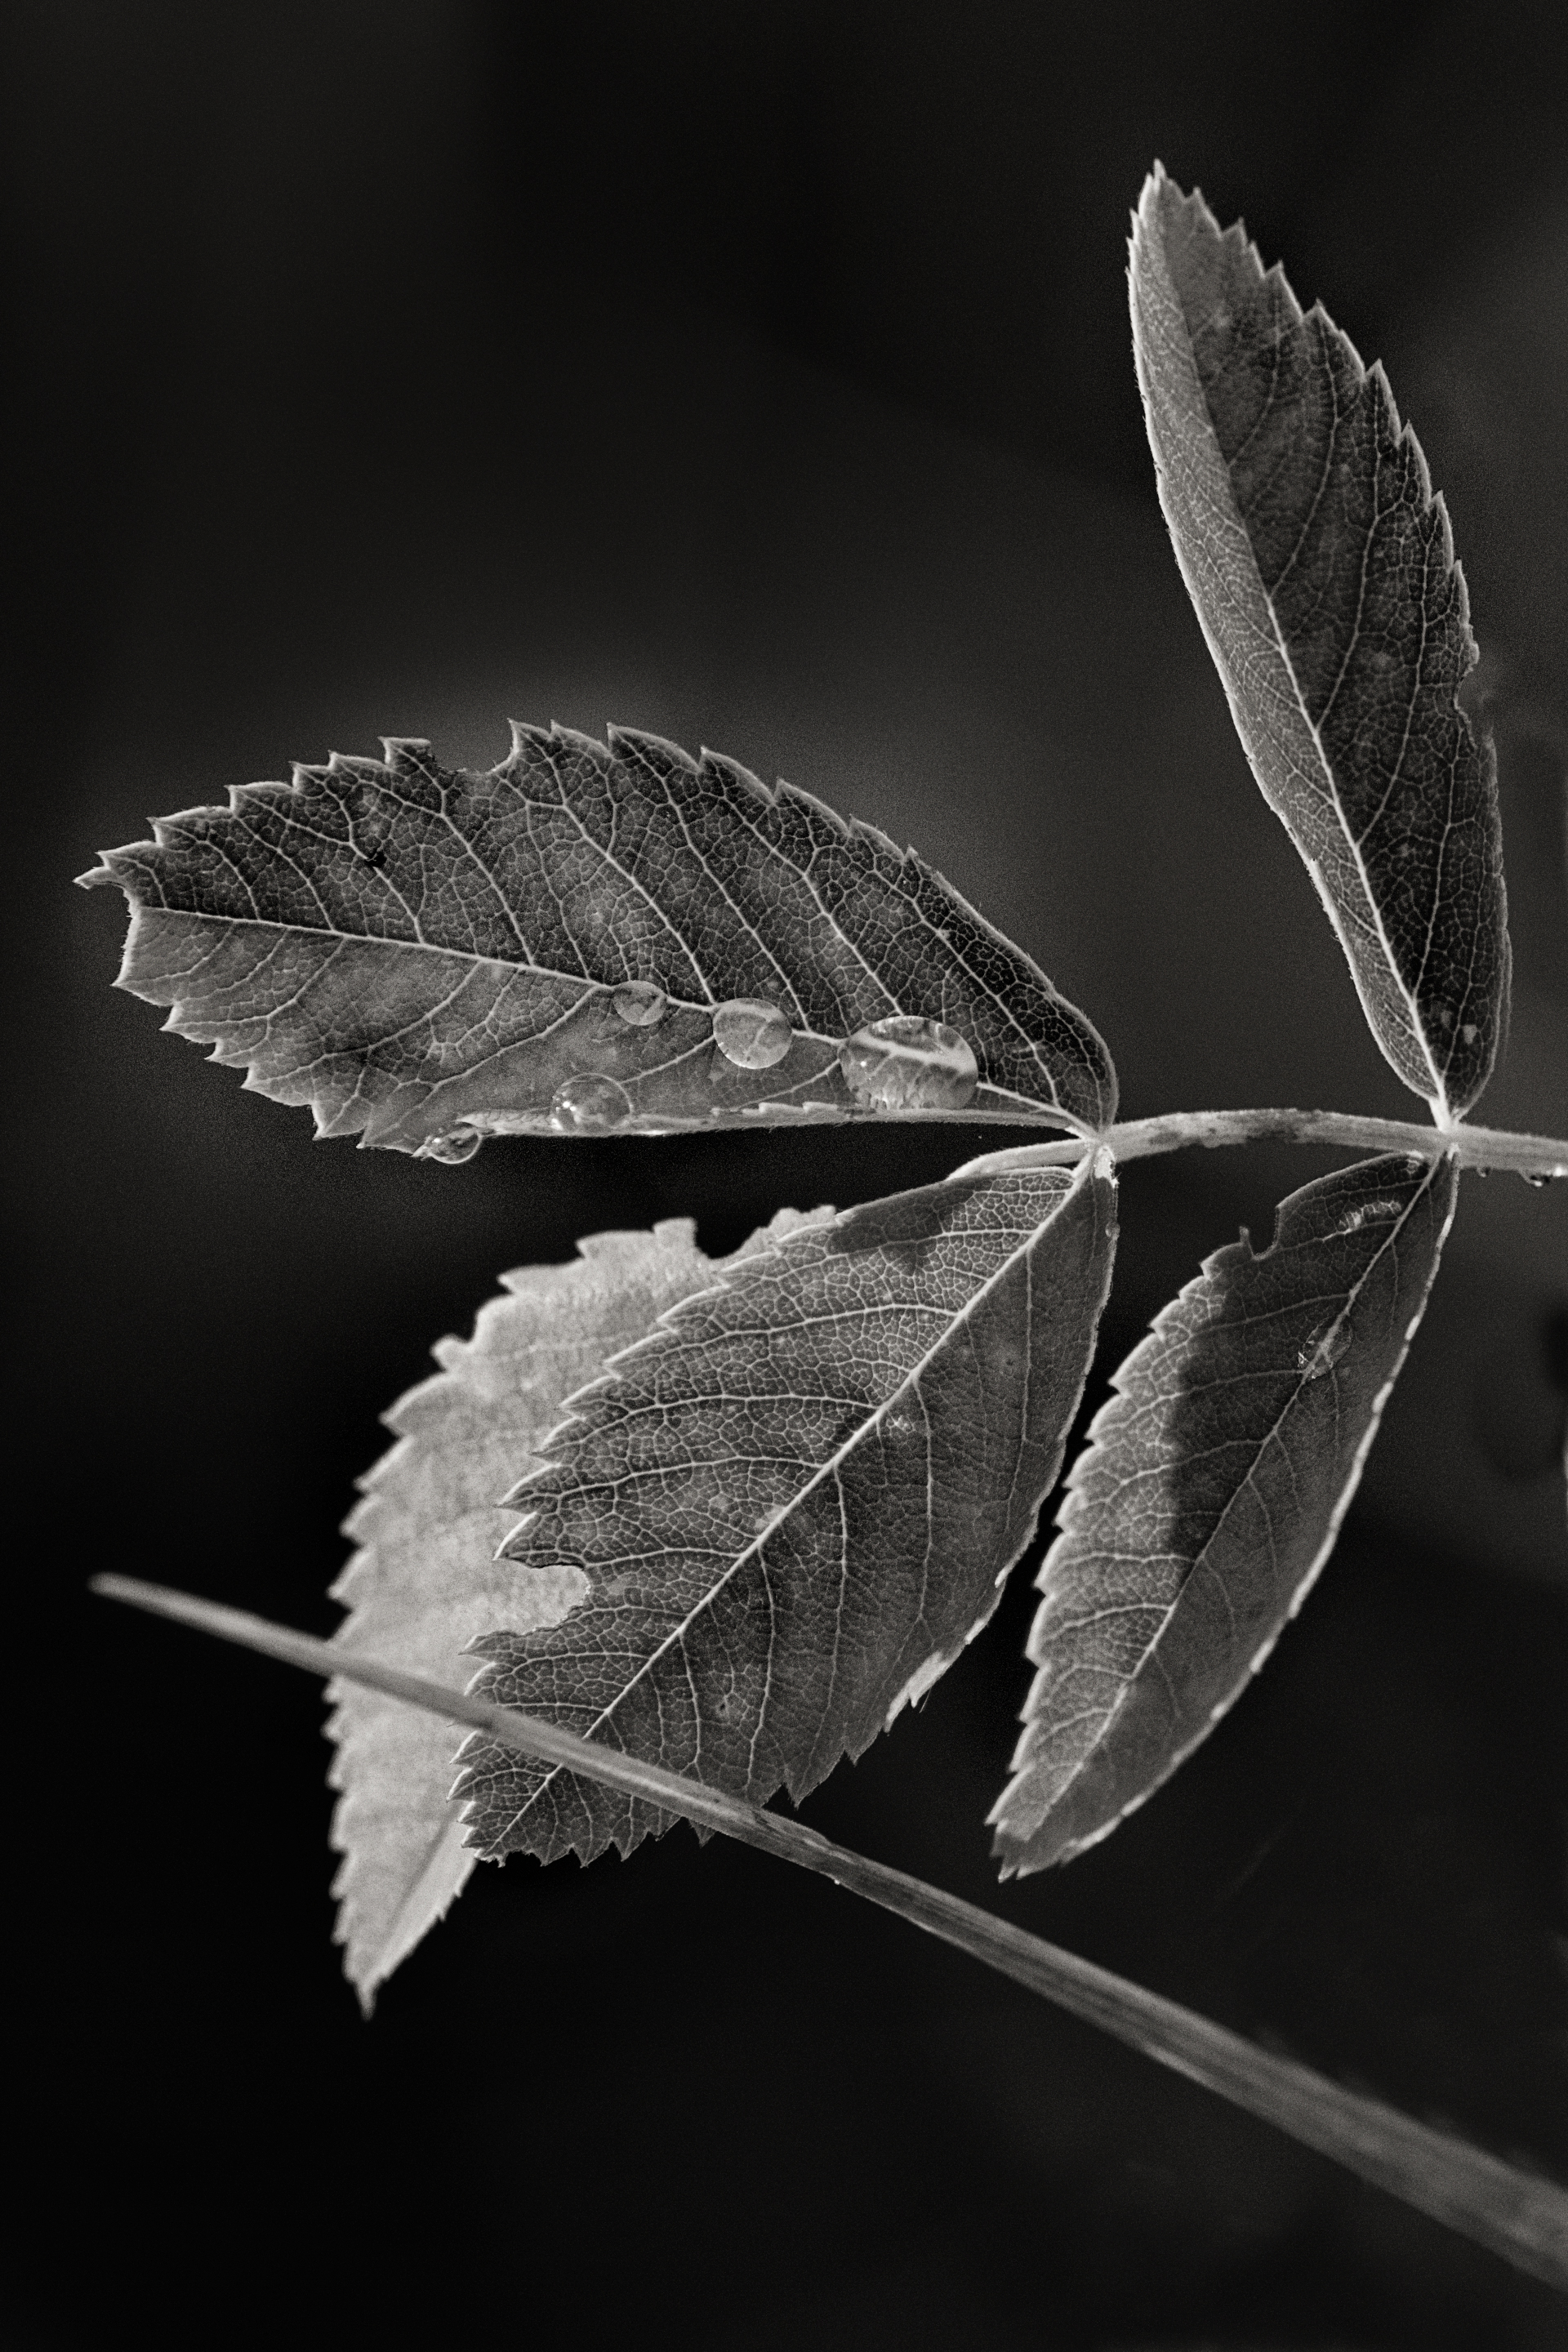
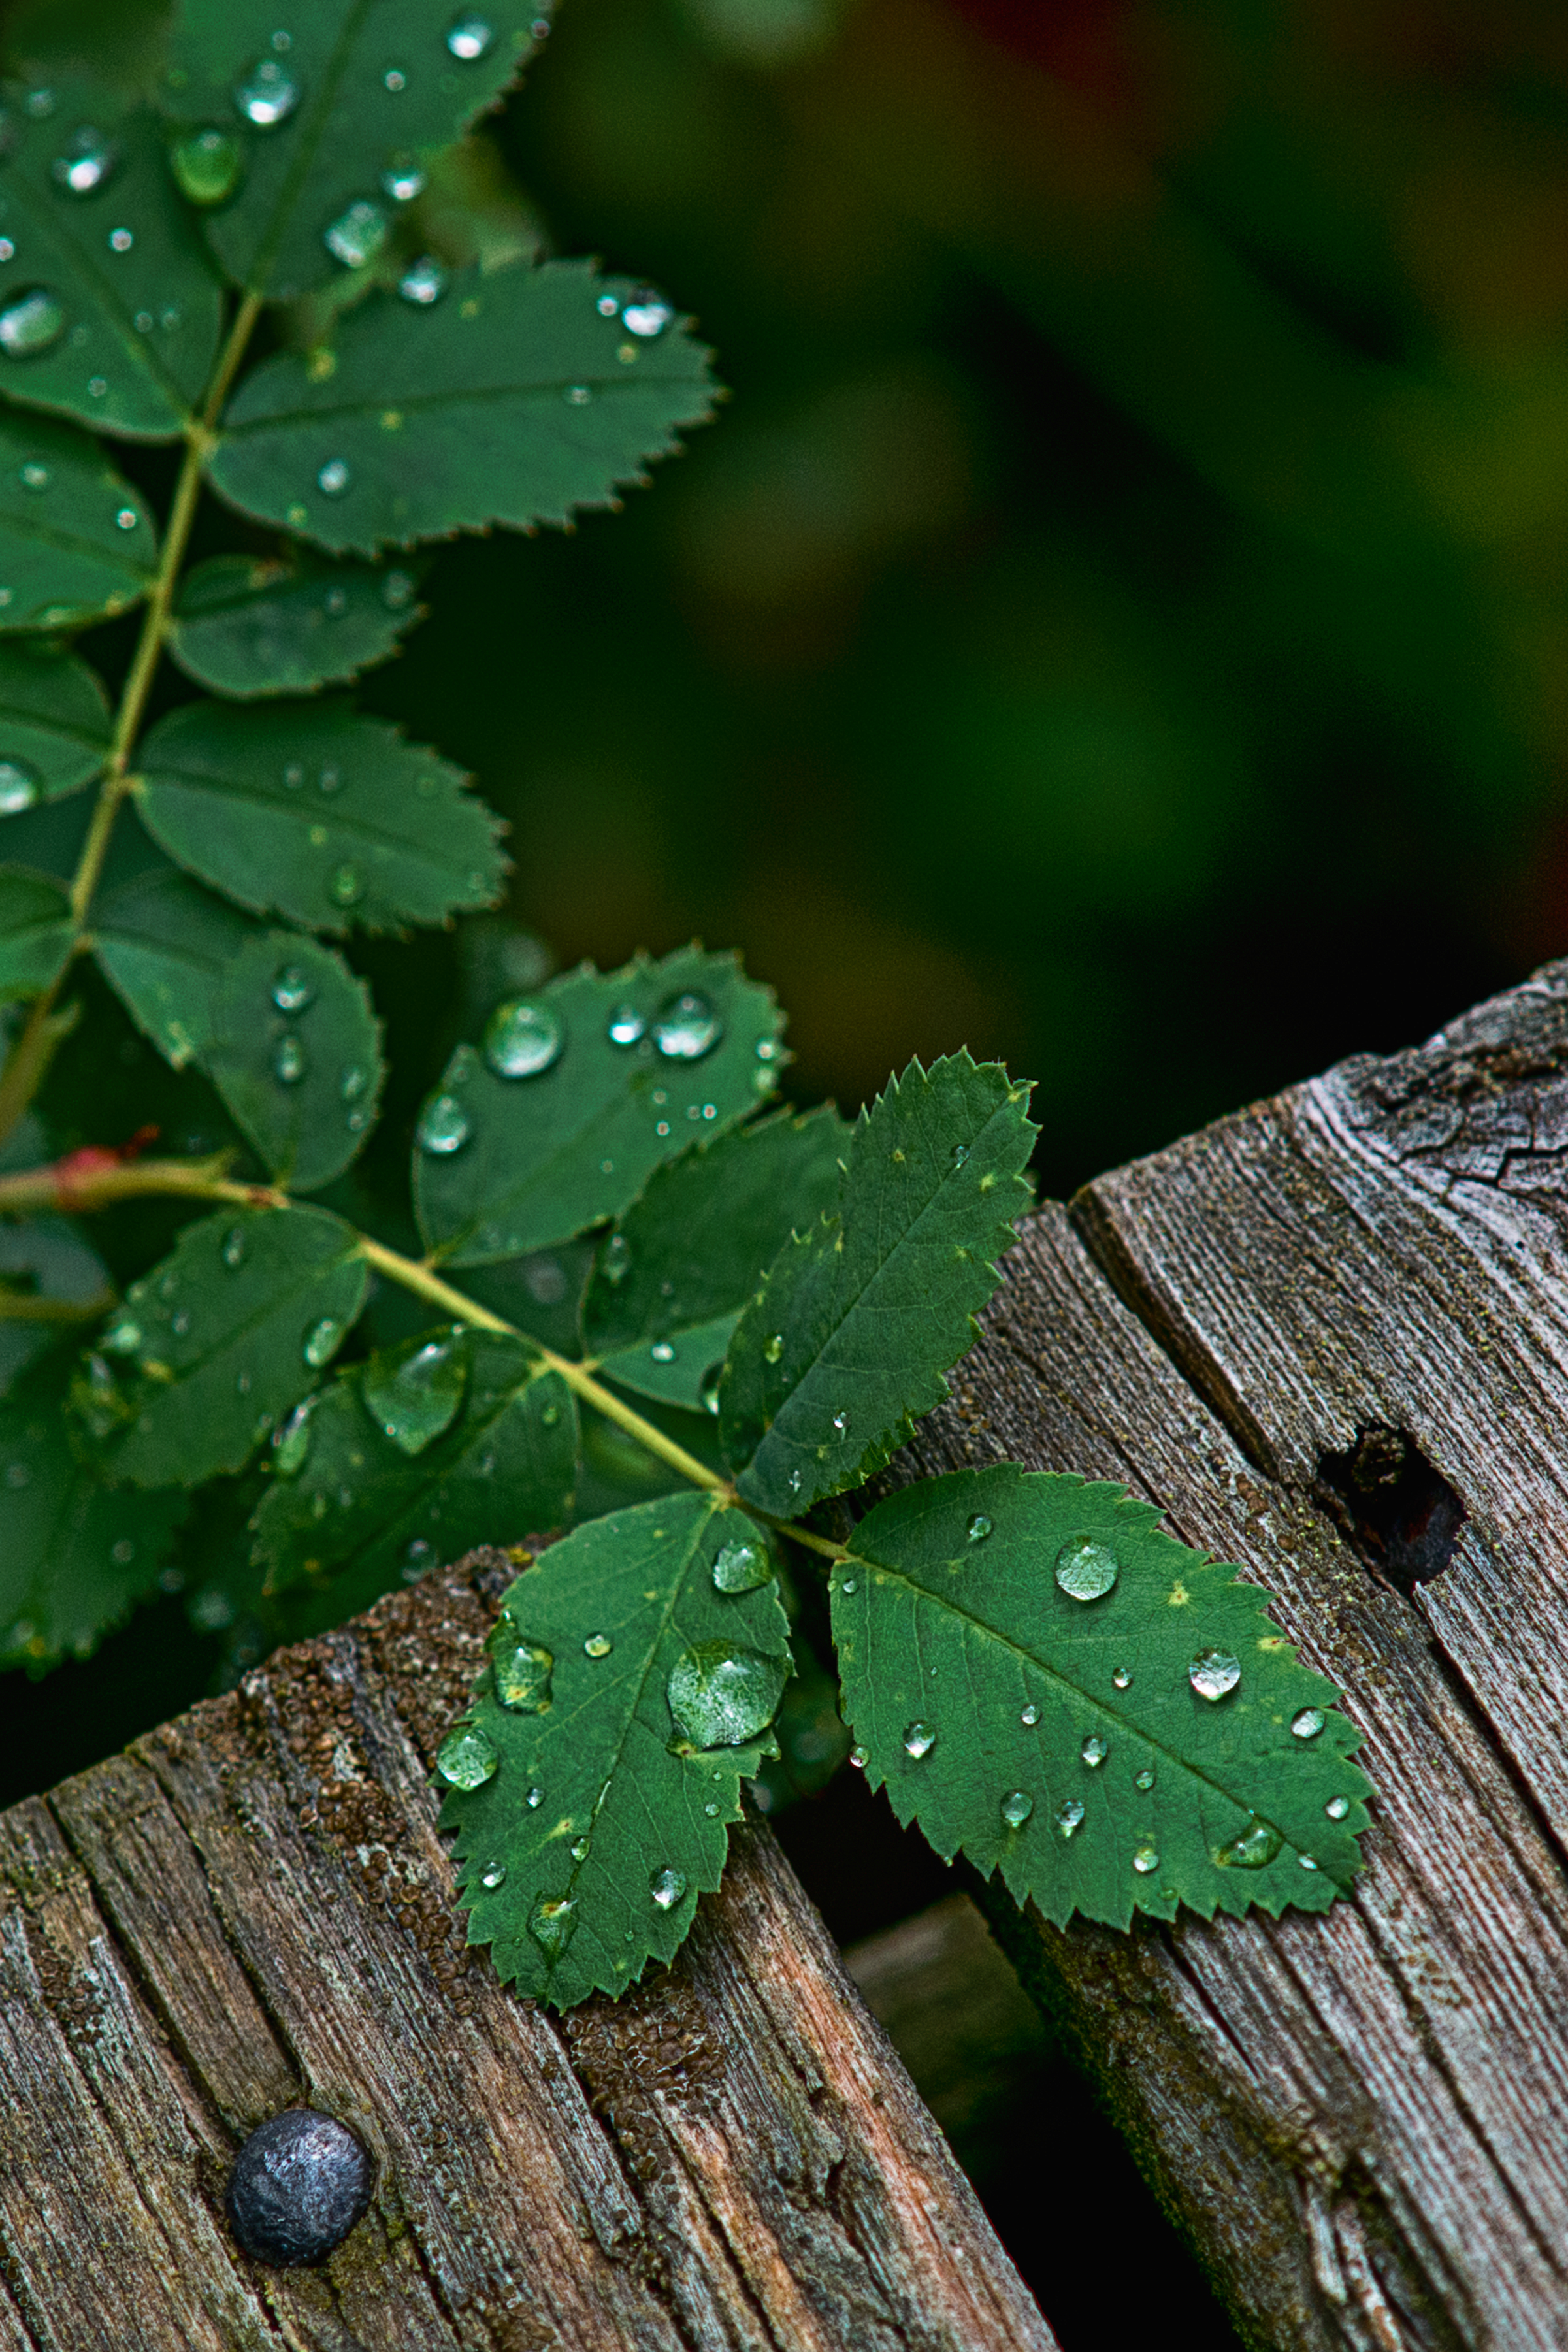
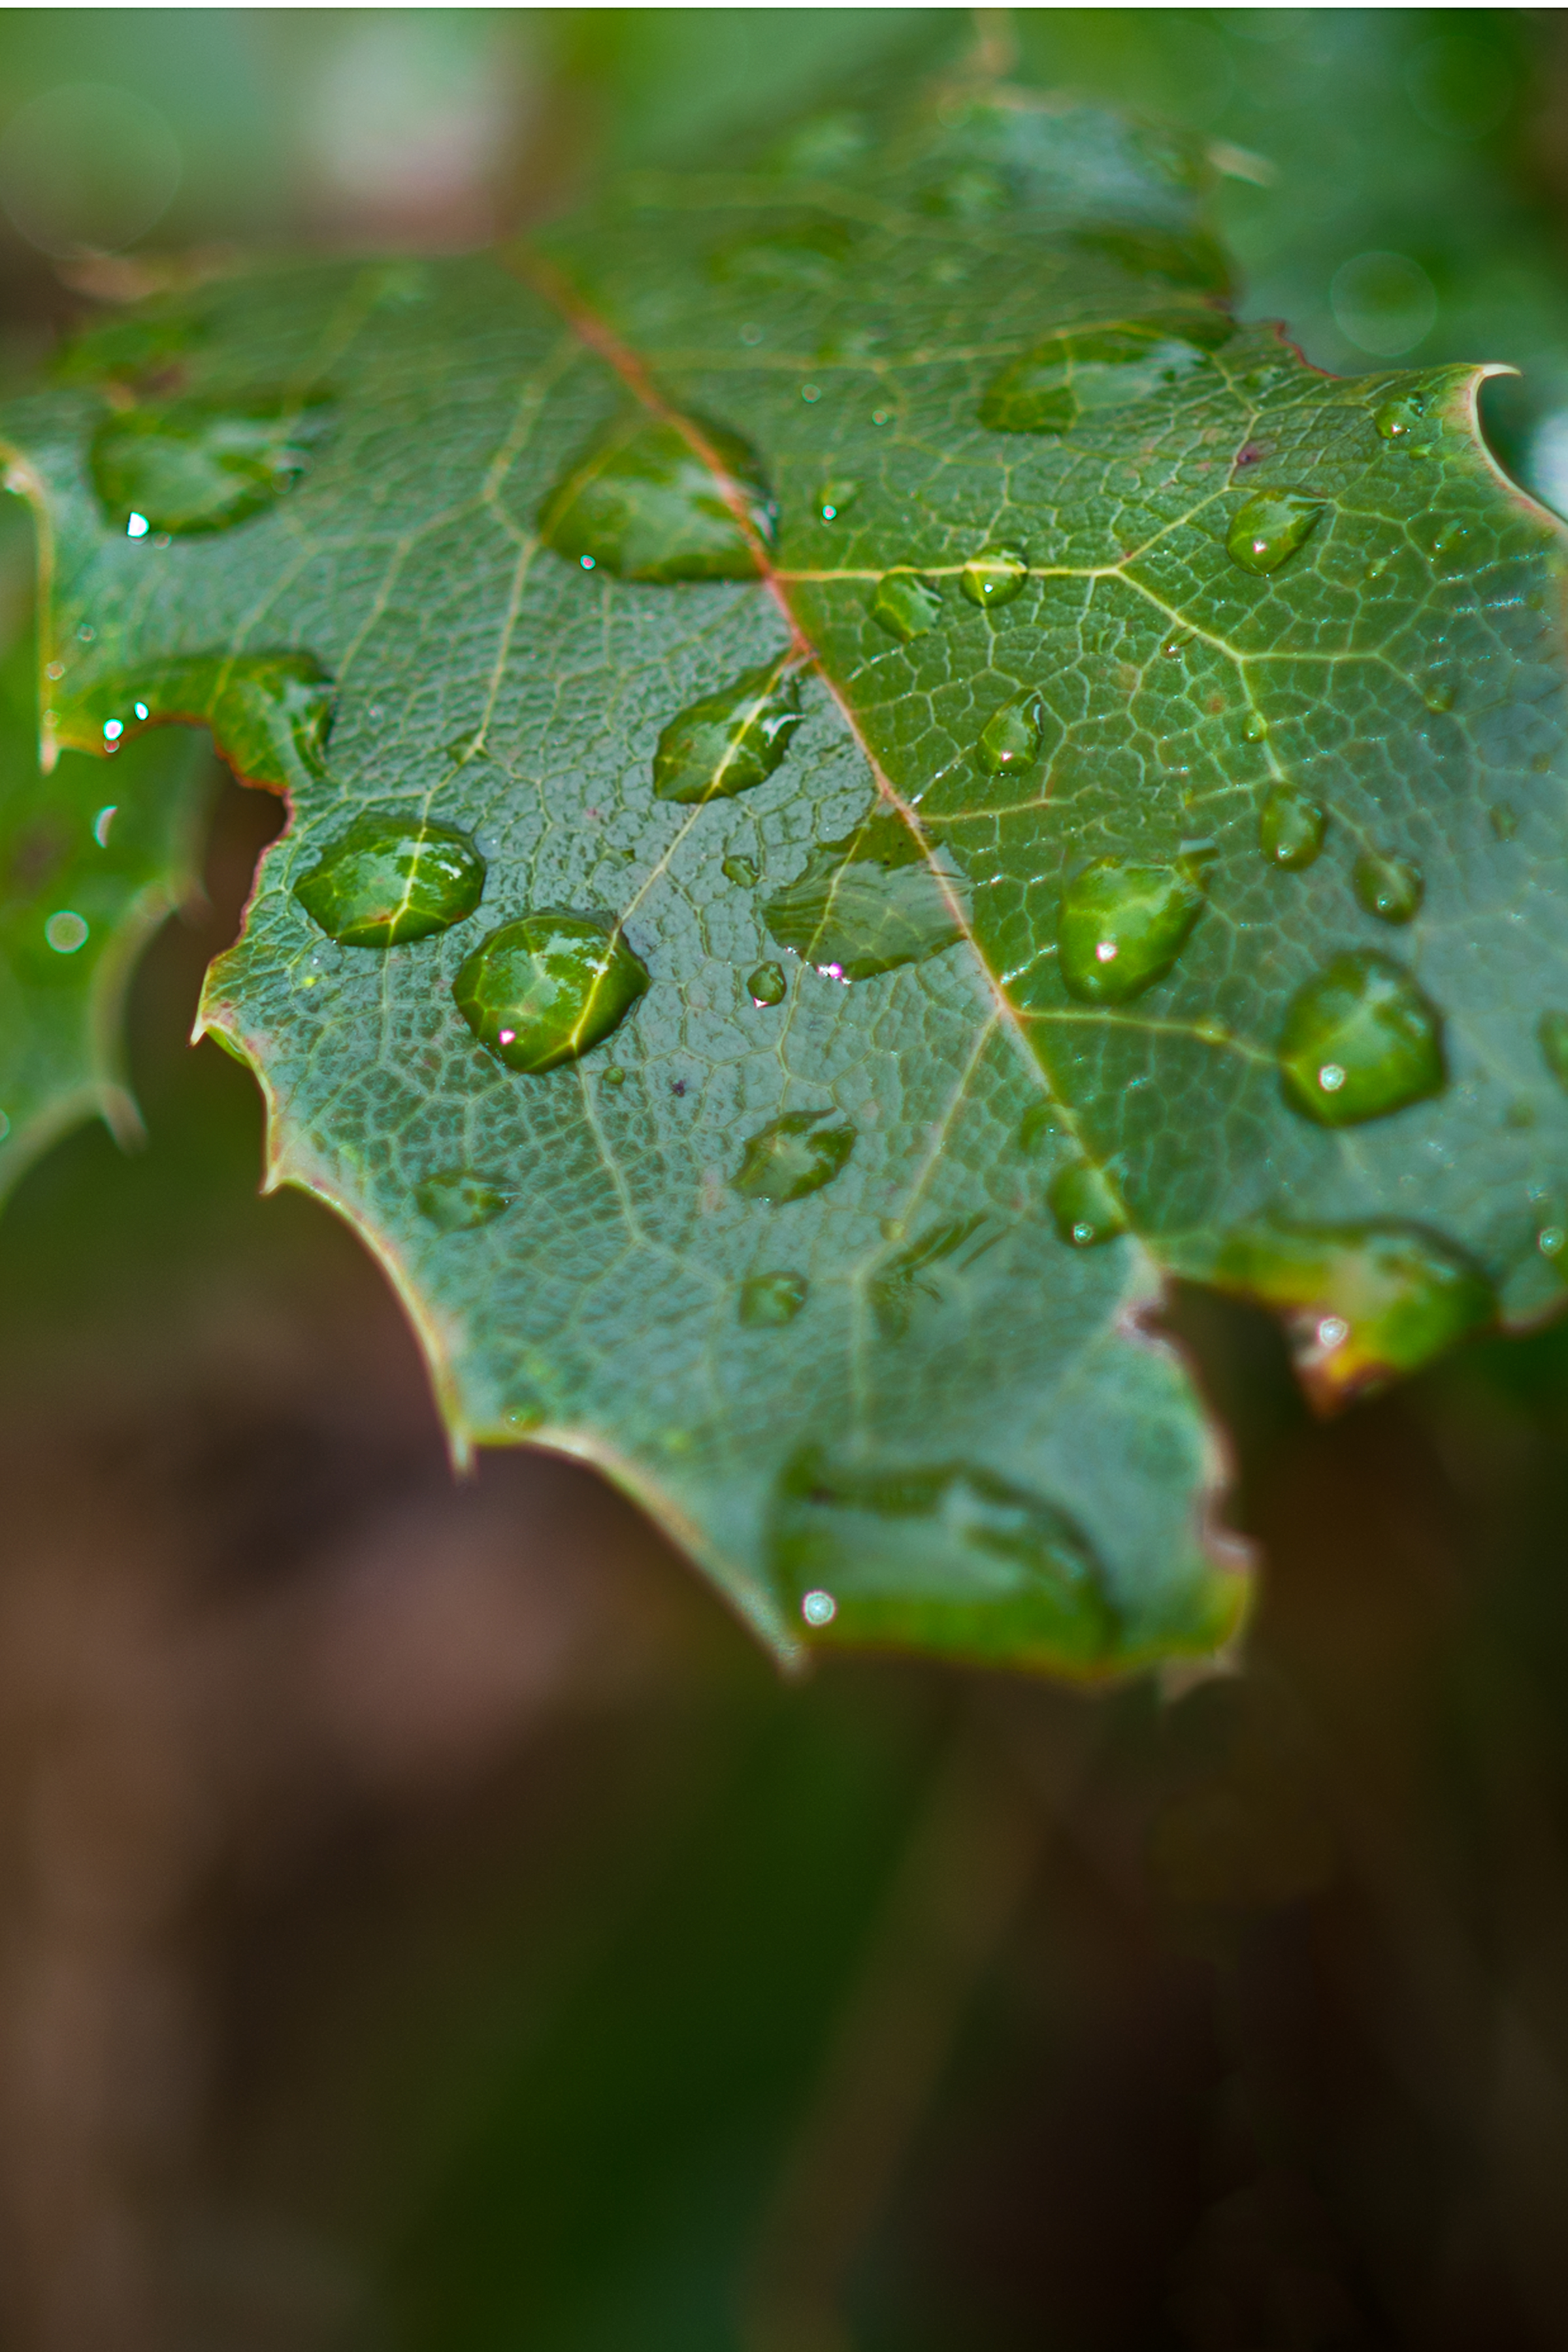
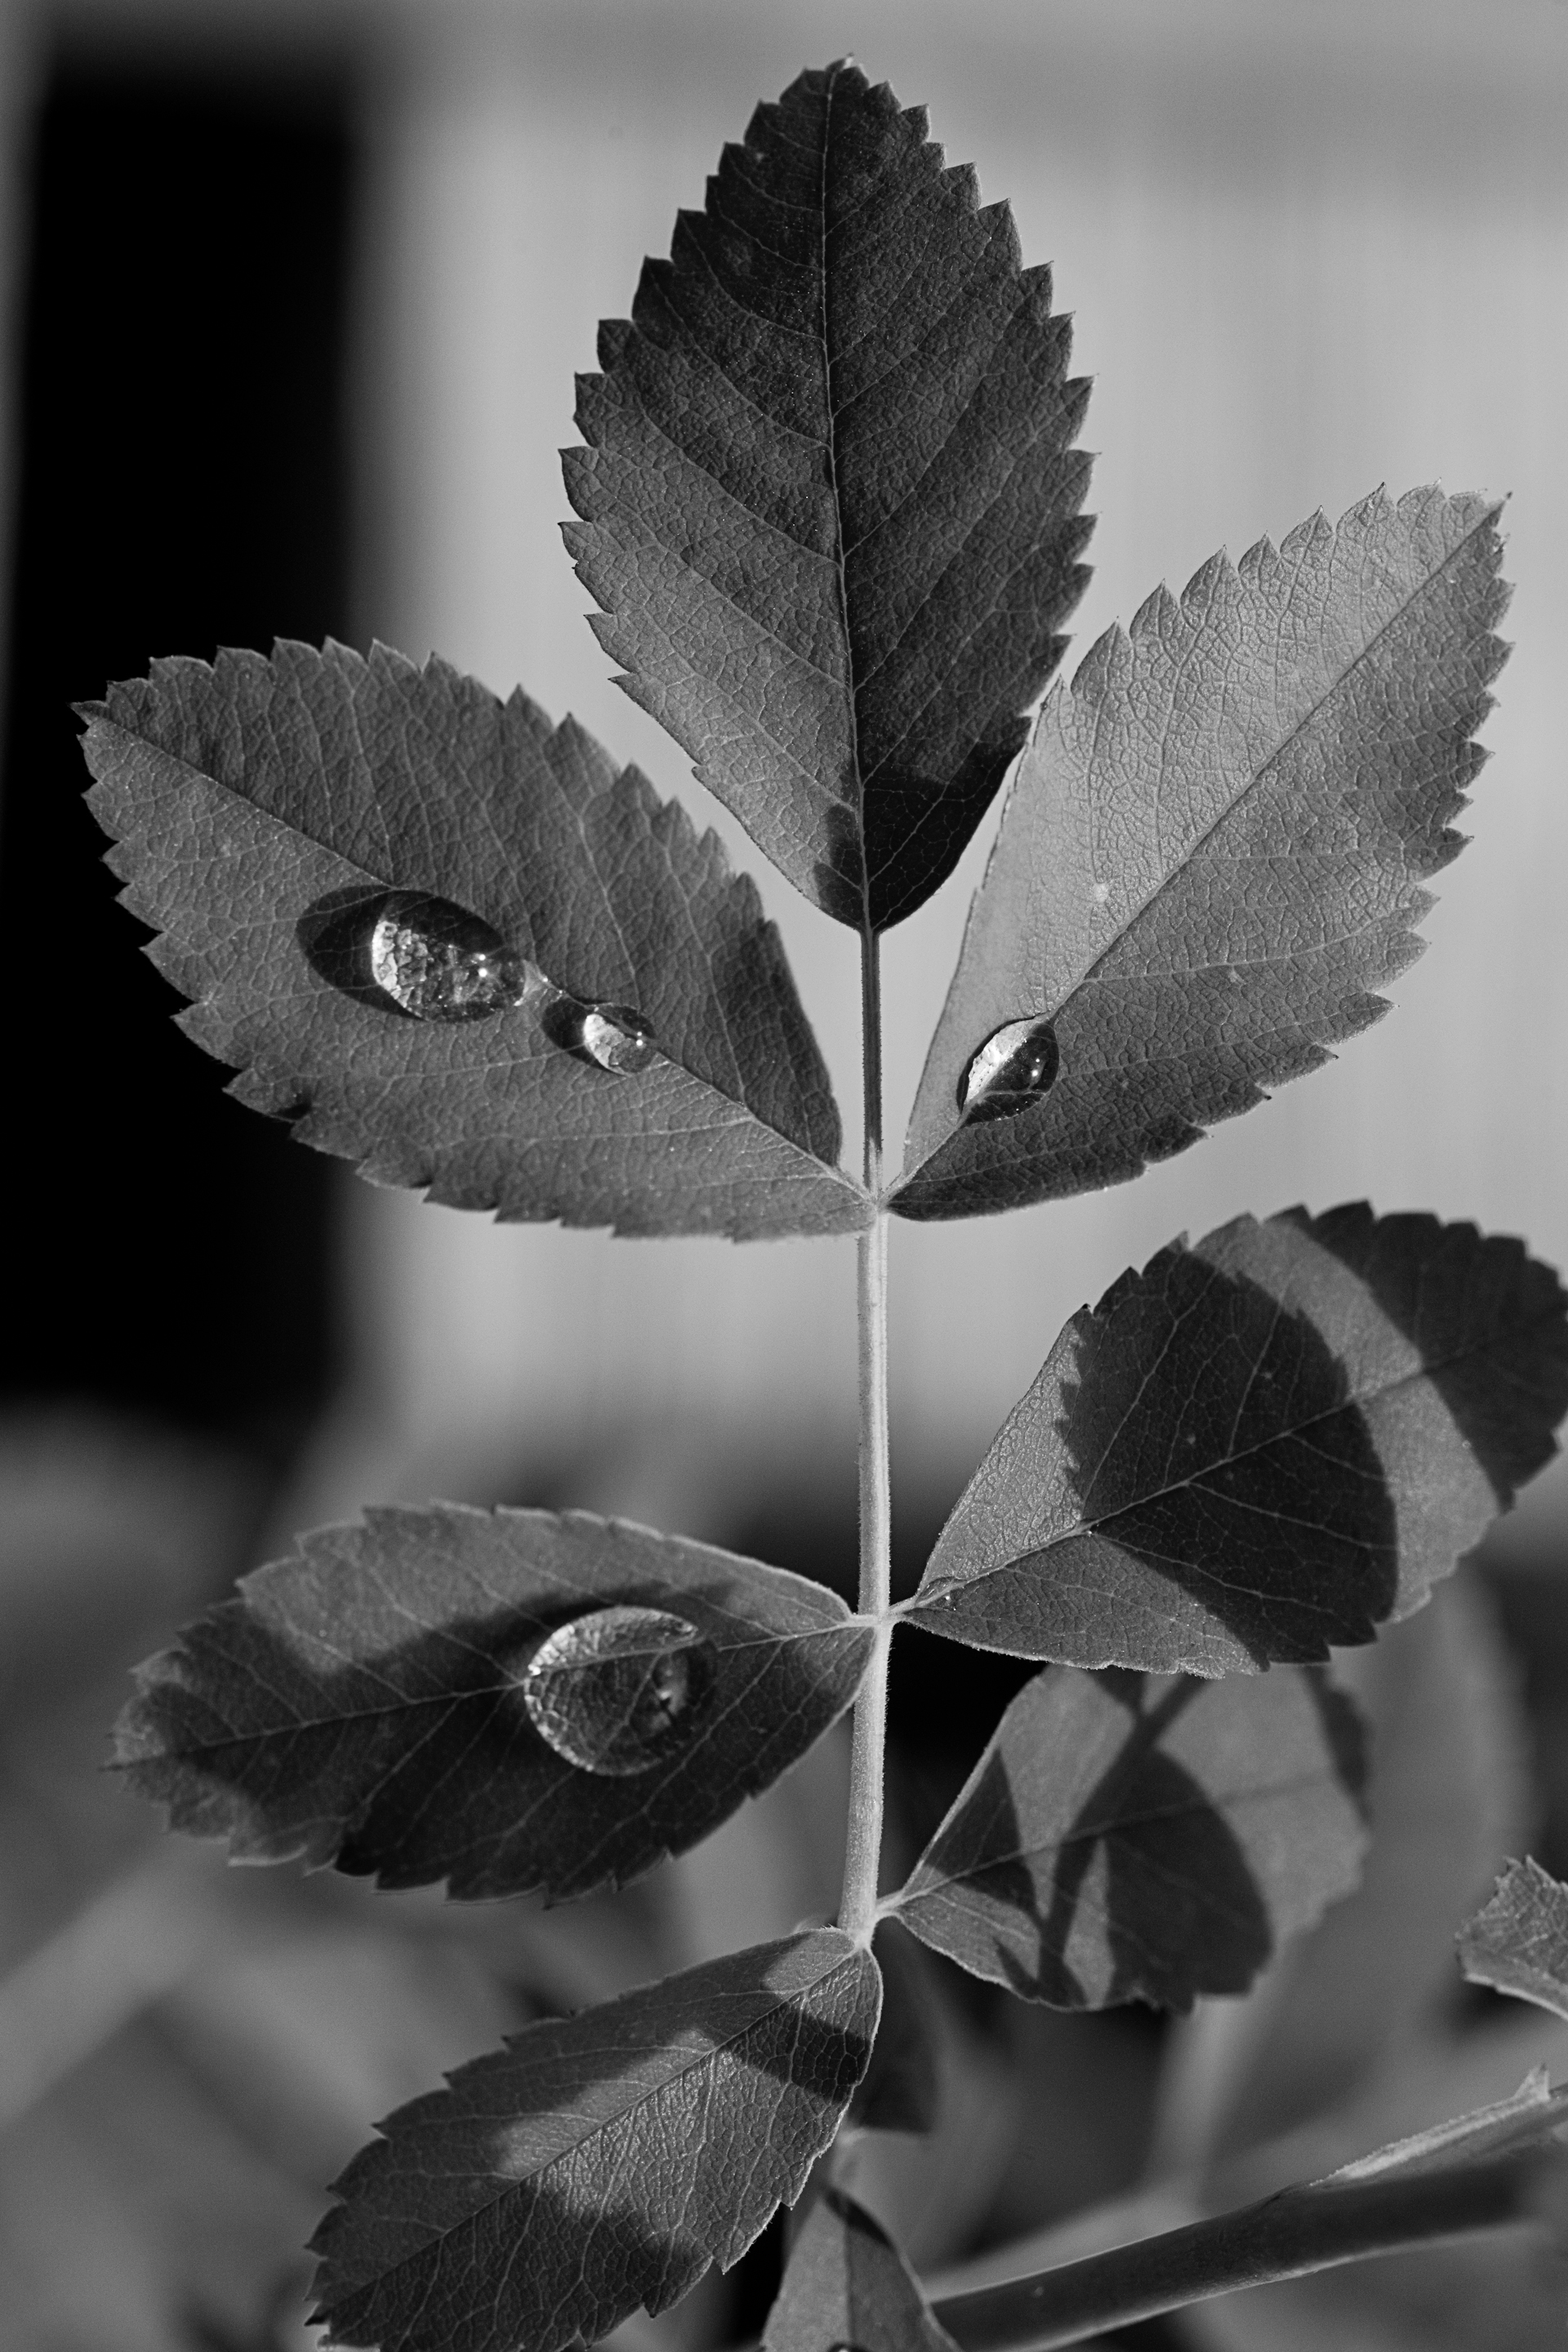
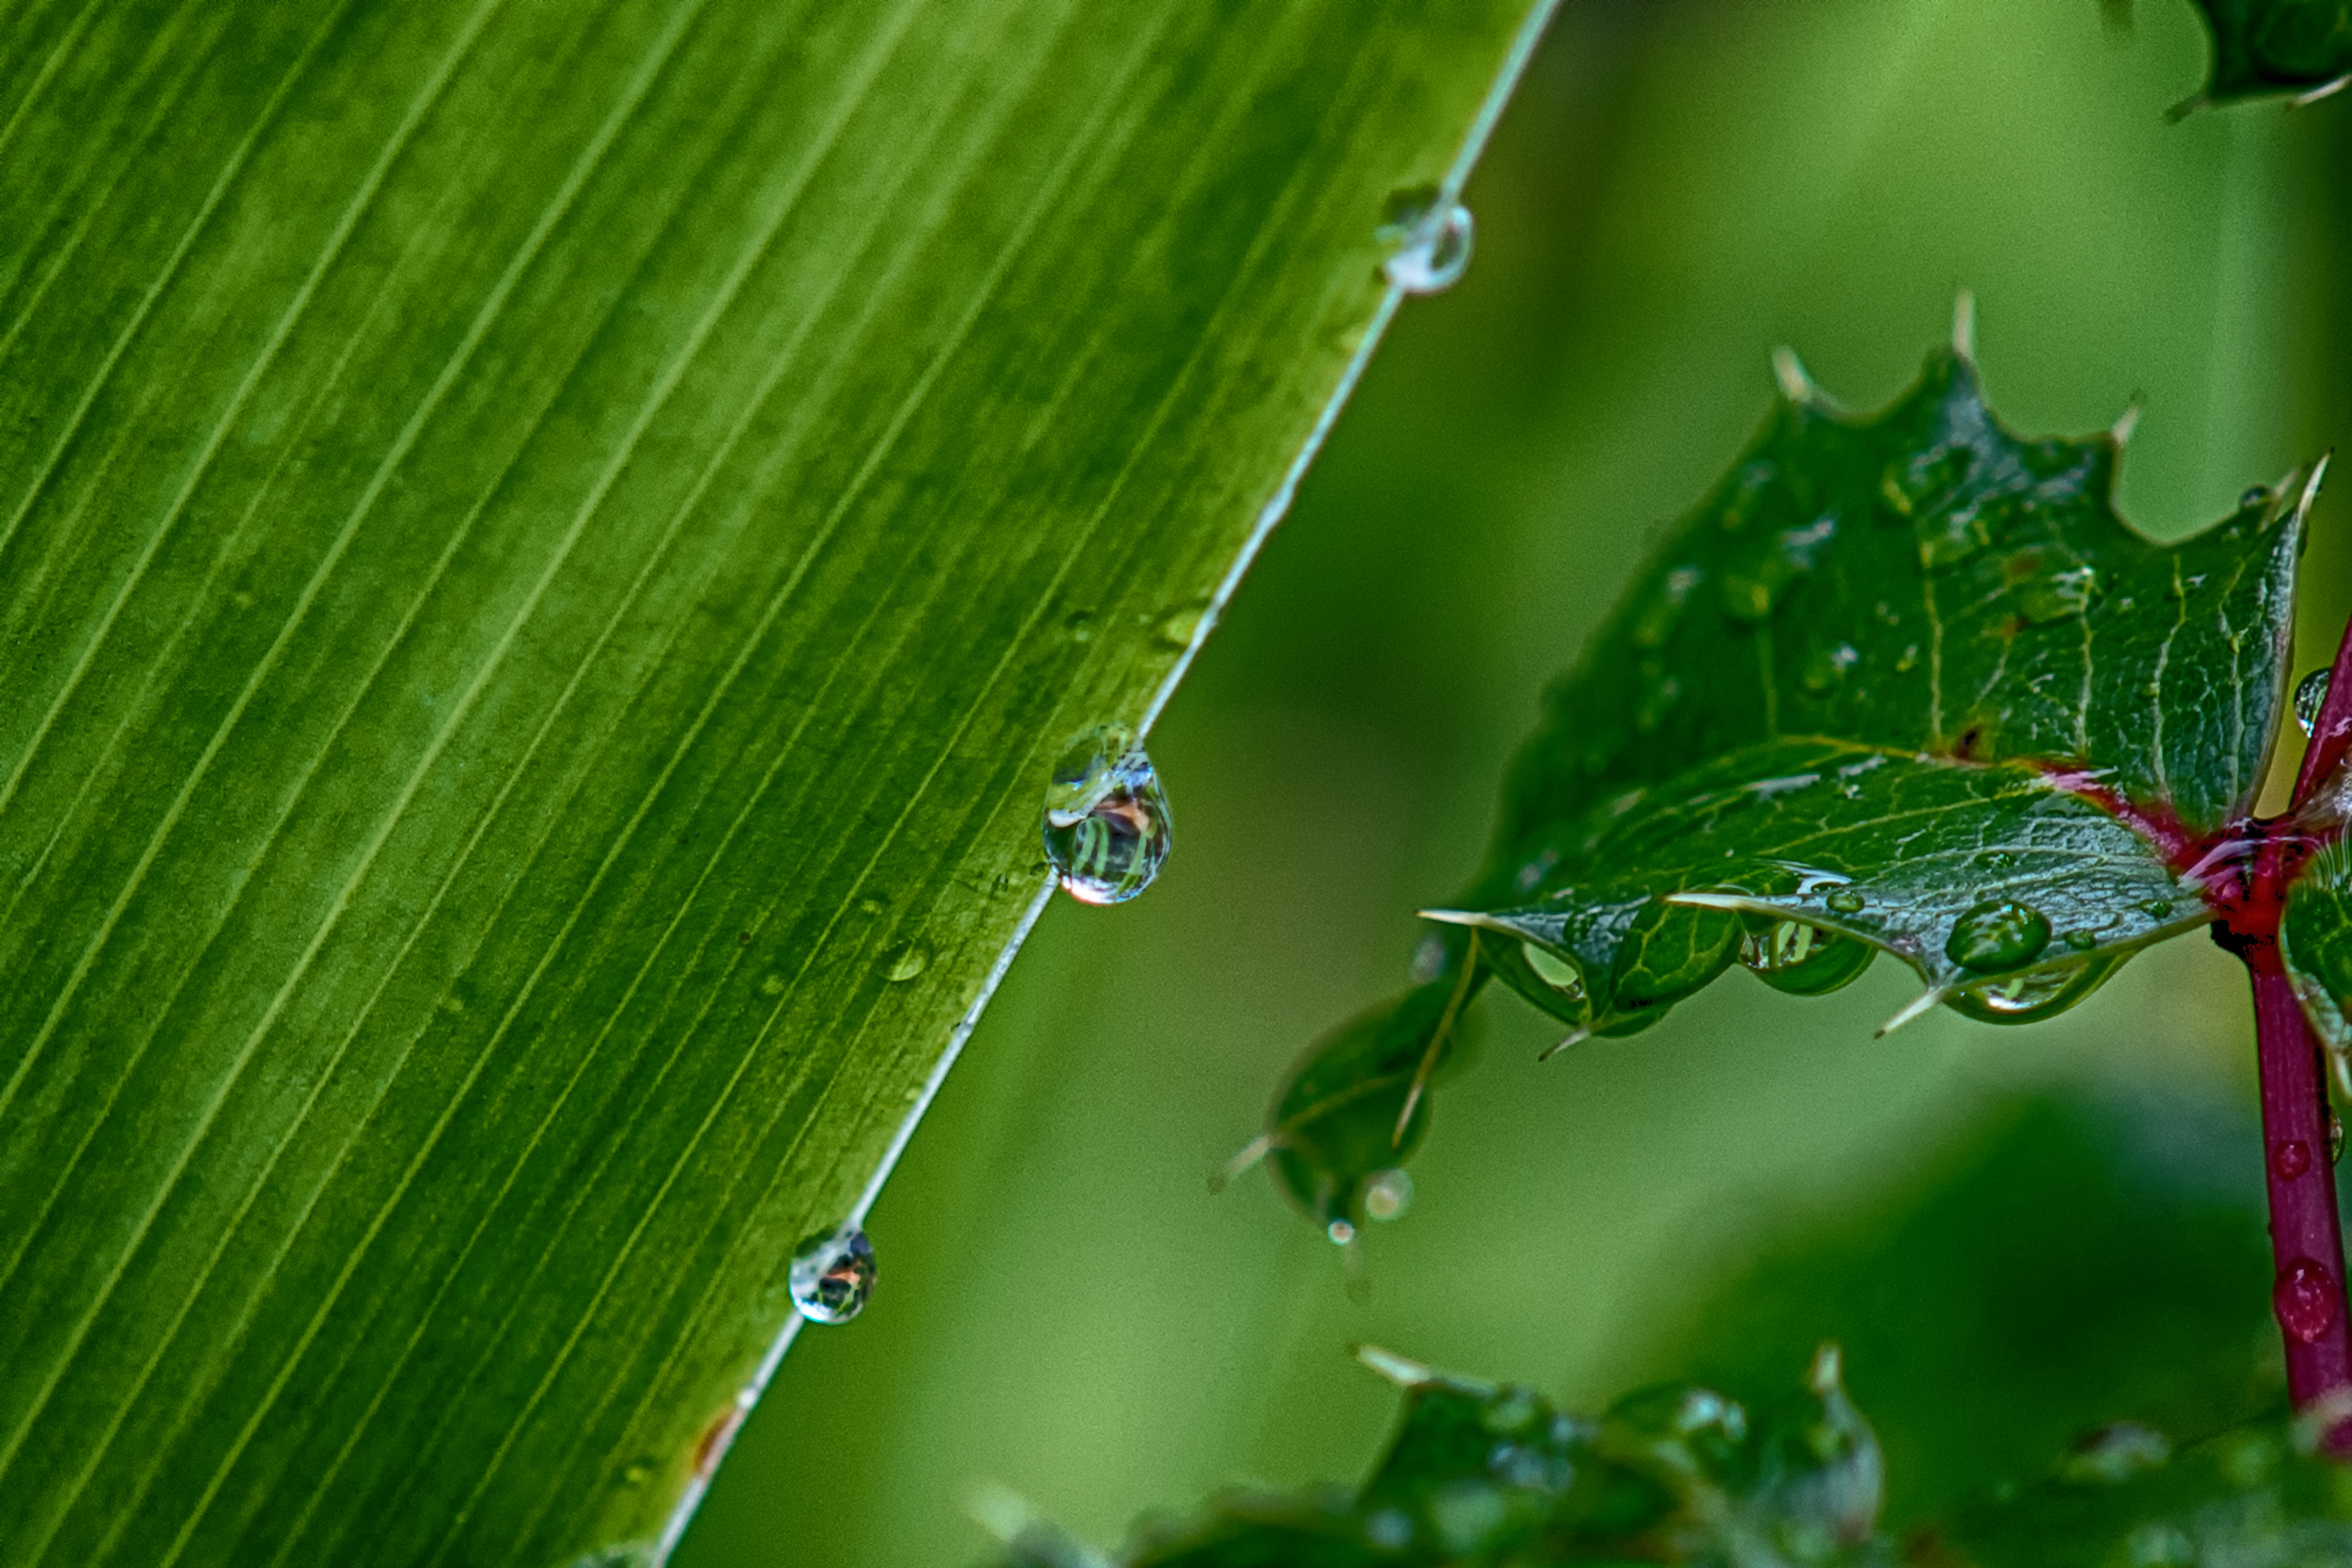
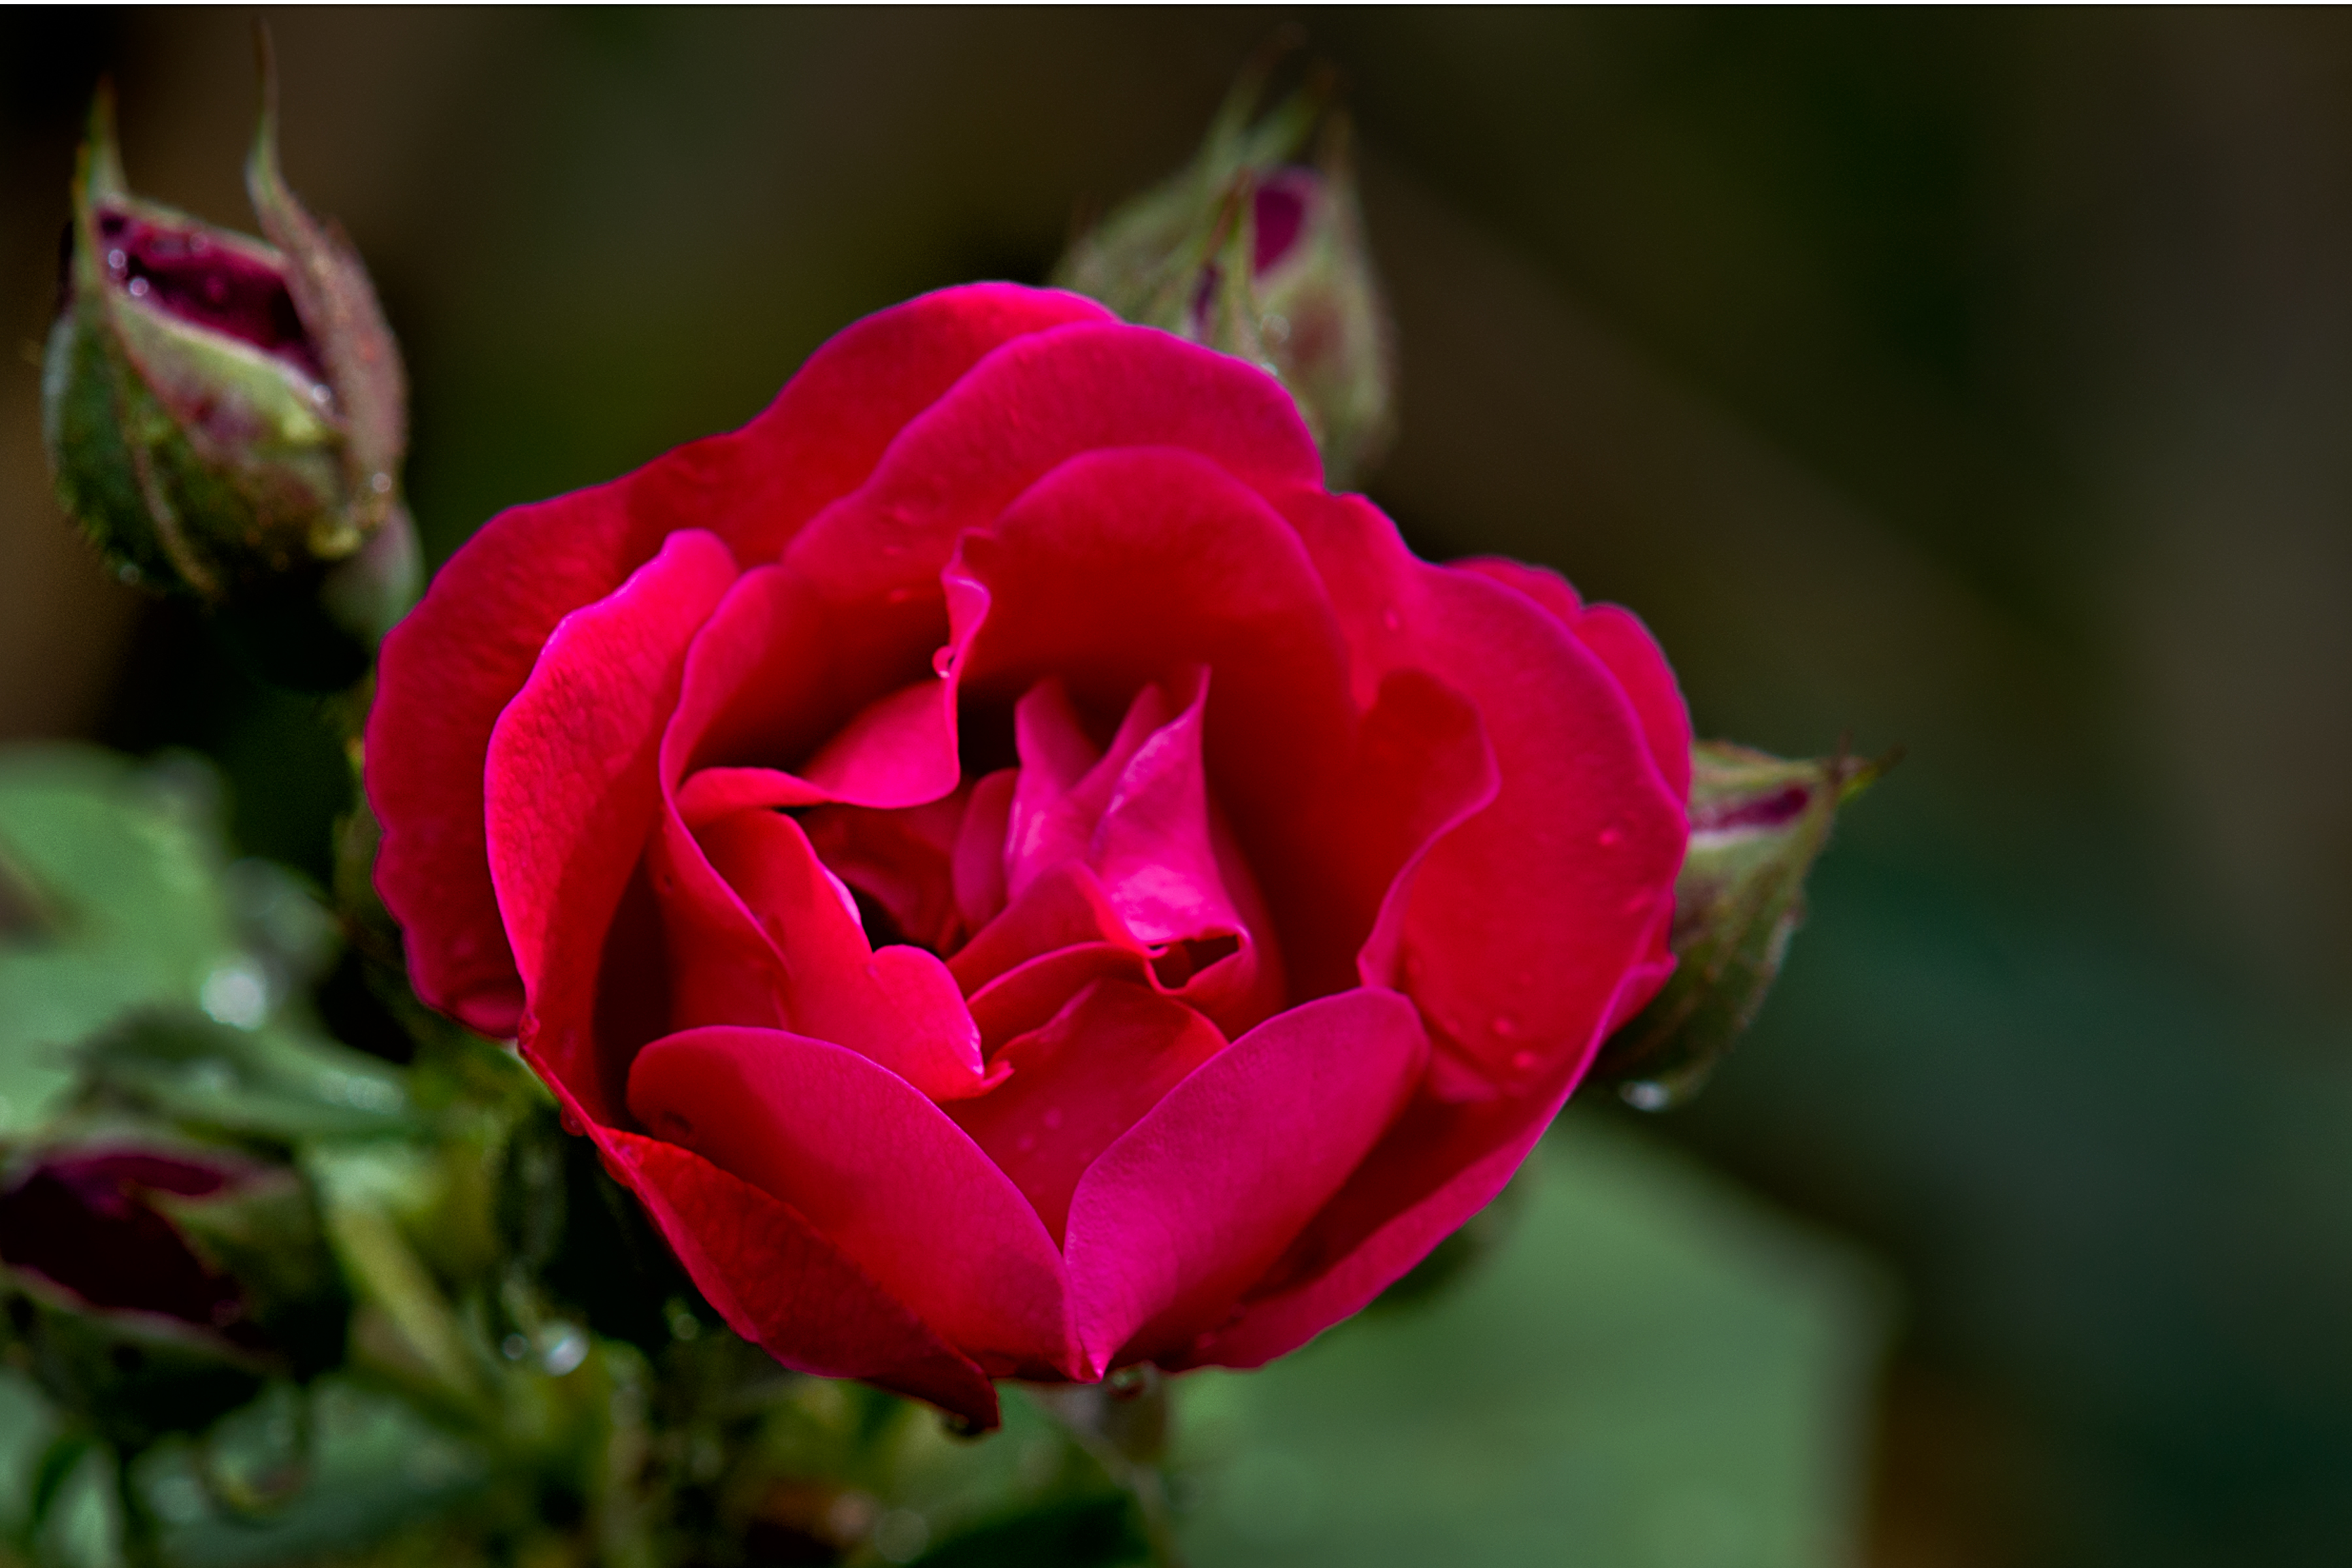
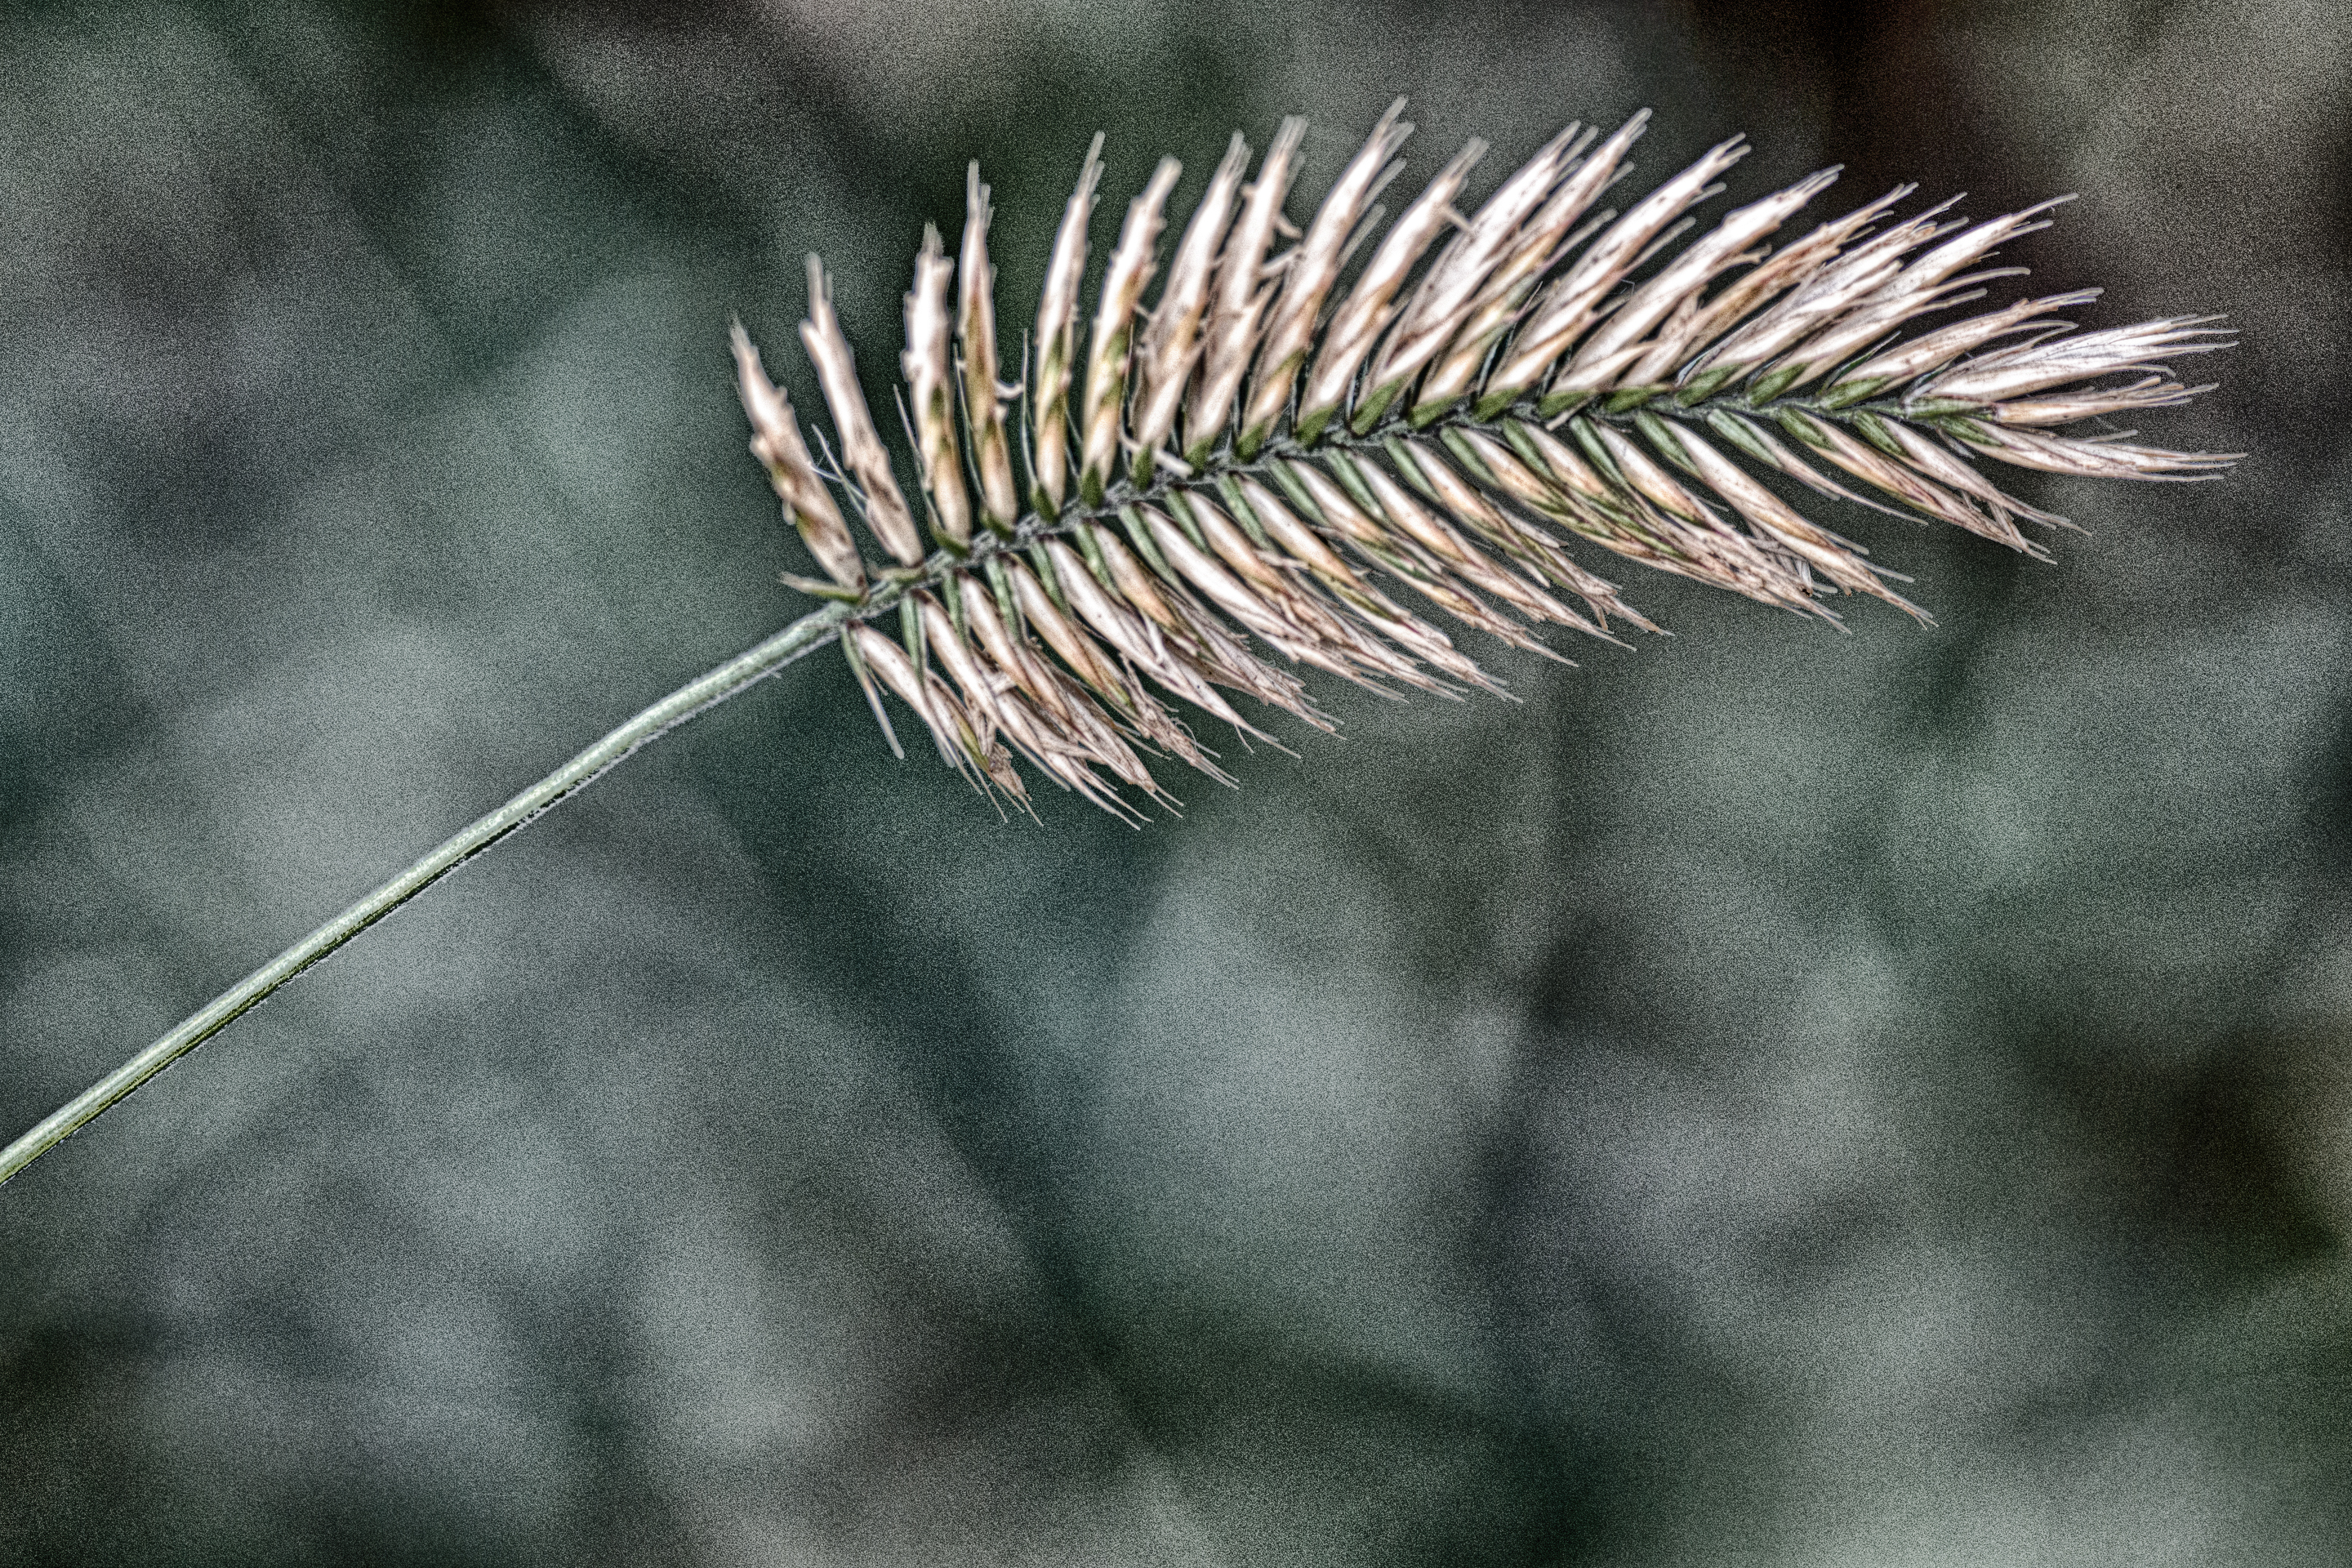
Fortunately for me the rain wasn’t hard and constant. It would come and go, leaving spaces of time for clearing, with moments of sun poking through the clouds. So during some clear moments, I mounted a macro lens on my camera, grabbed my tripod and went outside.

I looked for interesting plants with raindrops to photograph until the rain began again, then I’d go back inside and wait for the next lull in the rain, however, I then had image files that I could download to my computer. And while I waited to go out again I could sit and creatively work with the pictures I just captured.

I spent the afternoon that way, I’d go out when the rain lightened up, wander around the yard and photograph anything with water drops that caught my eye, return to the house when the rain returned and work on those image files till I could go out again. I snacked, had a couple glasses of wine, and spent a great afternoon with photography. What could be better than that?

There is always something in the garden no matter the weather, sun, snow or, like on that enjoyable day, intermittent rain. The slight overcast day was perfect for my subjects. Bright sun will increase a subject’s contrast making it hard to capture details in the extremes, and I wanted to hold on to what details I could. The diffused daylight reduced the number of f/stops from black to white.

I used two different lenses, a 200mm macro lens and a 70-180mm macro. I wasn’t after anything in particular so I just changed lenses depending on my mood. I positioned a reflector sometimes, used a wireless, off-camera flash mounted on a light stand for others, and neither when the sun really came out.

I suppose I am a bit of an opportunist and I regularly can be seen wandering around the yard and neighborhood with my camera in search of nothing in particular.  I just like taking pictures rain or shine.

About getting out there with a camera the famous French photographer Jacques-Henri Lartigue said it best, “It’s marvelous, marvelous! Nothing will ever be as much fun. I’m going to photograph everything, everything!”               I am in complete agreement, how about you?

I look forward to your comments. Thanks, John

My website is at www.enmanscamera.com

Photographer Didn’t Understand the Purpose of a camera’s Meter.

Wedding Kiss Touching Noses

A few weeks ago I wrote about digital camera terminology. I expected some readers may have skipped reading that to find something more advanced, however, I received lots of comments, and some good discussions on terminology I had not included, supporting my contention that many photographers are perplexed at the new jargon.

My article was in response to a customer confused about how to discuss her camera, however, this week I was reminded again that many photographers aren’t only confused with pixels, resolution, and bit depth, but also basic camera functions.

A photographer that had recently taken a local photography class complained to me, “I don’t really understand what the meter does, or how I would use it.”  The instructor had pointed out how to select the different camera modes, but neglected to include why one might select one over another for particular subjects. He told me the class ignored Manual mode, and left him thinking that only the three automated modes were worth using. The word exposure was only mentioned in passing when referring to those automated modes and guidance concerning the camera’s meter, and how to effectively use it didn’t seem to be part of the class.

I told the photographer that the meter is the measurement tool that allows users to control light, and suggested using the Manual mode as an easy way to access the two important camera mechanisms, the Shutter and the Aperture, to increase or decrease the amount of light reaching the sensor.

I explained that the Shutter blocks light from the sensor until the shutter release button is pressed, then it quickly opens and closes.  Setting the camera’s shutter speed controls the length of time light reaches the sensor.  The Aperture is an opening that lets light pass through the camera’s lens and is measured in f-stops. In actuality, it is a hole (aperture) that photographers control by opening it wider (wider aperture) for more light, and closing (smaller aperture) for less light, similar to the pupil of our eye.

Photographers can use the meter to determine under-exposure or over-exposure of their subjects, for example, I might want to slightly under-expose a highly reflective, white gown on a bright sunny day, or conversely, brighten it up on a heavily overcast day. In both instances I would use the manual mode to check a particular subject’s exposure with my camera’s meter, especially underexposed areas or subjects wearing a black suit.

To sum this all up, photography is all about reflected light and my recommendation to that beginning photographer was to pay attention to the camera’s meter and start using the Manual mode when he decides it is best for the job at hand. The camera is a tool with many functions, and one is never limited, and can choose as the situation demands.

Learning to use the camera’s meter and getting comfortable using manual exposure mode to manage shutter speed, and/or the aperture settings gives the advantage of full control without as many chances of the camera being fooled by unexpected changes in light. It gives optimal command, when needed, over the amount of light that still shows details in both the shadows and the highlights, allowing mastery over how photos are viewed and interpreted.

Don’t hesitate, I enjoy you comments.

My website is at www.enmanscamera.com

Fifteen Photographers at Open House

fifteen photgraphers & a Model  Creek shooters  Modeling session  Lighting a portrait

Last weekend fifteen dedicated, and I think, pretty excited, photographers attended the Versatile Studio’s photography open house just outside of Kamloops, British Columbia. It is aptly named Versatile Studio because it provides multiple locations for portrait photography inside and out.

The day began with coffee and numerous discussions on portrait photography. At one point I got up to refill my coffee and then stood back, realizing this group of photographers, with their many different styles and approaches was going to make the day interesting, educational, and a lot of fun.

Of course, it immediately began with a hitch, as only one (thank you, Ali) of the four models that promised to appear showed up; nevertheless, these relentless photographers didn’t miss a beat, and decided to split into three informal groups using each other as subjects.

Those that wanted to work with lights in the large studio space chose two of their number with the most experience in studio strobe lighting to lead, and they took turns modeling, moving lights, backgrounds, etc, and making pictures that delved into some interesting experimentation.

Several others picked up reflectors and gathered at the stream with the one model, Ali. The light filtering through the trees was perfect for the large reflectors, and I think wading in the cool running water was also enticing on the hot August day.

A few decided to try out the light-diffusion panels I had set up in the meadow behind the studio, and later made portraits using the portable strobe I had placed in what was once a large farm equipment/hay storage shed.

Small groups interacted, gathering to discuss different techniques and to exchange thoughts on photography, and in my opinion, it was that exchange of personal experience between the photographers that made the day a success.

As I got the chance to peak at the LCD of several photographers’ cameras, I was intrigued at how differently each photographer captured the same subject. As I write I think of some famous quotes, the first by iconic photographer Ansel Adams, “Photography, as a powerful medium of expression and communications, offers an infinite variety of perception, interpretation and execution.”   His words more than fit what I saw created by those assembled at Versatile Studio that day, and I also like this quote, by author Peter Bunnel, who in his book, “Creative Camera International” writes, “There is no single form or style of portraiture. Portraiture means individualism and as such means diversity, self-expression, private point of view. The most successful images seem to be those which exist on several planes at once and which reflect the fantasy and understanding of many.”

So of course, you can understand why I would include that quote because, indeed, I saw many styles of portraits being made on that day. That’s the interesting and enjoyable thing about getting together with other photographers, especially a collection of photographers as large and diverse in talent and experience as was there; everyone is an individual and creates from their own personal perspective.

Versatile Studio, situated in the small community about fifteen minutes from my shop in Kamloops, hosted this photographer’s event with the help of accomplished photographer, Gary Risdale and myself. Our roles weren’t that of instructors as much as we were there to introduce, demonstrate, and facilitate.

I was so involved with what others were doing that, other than the images I have posted, I didn’t get a chance for anything else.

The studio’s owner, Dave Monsees, commented to me that he liked being around fun people with a true passion for photography and said he enjoyed himself so much that he intends to try to have photographer and model get-togethers like this in his studio on an occasional basis, every month or so.

I enjoyed spending time with those photographers; some were long time friends, and some were new acquaintances; and, I must admit, some of my most favorite times of all, have been either doing photography, or being with people that are doing photography.

It is always great to have your comments, John

My website is at www.enmanscamera.com

Digital Camera Terminology

      White balance                                                  

A customer walked into my shop last week and complained, “ My camera isn’t working.  I think there is something wrong with the chip.”  Did that mean the camera’s main computer wasn’t working? Or maybe she was referring to the memory card, (the small storage hard-drive inserted into the camera)? As it was, the camera was fine and the problem was with the lens.

We should not be critical or frustrated with the owner. Since the introduction of digital cameras we have been confronted with new terminology and those new words can be bewildering.

Digital cameras have been available for well over a decade with Kodak introducing its 1.3 megapixel camera in a professional Nikon body in 1991, and then the Kodak DC40 for general consumers in 1995. Both Nikon and Canon had introduced several serious DSLRs by 2002.

Yet, all these years later, many photographers are still perplexed at the new jargon, and I will admit that sometimes I catch myself mixing up definitions or going to the internet in search of clarification.  After dealing with the confused customer, and a thoughtful explanation by a friend regarding my own confusion on “bit depth,” I thought I’d offer the following help to readers.

Digital Images:  The digital image is a grid of dots or picture elements (pixels). Each pixel is assigned tonal values (black, white, shades of gray, and colour). The bits are then interpreted, read by the computer, and produced as an analog version for display or printing.

Pixel: Picture Element: Digital photographs are comprised of thousands, or millions of them; they are the building blocks of a digital photo.

Sensors: When a picture is taken, the sensor is struck by light coming through the camera’s lens. Each of the tiny pixels that make up the sensor converts the light into electrons. The number of electrons, usually described as the pixel’s accumulated charge, is measured and then converted to a digital value.

DPI:  Dots Per Inch is a measurement of the resolution of a digital photo or digital device. When printing, the higher the number the greater the print quality.

Image Resolution:  Is the number of pixels in a digital photo and that affects the image quality.

Bit Depth:  A bit is the smallest unit of data. 8 bits comprise a byte. A byte (or 8 bits) can therefore represent 256 different colours.  Here is a good discussion on understanding bit depth by Ian Lyons.  Go to: http://www.luminous-landscape.com/tutorials/bit-depth.shtml.

Megabyte (MB):  A measurement of data storage equal to 1024 kilobytes (KB).

Mega Pixel:  Equal to one million pixels.

LCD: Liquid Crystal Display: A low-power monitor used on a digital camera to display settings or the photo itself.

Histogram: A graphic representation available on the LCD, of the range of tones from dark to light in a photo.

ISO: International Standards Organization is a rating describing the sensitivity of the camera’s sensor to light.

JPEG:  A standard for compressing image data developed by the Joint Photographic Experts Group. It is referred to as a “lossy” format, meaning image quality is lost in achieving JPEG’s high compression rates or when resaving.

RAW:  Is the image format data as it comes directly off the sensor, with no in-camera processing.

White Balance:  Refers to the relative intensity of colours in your image. Without correction, a picture taken at sunset can seem too yellow or orange, and a picture taken under fluorescent lights might seem too green.

Noise:  Pixels in your digital image that were misinterpreted, usually at the higher ISO values. It appears as random groups of red, green or blue pixels.

Shutter Lag:  The time between pressing the shutter and actually capturing the image.  This is due to the camera having to calculate the exposure, set the white balance, and focus the lens. It is usually a problem with small point and shoot cameras.

sRGB: A colour space produced by HP and Microsoft. Although sRGB has a small range of tones and colours, it is versatile and supported by all cameras and image viewing software. The best choice for those that prefer keeping things simple and avoiding colour shift problems during editing or sharing.

Adobe RGB (1998): Created by Adobe for colour management in their Photoshop software. Because of the wide use of Photoshop this colour space is popular and extensively supported. This is a wider colour space than sRGB.  It encompasses around 50% of all visible colours, and is a good choice for editing because it typically carries more information for custom printing.

Be sure to let me know if I have missed anything. I really like everyone’s comments.

My website is at www.enmanscamera.com

Using Flash – even – for Sunny Day Portraits

John Mike & Shannon Constable Mike Moyer View from the Bonniville Royal Canadian Mounted Ploice

Using a hot shoe or auxiliary flash is confusing for many photographers, and when I say that I prefer adding flash to all my portraits whether inside or outside, on overcast or bright sunny days, and that I rarely make a portrait without one, will often produce quizzical and disbelieving looks from photographers.

I got one of those looks recently at a wedding I was photographing under a cloudless +35C day. The unforgiving conditions were sunny and bright with participants’ faces constantly affected by strong shadows. A guest, wielding a sophisticated DSLR that was sporting a very wide angle lens, inquired about my bracket-mounted flash and politely listened when I said I always used flash, however, I could tell that he walked away still confused as to why I would bother to use a flash when there was plenty of daylight. I suspect that the unflattering shadows across the subjects’ faces were not all that evident on his camera’s LCD, or he just did not see the problem. Besides, he might have thought himself more of an event chronicler, or, because of the wide-angle lens he was employing, an artist.

I read a query in an online photographer’s forum asking, “I’ve been shooting headshots recently and it got me thinking a lot about metering. How do I meter for flash portrait photography on location? I know that without a flash, I would just spot meter their face…and snap. What happens when I have an off camera flash? Do I just meter normally then shoot? Because when I do this, once the flash goes off, the exposure would be completely different than what I’ve just metered, which would usually mean overexposed. This is so very confusing. Please shed some light on this (no pun intended).”

I also recall a friend’s class assignment to photograph someone wearing a wide brimmed hat under the midday sun. (My apologies to those that adhere to the words from Noel Coward that “only mad dogs and Englishmen go out in the midday sun”).

She explained, “Our assignment was to light the shadowed face under the hat and still have properly exposed surroundings.” At that time flash technology only produced constant light. The solution was to diffuse the light by placing a white handkerchief folded once or twice over the flash head to open up the deep shadow.

Fortunately, modern TTL flash is almost foolproof and only a modicum of thought is required on the part of the photographer as to how much light should be added for the subject’s exposure.

My camera is usually set to manual exposure mode. That allows me, not the camera, to choose the overall ambient exposure, and to add flash to those areas that are underexposed by shadows.  I meter the existing light, set the exposure, and make tests using the flash’s exposure compensation feature to increase or decrease the output level. I then check the histogram to see if there are blinking borders around any white areas indicating over exposure, and if I observe them I dial the exposure compensation down, till the flashing borders disappear on further test shots. That highlight-warning feature is set in the camera’s menu.

My photographs from that wedding day are evenly exposed with attractive, open shadows and do not appear as if there was a flash involved. Besides, using a flash really was not much more effort than if I didn’t, and I did not have to spend hours using postproduction software to lighten and darken my subjects from that day.

I use a bracket that places the flash high above the camera that can be quickly removed if I want to light the subject from one side. The bracket isn’t a must, however, I recommend a connecting cord from camera to flash so it can be used off camera.

I also advise reviewing the camera manual to determine if it has a feature called “high speed sync” that allows for a high shutter speed when using a flash. That’s a discussion for another time, but I recommend doing some recon on the web where there is lots of information.

Blending flash with ambient light isn’t really a mystery. The combination of off-camera flash, and a light meter to measure ambient and flash contributions, will give you complete control to craft portraits your friends and family will love.

A burst of flash will reveal your subject’s eyes and soften shadows all round, so it’s definitely a good thing and will improve your pictures.

I appreciate comments. Thanks, John

My website is at www.enmanscamera.com