Black and White

Black and white photography has always been my preferred medium, and at one time I even believed it was the only way serious photographers worked. To me a black and white photograph has a mood and conveys an almost tactile quality, and because of that many of my image files, personal and professional, get converted to B&W.

During film’s reign photographers had to decide whether to use black and white film, colour film or slide film and many carried two camera bodies for that, but today the decision to make a black and white image is best left to post production; there is no need for that second camera. Post-production is the intricate combination of computer programs, printers and papers that now rivals the quality of chemical-based, traditional black and white photography.

Traditional black and white depended first on the brand and type of film, for example, Kodak Tri-X, or Ilford Delta 400, etc., then the camera’s initial exposure, how the film was developed (what chemicals were to be used), and finally the choice of paper for final printmaking.

The difference between black and white film and the digital sensor is that film has more latitude and getting a usable exposure is very easy. If one over exposes with B&W film it usually isn’t a problem, but an over exposure with digital equals a loss in image information and can end in an unusable photograph. With film we used to hear “shoot for the shadows”, with digital all that has changed; we have to be very careful not to over expose. Fortunately, we can now check our exposures using the histogram.

Most digital cameras have a black and white mode available in the menu, but I don’t recommend using that, it does nothing more than create identical red, green, and blue channels in the final picture file. Just de-saturating a colour data file in-camera will give a black and white image, but it doesn’t include control of the different tonal values that make up a black and white image.

There are however, many programs and “recipes” for image conversions very close to the quality that used to be only available from a roll of film.

When I first started making black and white pictures years ago with PhotoShop 7 I used a B&W conversion process that used the channel mixer. To do that I first opened the image, then I went to the menu and selected adjustments, then in the drop down list I selected Channel Mixer. I checked the monochrome box at bottom left, I changed the red channel to 60%, changed the green channel to 40%, ignored the blue channel, and changed the constant to +4. Finally I clicked ok and I had a black and white image.

PhotoShop CS3 and CS5 both have very good black and white mode selectors with lots of tonal control. I also suggest programs like Silver Efex Pro available from NIKsoftware.com.

However, there are excellent instructions for making B&W images from the likes of Hollywood celebrity photographer Greg Gorman, and I have tried a neat Hue/Saturation conversion I found floating around the internet by someone called Hikin’Mike. There are many more, just do a search.

A black and white photograph depends on its ability to communicate, as it doesn’t attract with eye-catching colours for its’ visual presentation. Those B&W images that stand out combine attention to lighting, composition and perspective. Black and white photography is far from being left behind in the past, and, in my opinion, with the current processing software, updates in high quality printers, and the latest in printing papers, black and white image-making will continue to be an option for serious photographers.


Using a ring flash


I got up one morning last week and realized that it had just stopped raining. Everything was bathed in that nice, quiet light that comes when the storm ends and before the skies brighten when the clouds lift. As I drank my morning coffee I connected a macro lens to my camera and placed a ring flash on the lens preparing to go out for some fun garden photography.

I like wandering in my wife’s garden with my camera just about any time – winter, spring, summer, or fall – each season has its own distinct visual character that is fun to photograph, but my favorite time is just after a rain.

I prefer using a longer focal length 200mm macro lens with a ring flash attached. I was fortunate enough to get a used one some years ago. I did not know what I was doing at the time, however, that ring flash went from what I thought was a gimmicky way to add light to what I now consider an essential part of my lighting for plants when the ambient light is low or flat like on that wet morning.

Lighting small objects with a ring flash isn’t new to photographers, as ring flashes have had changing popularity during the years I have been involved in photography. Along with the amazing digital cameras we use, technology has brought new life into what was once pretty much left to biologists, naturalists, hard-core flower enthusiasts, etc., as many photographers are now choosing ring flashes or ring flash modifiers for their macro work.

Canon has the MR-14 Ring Lite designed to surround the front of a Canon macro lens. Nikon has now moved away from the ring flash, but the two they offered for years, the SB29, and the older SB21b that I use, are easy to find used, and excellent to use. There is the Phoenix RL-59, the Cameron PRO DRF14 Macro Ring Flash, and Sigma’s EM-140 DG to name a few. Also popular and economically priced are two that aren’t ring flashes, but are flash modifiers that attach to any flash converting the light output to that of a ring flash; the Ray flash and Orbis ring flash. The Ray Flash mounts to your camera with the flash attached on the hot shoe and the Orbis mounts from under your lens, with the flash stuck up inside it connected to the camera with an off-camera TTL cord.

Ring flashes produce perfectly even, shadowless images. I wouldn’t select that kind of lighting on a bright sunny day, but on overcast rainy days it’s an effective way to illuminate the water droplets balancing on flower petals and leaves. I use mine on the “manual” setting, and reduce the light by adjusting the aperture until I get the sparkles to appear the way I want them, and then adding additional light from a flash keeps the shutter speed high to compensate for plant movement caused by an unwelcome breeze that might come up just when I‘m ready to press the shutter. Using a tripod and a cable release will stop camera movement, but there are times when conditions are quickly changing and I want to photograph many subjects before the weather stops cooperating, and wind or rain drives me indoors. A ring flash allows me to do that.

For me garden photography is very relaxing and I like to take the time to look at each plant creatively. I also like to add light to the small, close-up subjects just as I would when taking someone’s portrait. That might mean using a reflector, or an off-camera flash, or as I have discussed above, with a ring flash, because it is really all about the quality of light that separates one image from another.

Event Photography

A couple of weekends ago I assisted photographers Rick Tolhurst and Ty Korte photographing the Femsport Challenge held at the Tournament Capital Center in Kamloops.  This event was advertised as the Women’s All Strength & Fitness Challenge and after interviewing several area photographers the organizers selected ShotsbyRick Photography to officially document the event.

Tolhurst approached me to be backup for him and Korte in case of unforeseen problems, and also asked me to setup a photo studio for team portraits. When he asked for assistance I thought that lots of unseasoned local photographers had likely applied for the job.  With modern technology many amateur photographers believe all they need is a new DSLR to match the pros, however they aren’t experienced enough to realize that if this competition was important enough for the organizers to go through a section process for a photographer then it also demanded more than an expensive DSLR and a willingness to try something new.

 In my opinion an event photographer’s first goal is to successfully document everything that happens. The second is to compile enough images to be a narrative of the occasion, and then third, and maybe most important, to create photographs that tells individual stories about those that attended, or are the main focus of the function.

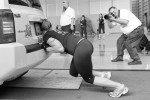
 I felt that Tolhurst and Korte, and the occasional news photographer, were more than enough photographers on the floor of the event. There were lots of friends, family, and well-wishers, all trying to snap pictures of their favorite athlete and if I was on the floor I would be one more person to block their view.  I moved in when I saw angles that weren’t covered, or to get some pictures I could use for this column, and I also wanted some shots of the two photographers that I could give to them. I saw myself as a back up in case of problems, but mostly I was there for team photos.

 All three of us were prepared with wide aperture lenses in case of limited lighting. As it was the Tournament Centre had excellent ambient lighting from high skylights and I expect most shooters only used wide aperture when wanting to blur out the background.

 Tolhurst carried two cameras, both set at 400 ISO, one mounted with an 80-200 and the other a 28-70mm. Korte worked with only one camera sporting a 70-200 lens. I think his camera is easily capable of producing image files at ISO 800 without any background noise, and I think that’s what he used. For my excursions onto the floor I used a 24-70 and 400 ISO.

 Experienced photographers consider a balance of ISO, shutterspeed, and aperture. Photographers need to know just how high an ISO their cameras will operate at without image noise, and yet still produce reasonably-sized, quality enlargements.   To do that requires some experimenting beforehand. I know my camera produces sharp, clean, noise-free images that are easily enlarged to 16×20 (or larger) if I stay around ISO 400. That even gives me comfort room for cropping if I need.

 When I arrived I immediately started checking for the highest shutterspeed and smallest aperture combination. A wide, background-smoothing aperture is great for portraits, but I wanted enough depth of field to allow for quick moving athletes to be shown. The higher the shutterspeed the better one’s chances are to stop action and I knew both Tolhurst and Korte wanted fast shutter speeds and Korte even mentioned, as he walked to the floor, that he would like to use 1/500th second.  All that aside, I also wanted enough ambient light to illuminate the background in some shots, so when I felt my subject was at peak action or stopped for a moment, I actually reduced my shutter speed to 1/160th of a second.

 The Femsport Challenge was packed with excitement; lots of action and the location had great ambience with bright even lighting. All of which made for great opportunities to capture excellent photographs of the many participants.  Overall it was an enjoyable way to spend a Saturday and by the time the day was over we had loaded over eight thousand images into Tolhurst’s laptop.

Recommendations for photographing a christening

This week I replied online to a plea from a photographer wanting information about how to photograph a Christening. He had been persuaded to fill in for another photographer, and, although a good landscape and architectural photographer, and aside from pictures of family and friends, he was walking into new territory.

I have photographed christenings before, and, other than the unproductive time sitting and waiting during services, the event is actually pretty enjoyable. To that worried photographer I commented how I would photograph everything and included a suggestion not to make things complicated and to have fun.

I advised that he should to be as versatile as he could be, and I suggested he leave his fixed focal length (prime) lenses home. Today there is lots of interest in using non-zoom lenses like 50mm, 35mm or 85mm. But in the limited space of a family packed room or child’s bedroom I prefer a short zoom like 24-70mm or even something wider like my 16-85mm that allows me lots of versatility without the hassle of carrying and continually changing lenses.

I am not concerned about a wide aperture because I want family members to be in focus so lots of depth of field is important. I always use a flash, and with small children keep the diffuser cap on and aim toward the ceiling so the light bounces around filling the space, and I shoot like I am at a sporting event, quickly making exposure after exposure in hopes of catching that fleeting smile on the infant’s face. Nevertheless, I’m always patient; I don’t want parents to get frustrated as they try to entice the perfect expression from their child and advise them its ok to do something else and we’ll try again later. I learned years ago that when photographing children one needs to just wait until they are ready.

Modern photographers suggest a second flash held by an assistant off axis for more flattering light. I surely agree if there are two of you. If I can I will use a second flash, but in tight spaces, or a room filled with people, finding a place for a stand-mounted second flash becomes a problem and in situations where family is important, I would never presume to clear the room so I can be an artist. In my opinion it’s all about making each place and time work.

The photographer also questioned about the church and restrictions. In a Catholic ceremony like he was about to participate in I suggest finding the priest before things begin, introduce himself, tell him he is working for the family and ask what the rules are.

I have been working in the same town for years and am familiar with most clergy, however, even when they recognize me I still ask them if there is anything they would rather I refrain from doing, and after I am done I always, always take the time to thank them. I want their trust and to be remembered as the kind of photographer they like at their church service.

During the baptism I am continually moving around. I use a flash and choose shutterspeeds like 1/125 or 1/160 of a second so I can incorporate ambient light. I want the priest in the picture as much I can, and position myself so both he and the parents are visible. Fortunately, it’s possible to lighten those in the background during post-production.

Photography inside a church is much the same as any indoor location. Light the subject, try getting as much as possible in focus, watch the subject(s), make them look as good as possible in the photograph, be patient, capture as much of the action as possible, and have fun.

Anyone can take a picture

“Anyone can take a picture.” That complaint was made by a young photographer worrying that his photographs would not stand out in against those taken by so many other picture takers in this popular, expanding medium. His goal is to produce images that are visual statements of how he feels and are more than just of document of something.

The medium of photography has become very accessible for everyone. The days when a photographer had to be an engineer and chemist are long gone. With modern technology, today’s supercharged camera, machine-gun-like shutters, and seemingly speed of light focusing, many photographers get away without any knowledge whatsoever of photography. At one time photographers actually had to understand the combinations of shutter and aperture for a properly exposed image, and worried about camera shake and film choice. Photographers would carry more than one camera because they wanted the resulting photographs to be in both color and black and white.

The photographer holding his old 1980’s film camera that says, “all this digital isn’t real photography” must remember that a few short years ago photography needed large glass plates, hazardous chemicals, bulky cameras and wagons to carry everything.

I am not sure that the photographers of the late 1800’s or early 1900’s were interested in photography as a creative medium as much as they were interested in a way to document reality, whether it was convincing some person to sit as still as possible for long time periods or setting up unwieldy photographic equipment on a cold mountain top to photograph the view. I expect many photographers that loved the advancements of the 1970’s and 1980’s would never have tried photography if it had remained like that.

There are those that are intent on complaining that with the end of film comes the end of photography. Personally, I don’t think film is going away any time soon. (Film is just one part of photography.) The big box outlets may not carry it much longer, but there are lots of specialty items artists use that are only available in specialty stores, and I think the return of film at camera shops is a good thing, as, at least, the chances of getting the correct advice from the person behind the counter will be more likely.

Yes, anyone can take a picture nowadays. That’s a good thing and not something to complain about. There are lots of nice photographs being taken and most of them fall into the category of documentary or snapshot photography. People just want visual memories and today’s cameras are perfect for that.

I look forward to seeing photographs made by that young photographer and others like him. My advice was to use all the exciting technological advancements (because photography has always been about technology) he can get as he strives to make his photographs more than just a picture. He will work hard producing images that will be technically perfect visual statements about what he feels or wants to say. There are many photographers, myself included, who are interested in the resulting photos no matter how the image is produced as long as the final photograph has something to say, shows control over the technology used, and is visually exciting!

His critical comment “anyone can take a picture” shouldn’t make him worry about competition; and he should look forward to the future of this exciting medium.

The Photographic idea

Ansel Adams, in the Forward to his popular selling 1950’s book “The Print”, said, “Photography, in the final analysis, can be reduced to a few simple principles. But, unlike most arts, it seems complex at the initial approach. The seeming complexity can never be resolved unless a fundamental understanding of both technique and application is sought and exercised from the start. Photography is more than a medium for factual communication of ideas. It is a creative art. Therefore emphasis on technique is justified only so far as it will simplify and clarify the statement of the photographer’s concept.”

I have read and flipped through “The Print” many times since I got into photography. I think that it was almost required reading for photographers once upon a time, especially for those dedicated to spending hours of time in dimly-lit darkrooms peering at paper prints as they slowly materialized in smelly, liquid-filled trays.

There was a series of books by Adams from a period when photography was about striving for the perfect negative and a good final print, but those concepts are all but forgotten in this age of hi-tech, computerized image making. Those days are long gone, we don’t worry about a perfect negative any more, because even if the image file produced in-camera isn’t perfect, most images, especially RAW files are easily colour balanced, cropped, and sharpened. Contrast can be decreased or increased and the final picture doesn’t show any sign of resizing or noise reduction. And increasingly, the trend for many photographers has become to not make prints at all.

I find that Adams’ Forward in “The Print” is as worthwhile now as it was in 1950. Even with the changes of how an image is managed and finally used (whether print or electronic) the thought process and technique are important. Adams wrote about the technique of taking the picture, then the method used to develop the negative, and then finally the printing procedure. He might as well have been talking about transferring image data from a DSLR to computer, optimizing the RAW files in PhotoShop, and outputting to a personal printer for the final print. I thought about that as he continues, “We may draw an analogy with music: The composer entertains a musical idea. He sets it down in conventional musical notation. When he performs it, he may, although respecting the score, inject personal expressive interpretations on the basic patterns of the notes. So it is in expressive photography: The concept of the photograph precedes the operation of the camera. Exposure and development of the negative (RAW image file)(my remarks in parentheses) follow technical patterns selected to achieve the qualities desired in the final print, and the print itself is somewhat of an interpretation, a performance of the photographic idea.” I have always liked that final sentence of his “…the print itself is somewhat of an interpretation, a performance of the photographic idea.” Those words always remind me, as Adams put it, that, “Photography is more than a medium for factual communication of ideas.”

Modern photographers appear to be obsessing with each new offering manufacturers place on the table, and the obsession with technology may often look to be what photography is really about, and I do admit that it is fun, but photographers may need to be reminded that, “The concept of the photograph precedes the operation of the camera.” And that is why this mostly outdated book is still on my bookshelf, and why I regularly open it up. After all the prattle about what the newest camera, or lens, is capable of, I like to be brought back to what, in the end, photography is about for me personally, and as the great man said, “…grasp the full significance of visualization and planned execution in creative photography.”