Modern TTL Flash    

ttl-flash-camera

Attaching a flash to one’s camera has been, and still is, a hot topic of discussion that was going on long before I got serious about photography in the 1970’s.

I remember being confused, well actually, really confused, and read everything I could find trying to understand how a flash attached to my camera’s hotshoe worked, and how adding light from a flash (on and off camera) could be used to enhance my photography.

Early flashes produced a constant amount of light no matter how close the subject was, and over or under exposures were common. The most frequent way of controlling flash power was to use exotic technology like a white handkerchief, a translucent soap holder, or attaching a white bounce card to the flash.

Later technological development included light measuring sensors in the flash that read the light reflected back from the subject and shut off the flash when a predetermined amount was reached.

Then TTL (through-the-lens) flash came along and small computers in the camera controlled the flash. The reflected light was read by the camera, making the lens focal length, the aperture, and the distance all part of the exposure equation.

Today’s hotshoe connected flash is nothing short of amazing, and there is absolute control over the flash.

Subtracting light intended for the subject no longer needs some translucent material placed over the flash head.

Using devices like white cups, and bounce cards with a TTL flash have become all about softening or diffusing the light instead of only reducing it.

The latest flashes easily control power output, and can be comfortably used with wireless off-camera technology. Alternatively, the flash can also be connected by a dedicated cord and still remain off-camera allowing the photographer to point the flash toward the subject at flattering angles without time consuming calculations.

A photographer can, while shooting, easily select the exposure in camera, or dial the flash power output up or down. It is now so simple to reduce or increase the ambient exposure while maintaining or brightening the subject alone for more natural looking photographs than it was with early flash photography.

When I began using a flash many years ago it changed the quality of my photography. It became just like the image change I gained by using different focal length lenses.

I no longer had to rely on ambient light and I began to notice my subjects had more “pop” than those without the flash and I was pleased at being able to fill unflattering shadows coming from overhead lighting and reduce deep shadows caused by sunlight.

The modern speedlight (hotshoe) flash gives a photographer control over the quality of light and using a flash (or several flash units off-camera) when photographing people is more than just brightening up subjects in a darkened room.


Why Is The Concept of Depth Of Field So Elusive?     

depth-of-field-2

d-of-f-1a

d-of-f-2a


The topic of Depth of Field just keeps coming up and I suppose it deserves a revisit for this year. There must be a reason why Depth of Field is so elusive to photographers.

I wonder if it is because modern cameras have computers that focus, balance the colour, and control the exposure. All are impressive functions that make new users believe all they need to get a good photo is to point and shoot.

I have discussed Depth of Field in my blog numerous times. And find myself constantly explaining how depth of field works to photographers that visit my shop. I must admit that many photographers just smile and nod like they understand what I am talking about. However, unfortunately, when I see their photographs I realize otherwise, and I expect most would have been much happier if I just told them the reason their picture wasn’t really sharp was because they needed a new lens. (Buying a new lens is so much easier than taking a class in photography.)

Understanding of the concept (and I guess technique) of depth of field will make their photographs better and save them money, as they did not really need a new lens.

This past week, I viewed an image a photographer posted online. He wrote that he was proud with his creative and unusual view. The overall exposure was fairly good, the colours were close to reality, and the centre of the picture was in focus. Nevertheless, other than that small, in-focus, central area the rest of his subject wasn’t in focus at all. The foreground was blurry and the background was blurry.

The definition of depth of field is, “that area around the main subject, in front of and behind, that is in acceptably sharp focus”. In application the wider the lens’ aperture is the less the depth of field, or that area of sharp focus, around the main subject will be. Practically, the depth of the field of focus will be 1/3rd in front and 2/3rds behind the subject.

Using a wide aperture can increase the exposure in limited lighting conditions; but, along with the benefit of additional light reaching the camera’s sensor, the resulting effect is reduced depth of field. Creating a field of focus behind the subject of 4 inches or so might look really good when making a portrait, but it is not effective in a scenic.

The smaller the lens aperture the more the area of focus around the subject will be. I prefer using a small aperture for scenic photography. I am concerned with all elements in the photograph, front to back, of being sharp and in “acceptably sharp focus”.

The Internet is packed with information on scenic photography, and there are thousands (millions?) of books on photography that are easy to read. I expect that any discussion on scenic photography will include a full discussion of Depth of Field.

Infrared Photography On A Cold Winter Day   

blue-horizon

frozen-pond

winter-grass

tracks-and-cliffs

orange-sky

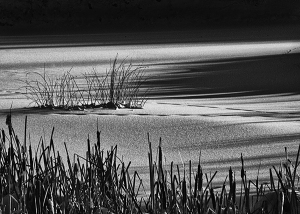
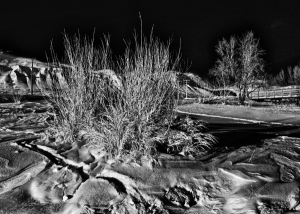
Gosh, this cold weather is uncomfortable! Mostly I have been huddling inside except to feed my chickens, and dig through the latest snowfall so I can get my car out of the driveway. However, the morning’s sky was so clear and blue that, in spite of the negative -19C, I just had to bundle up against the cold and head outside with my infrared camera.

The contrast of clear blue against the fresh white snow would make for a colourful scene, but there is something about infrared that has always intrigued me.

Maybe it’s the black sky against the brighter foreground. There is a word I remember my art instructors would sometimes use in their discussions and it is, “juxtaposition”, or elements in an image placed together with a contrasting effect.

In the summer infrared turns the trees to white, the sky a strange shade of magenta, and everything else a slight blue. But in the winter one can create an image with magenta tinted snow and clouds, with a blue cast to the sky by adjusting the colour channels in Photoshop, or convert to a striking black and white image. B&W is always my favourite. I guess that it is from the many years of exposing rolls of Kodak infrared film. And as I said, I like the black skies.

Infrared creates a completely different feeling. I have written before that using a modified camera is an exploration that moves a photographer far from the usual setting with the effect being surreal and unworldly. The bluer the sky, the greater the likelihood of that unworldly effect; and white surfaces can glow with an ethereal brightness.

I haven’t used my IR camera since last October when I decided to try out a fisheye lens.

Since then I acquired an 18-35mm, so I took that and my favourite, a 24-85mm lens out to see what I could get. I prefer a plan as opposed to just driving around, but this time I wouldn’t venture very far from my warm car. Besides the cold I was too lazy to get my shoeshoes and the snow was too deep to go off the plowed road.

I am not a prolific shooter. I guess that’s an oddity in this day of shotgun style photography when it’s not unusual for photographers to return with a hundred or so images from only a few hours of shooting. I spent a lot of time just standing and looking, and as was the case this time, freezing my fingers.

The low-angled light from the afternoon created lots of deep shadows on the drifts of snow and from fence posts, train tracks, and stark, leafless trees. All are excellent subjects for infrared.

If there was a goal for this outing it was to get a picture for next month’s calendar. My wife Linda and I alternate monthly as to who’s picture is displayed for each month’s calendar, and one of my infrared captures should work perfectly for February.

Learning From the best Photographers of the Past.

learning-from-famous-photogs

I had a discussion with a fellow that was looking for help with his photography. He was frustrated with all the books and online publications that seem to be more about the camera, lens, and exposure setting than what I’ll call “one’s mindset” when it comes to making a creative decision about photographing the subject.

My suggestion was to start looking at photographs made throughout history by those photographers applauded by their approaches. I suggested he check out Jerry Uelsman’s creative montages, Arnold Newman’s environmental portraits, Irving Penn’s fashion work, and, of course, the world famous, scenic photography of Ansel Adams.

I offered Digital Camera World’s “The 55 best photographers of all time. ”http://www.digitalcameraworld.com/2012/07/17/famous-photographers-the-55-best-photographers-of-all-time/

The editors began their article with “The best photographers of all time? Surely there can be no definitive list! We’re not afraid of courting controversy here at Digital Camera World. OK, maybe we are a little bit, which is why we thought it was time to be bold for once! Over the years we’ve interviewed a number of famous photographers and been inspired by each of them, but one thing we often hear from readers, social media followers and others is… “Who are the best photographers of all time?” It’s a good question! We put on our thinking caps and took a stab it.”

There is another top ten list by the editors of the website, Ansel Adams. http://www.picturecorrect.com/tips/top-10-most-famous-photographers-of-all-time/

They write, “If you want to take truly memorable and moving photographs, you can learn something by studying the pictures of famous photographers. Some of the most beloved artists are deceased, but some are still delighting us with their photographs. The list includes some of the more famous photographers that still impact our lives today.”

I liked what Picture Correct’s editors wrote about how famous photographers are, “impacting our lives today”. I believe a good photograph is timeless and speaks to every generation.

Both articles are great and well worth taking time to read.

I enjoy studying those that excel in this medium, and I think we, as they wrote, “Can learn something by studying the pictures of famous photographers,” and I believe that photographers can advance their personal work by examining the work of others.

Photography is a medium that almost everybody within our contemporary culture has a personal familiarity with and an opinion on.

I suspect it is probably that familiarity with photography that drives many to think that they will excel as long as they keep up with the latest technology their photography will be applauded by their peers. However, I am of the belief that even though a photographer has technical skills, examining the work of photographers with a track record from the past will, as Picture Correct puts it, “help advance personal work by examining the work of others”.

Those two lists are only the opinion of the authors and as I perused the comments readers posted, many felt their favorite photographers had been excluded and others were unhappy with some on the lists. In my opinion that just doesn’t matter who made or didn’t make the lists, I enjoyed reading about them and their personal perspectives on photography.