Try something different from the usual vacation photos.  


I hadn’t picked up my infrared camera since spring, and it was a last minute addition when I was loading the car for my trip to the Washington coast.

Now as I sort through the pictures I took on my short four-day junket I am glad I did.

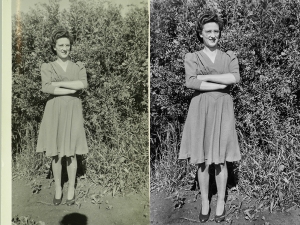
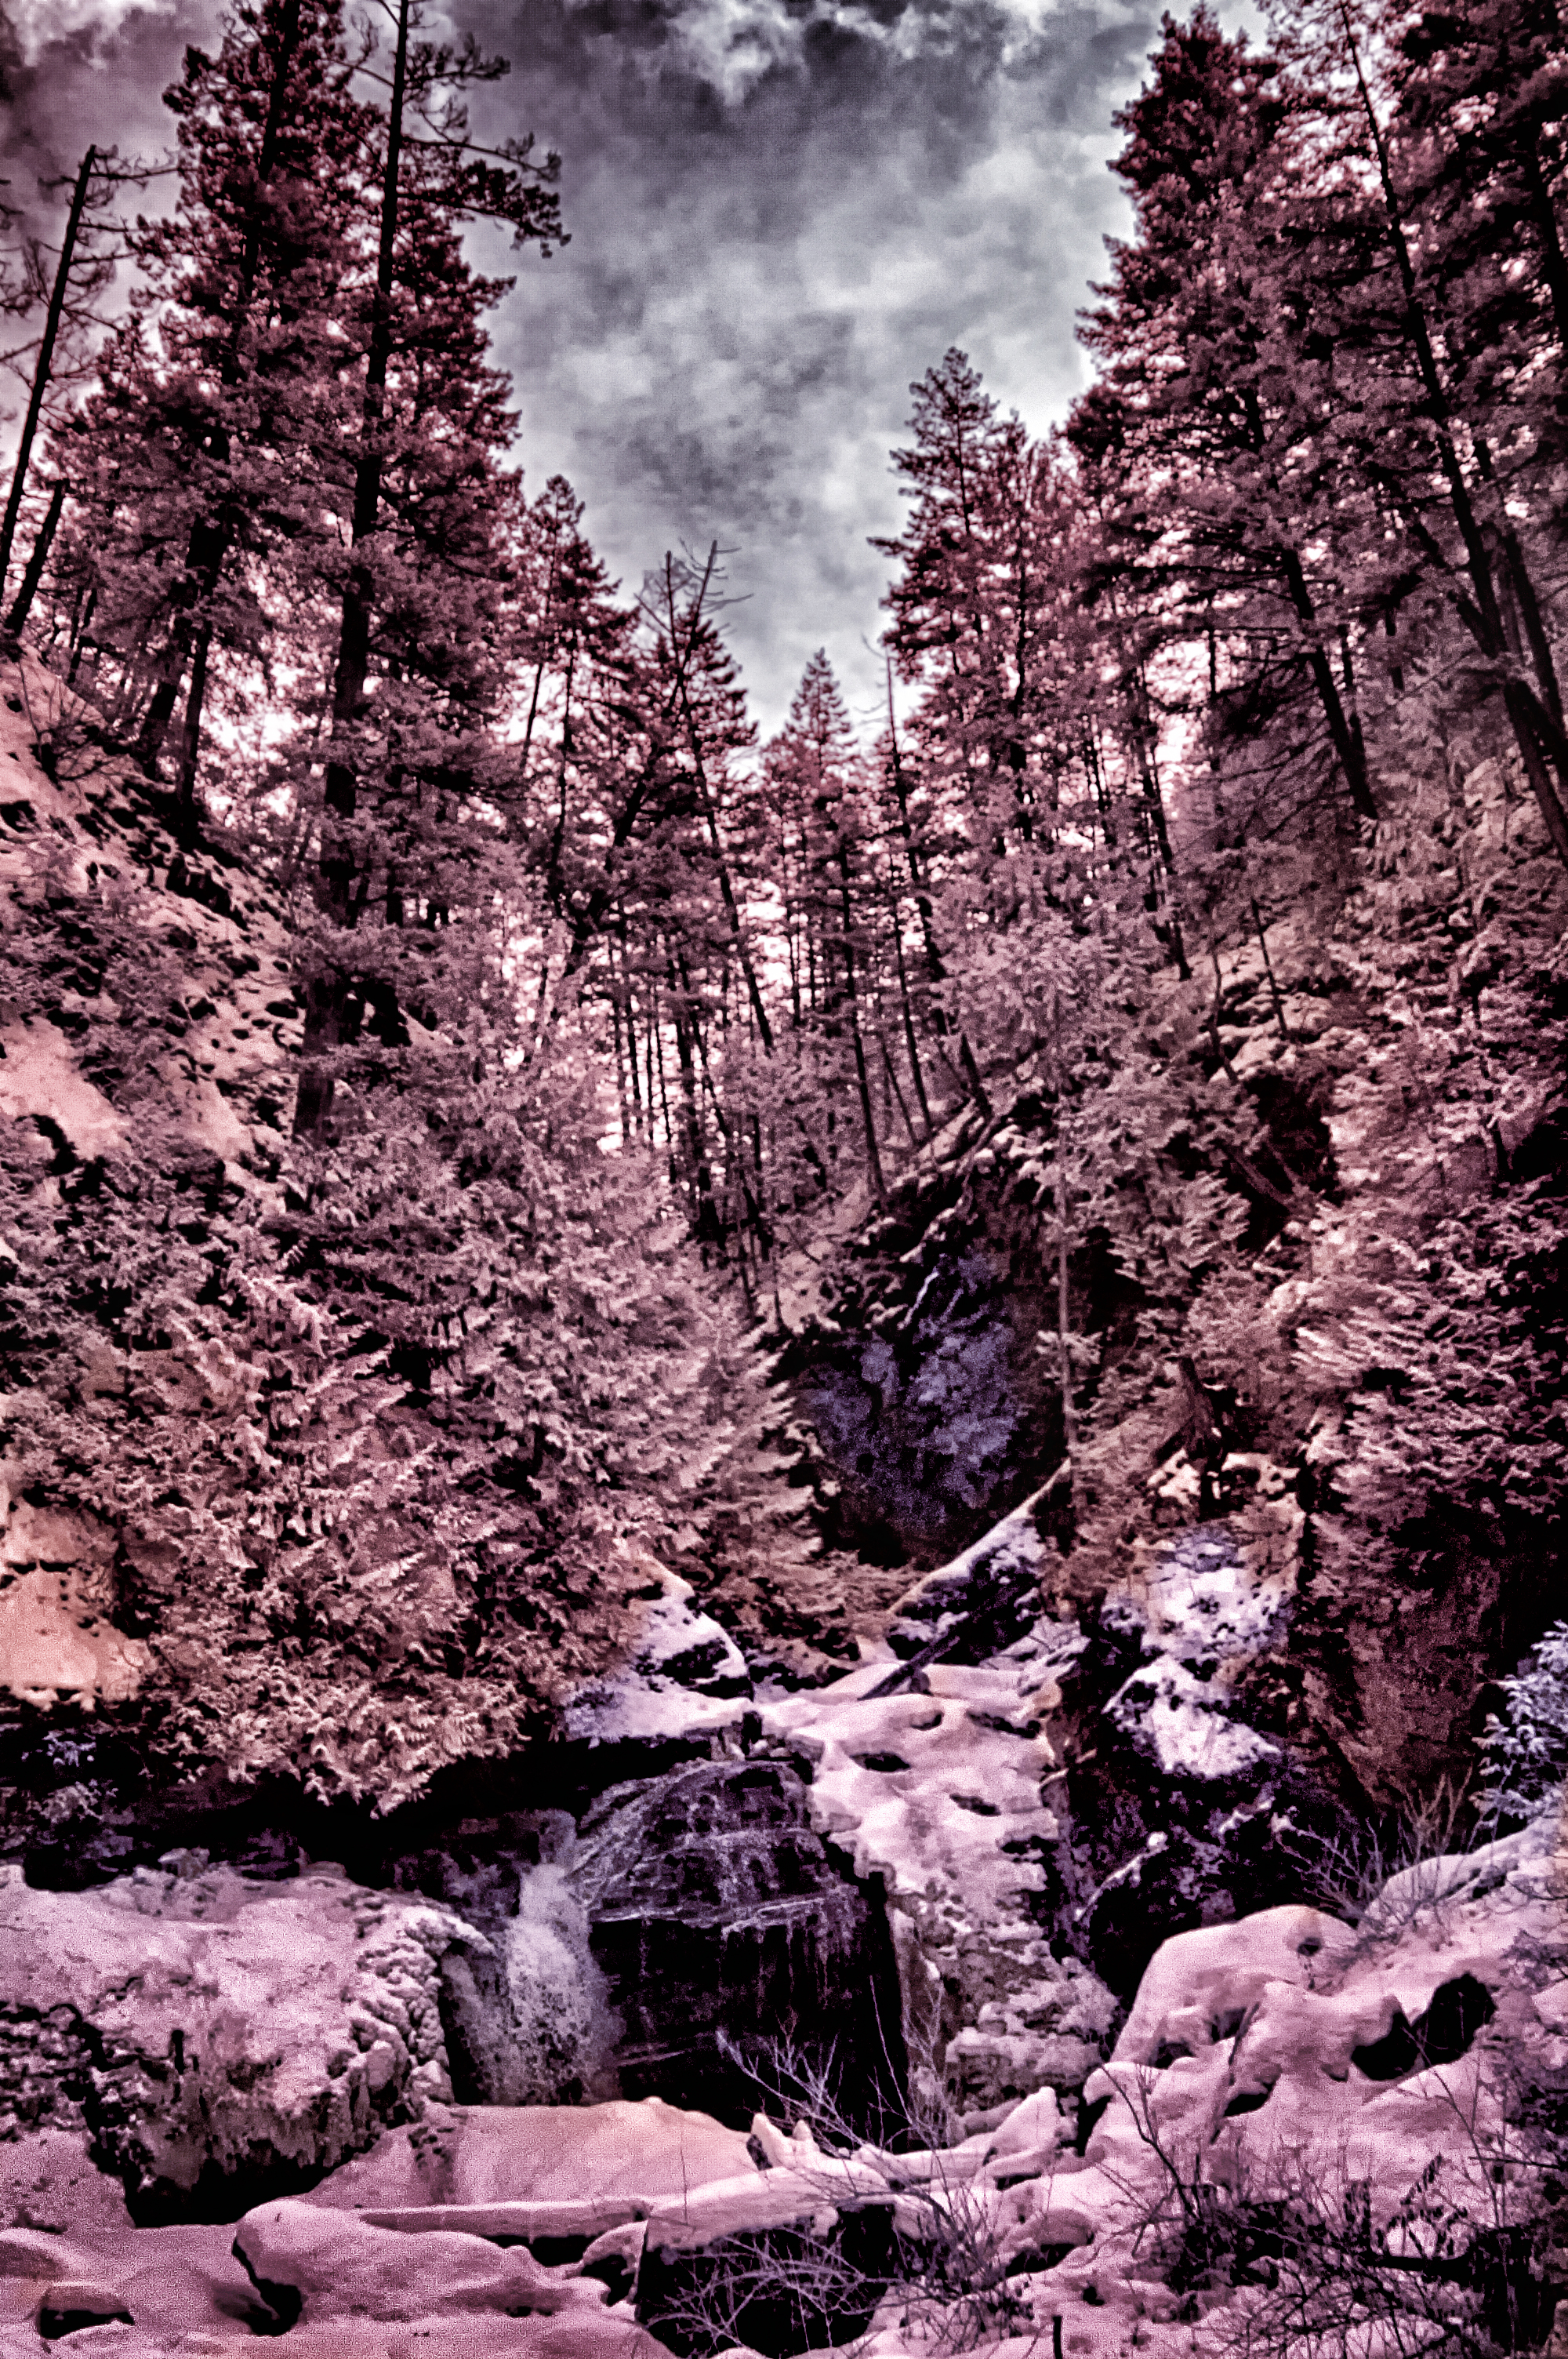
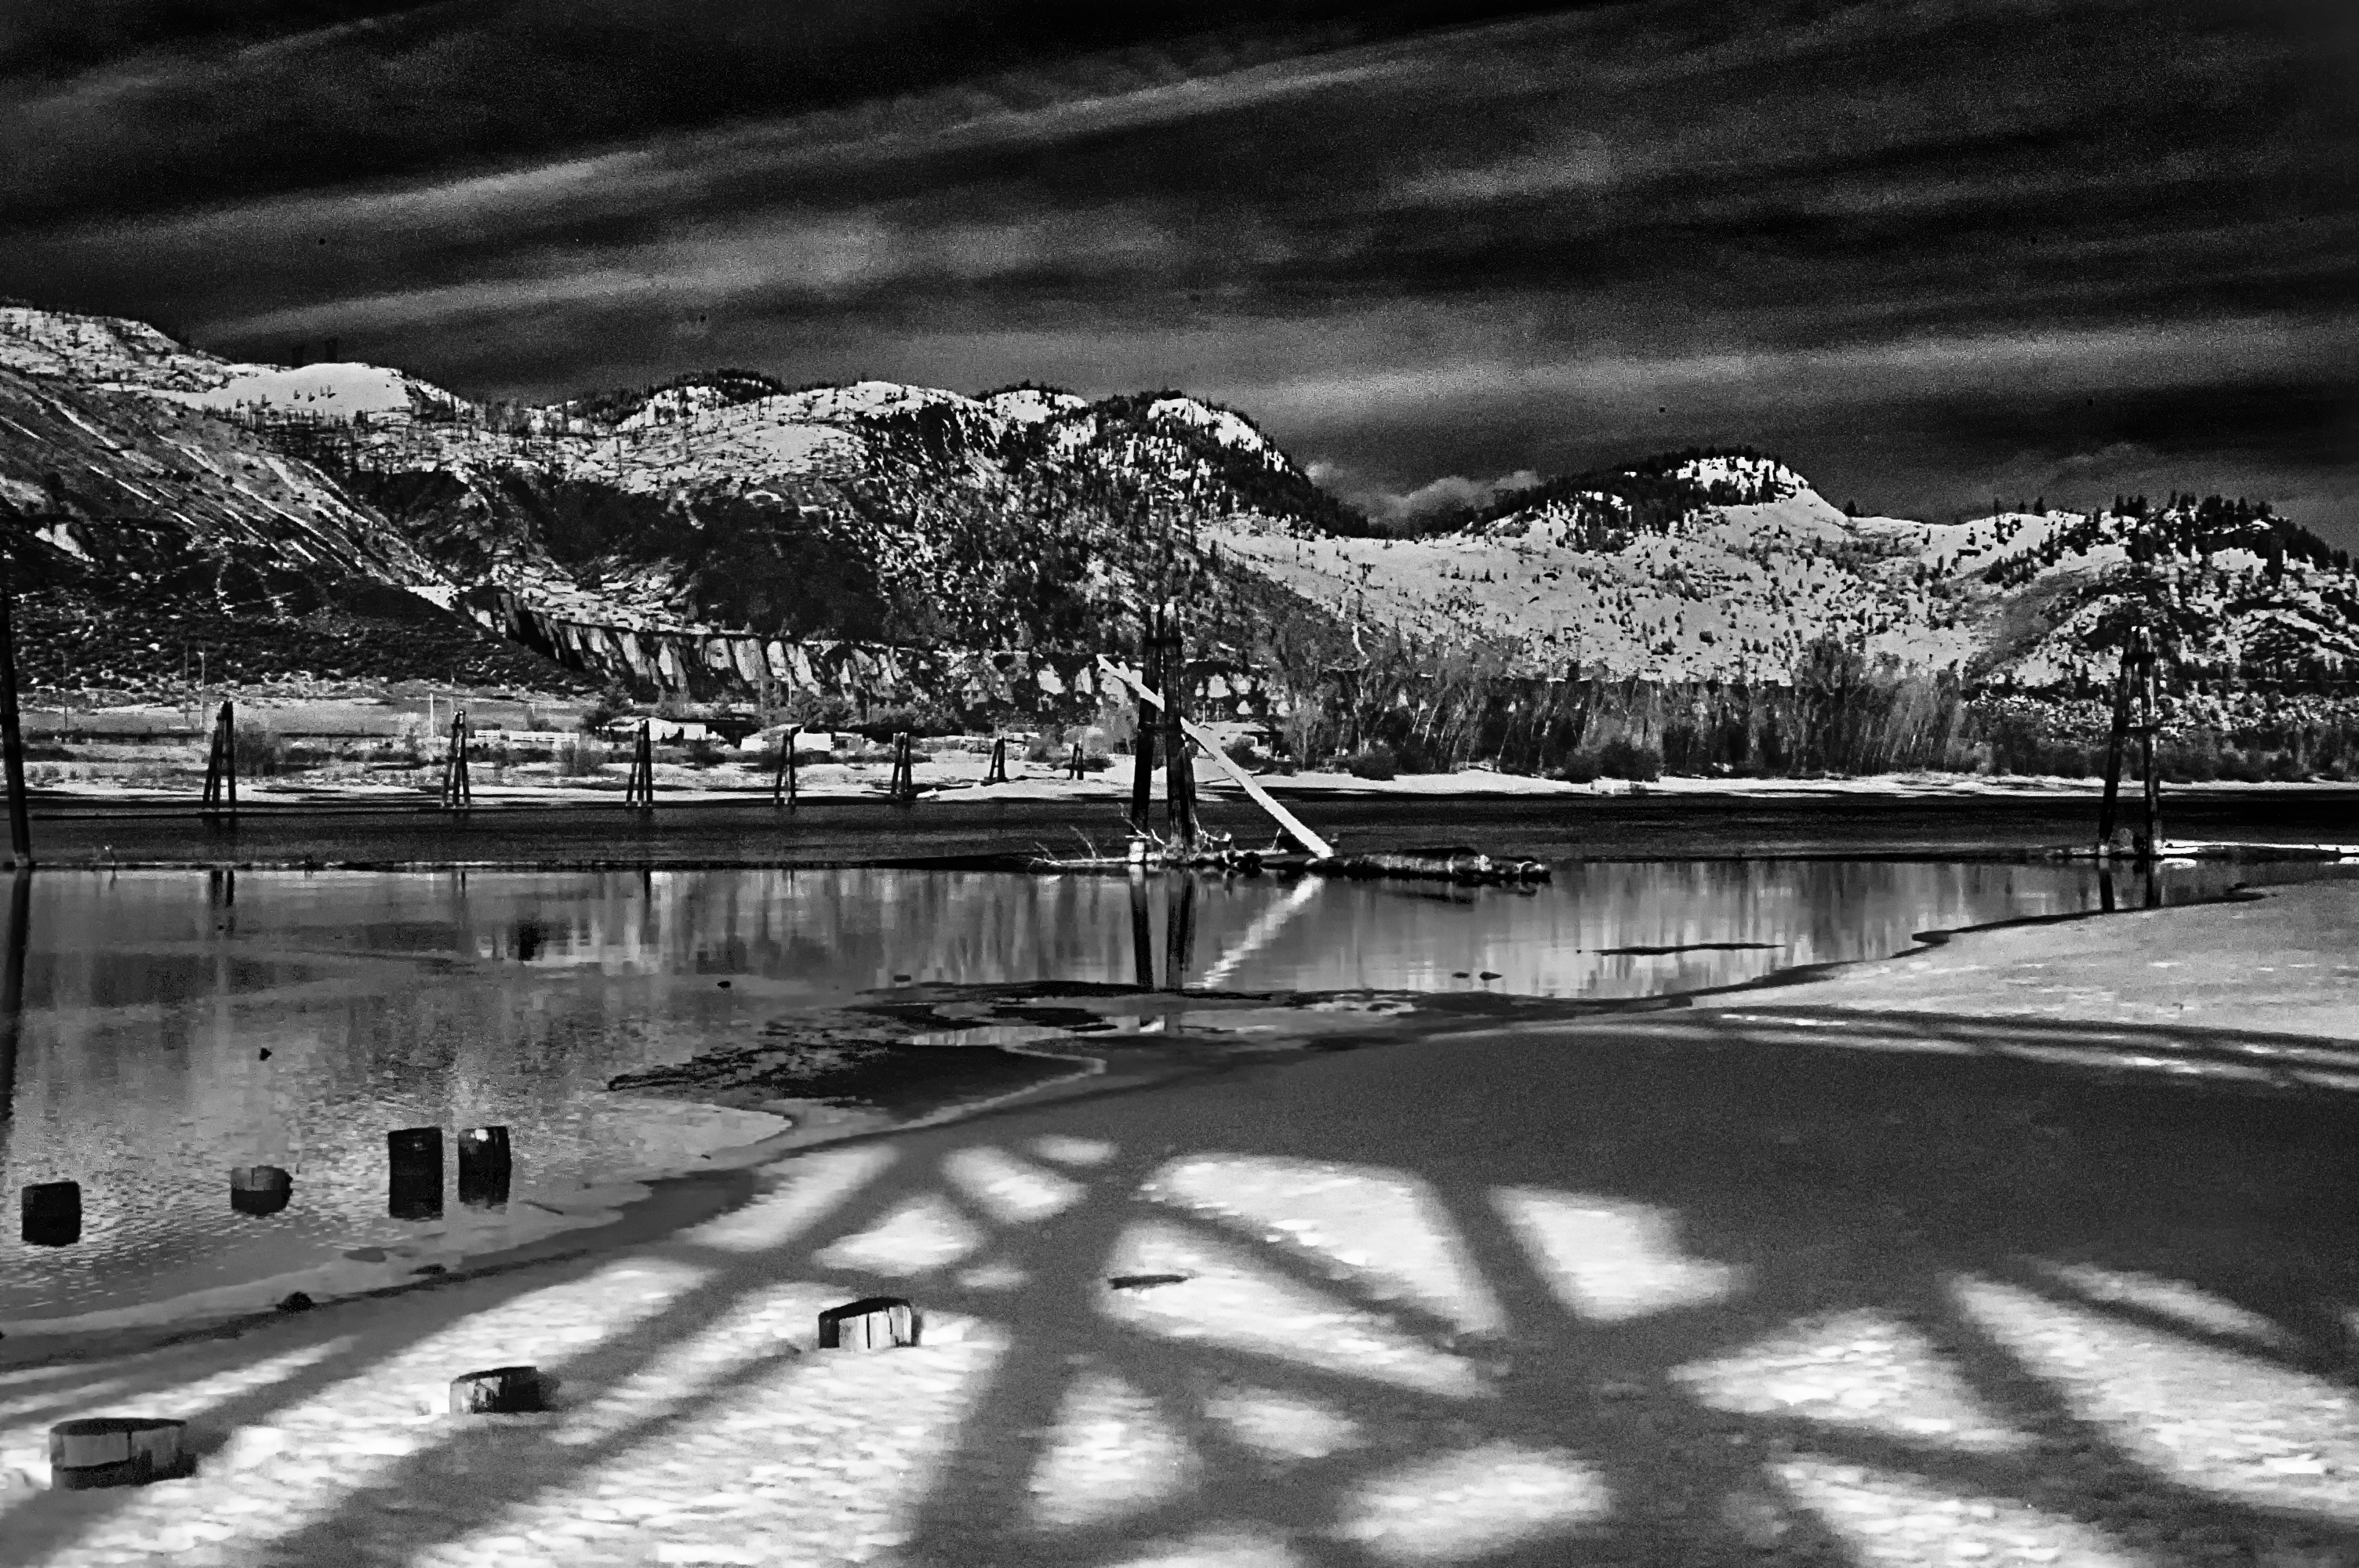
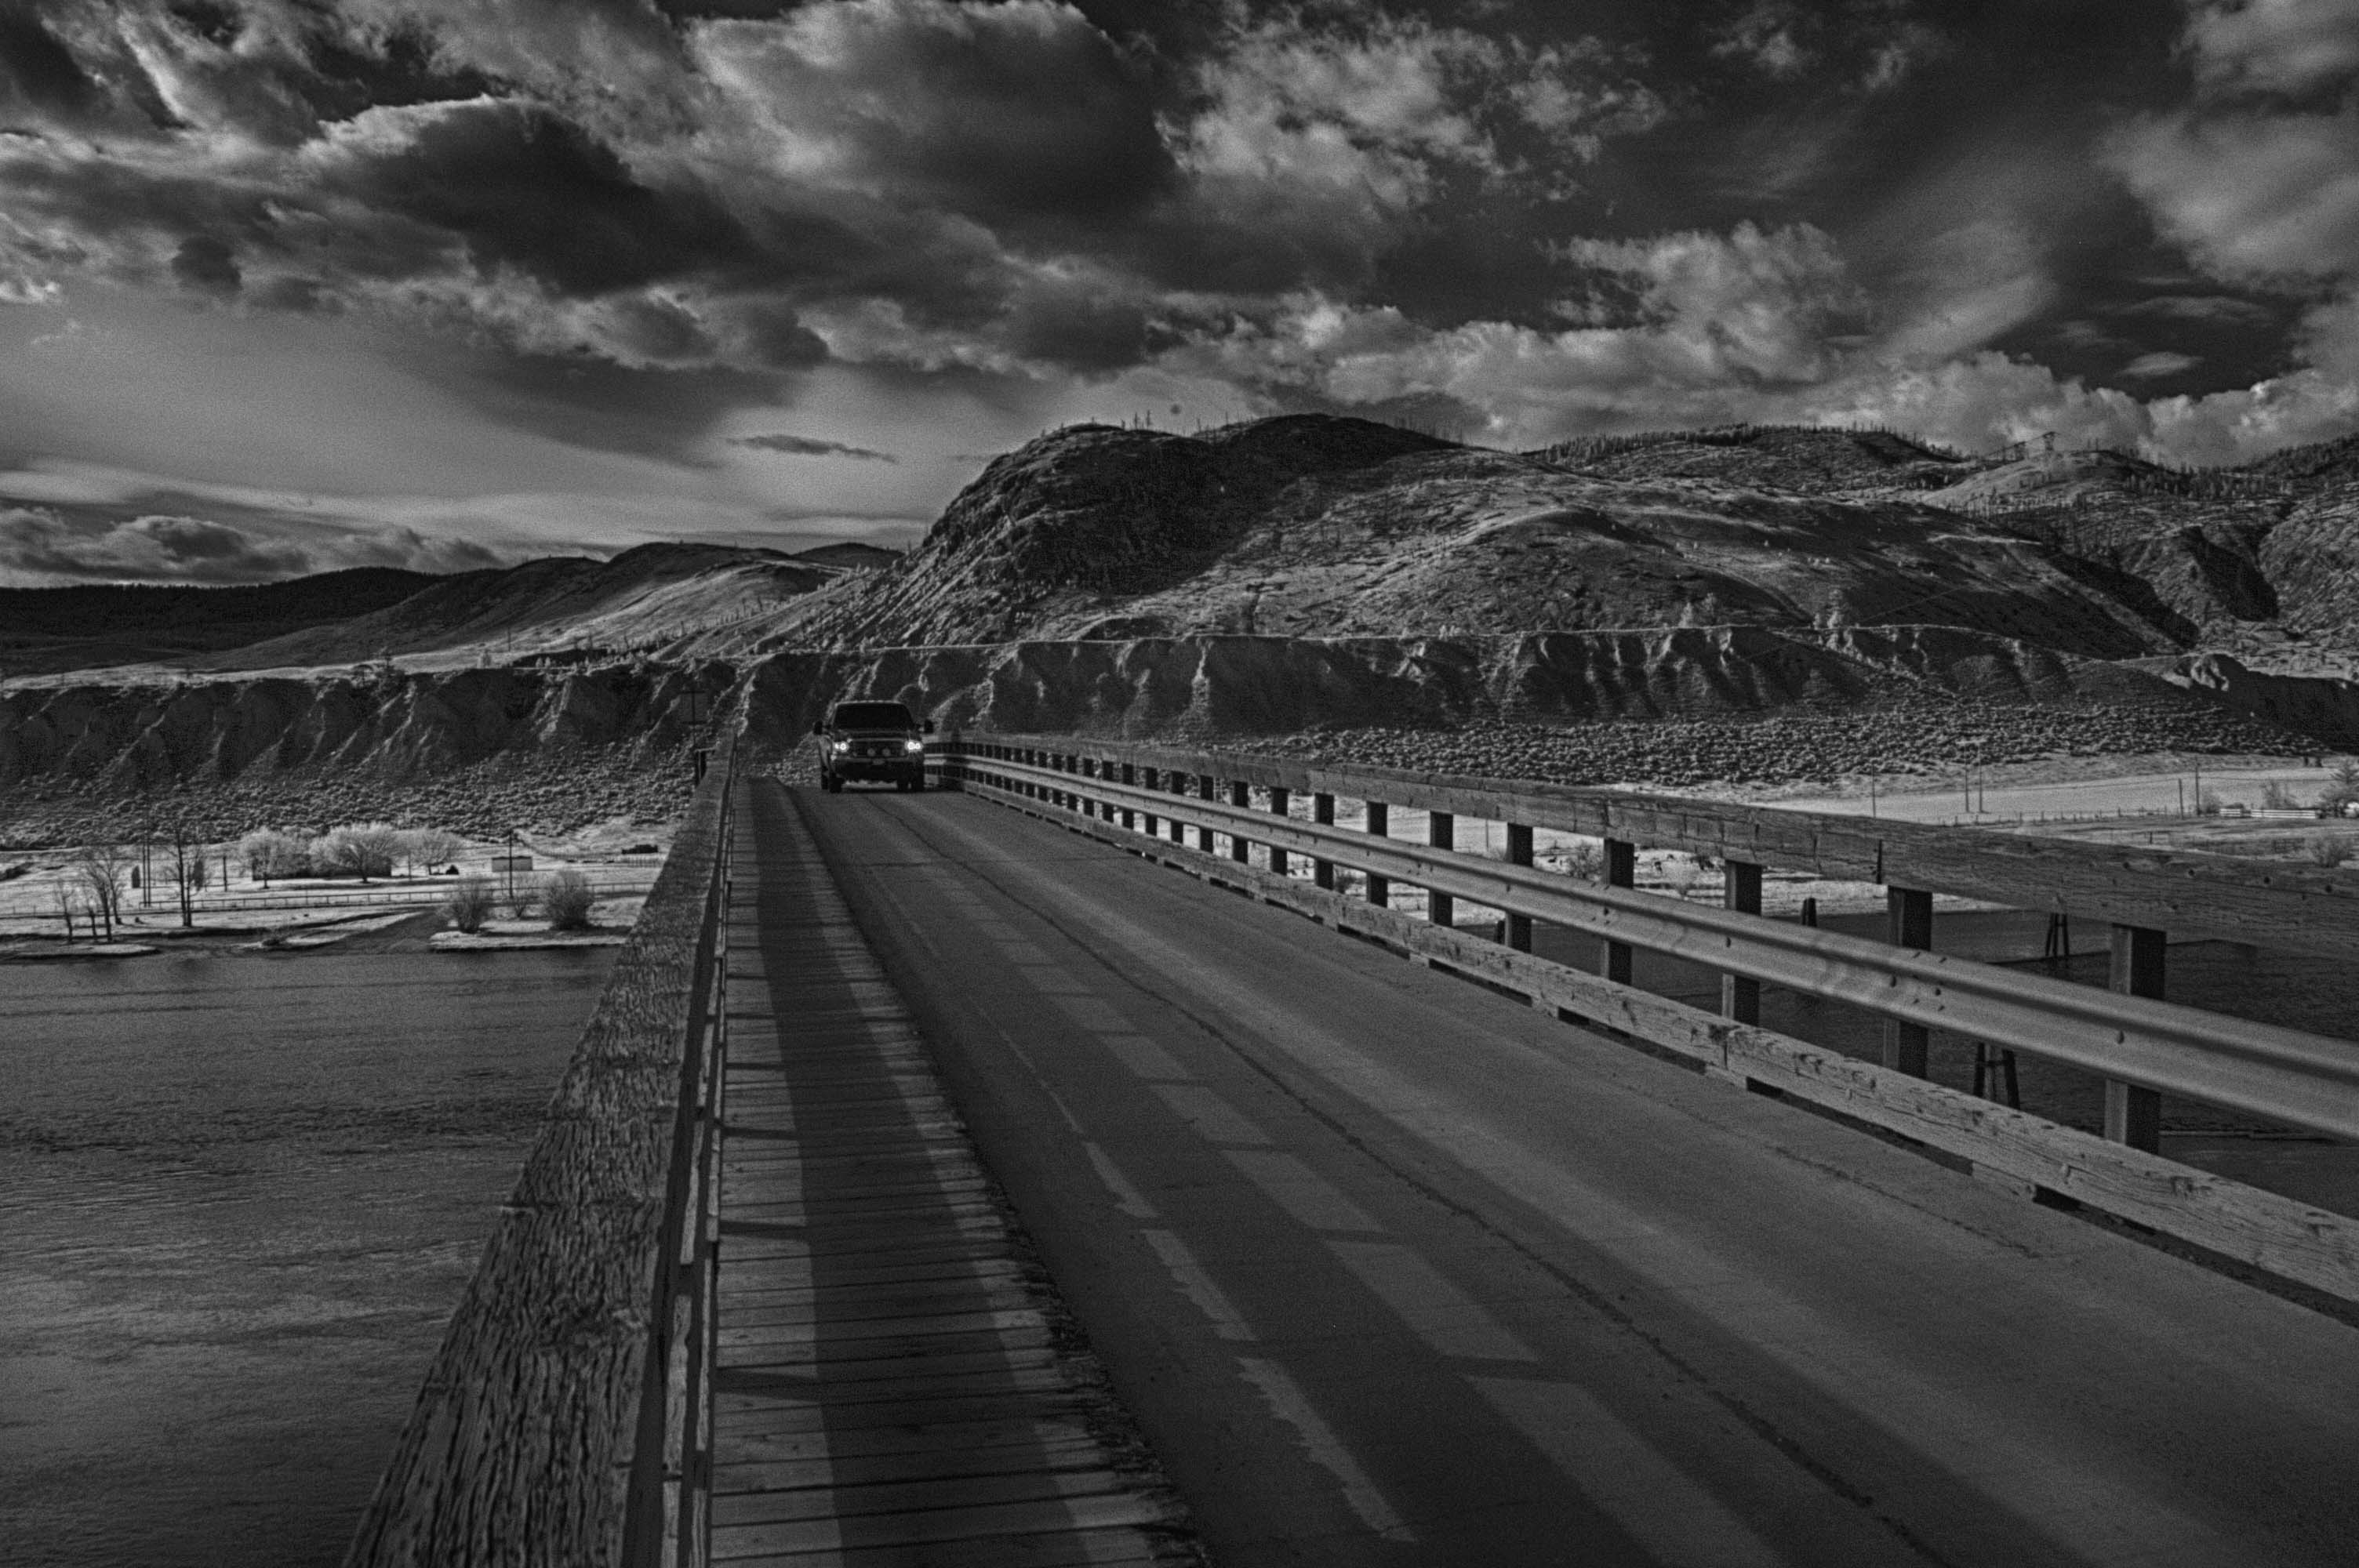
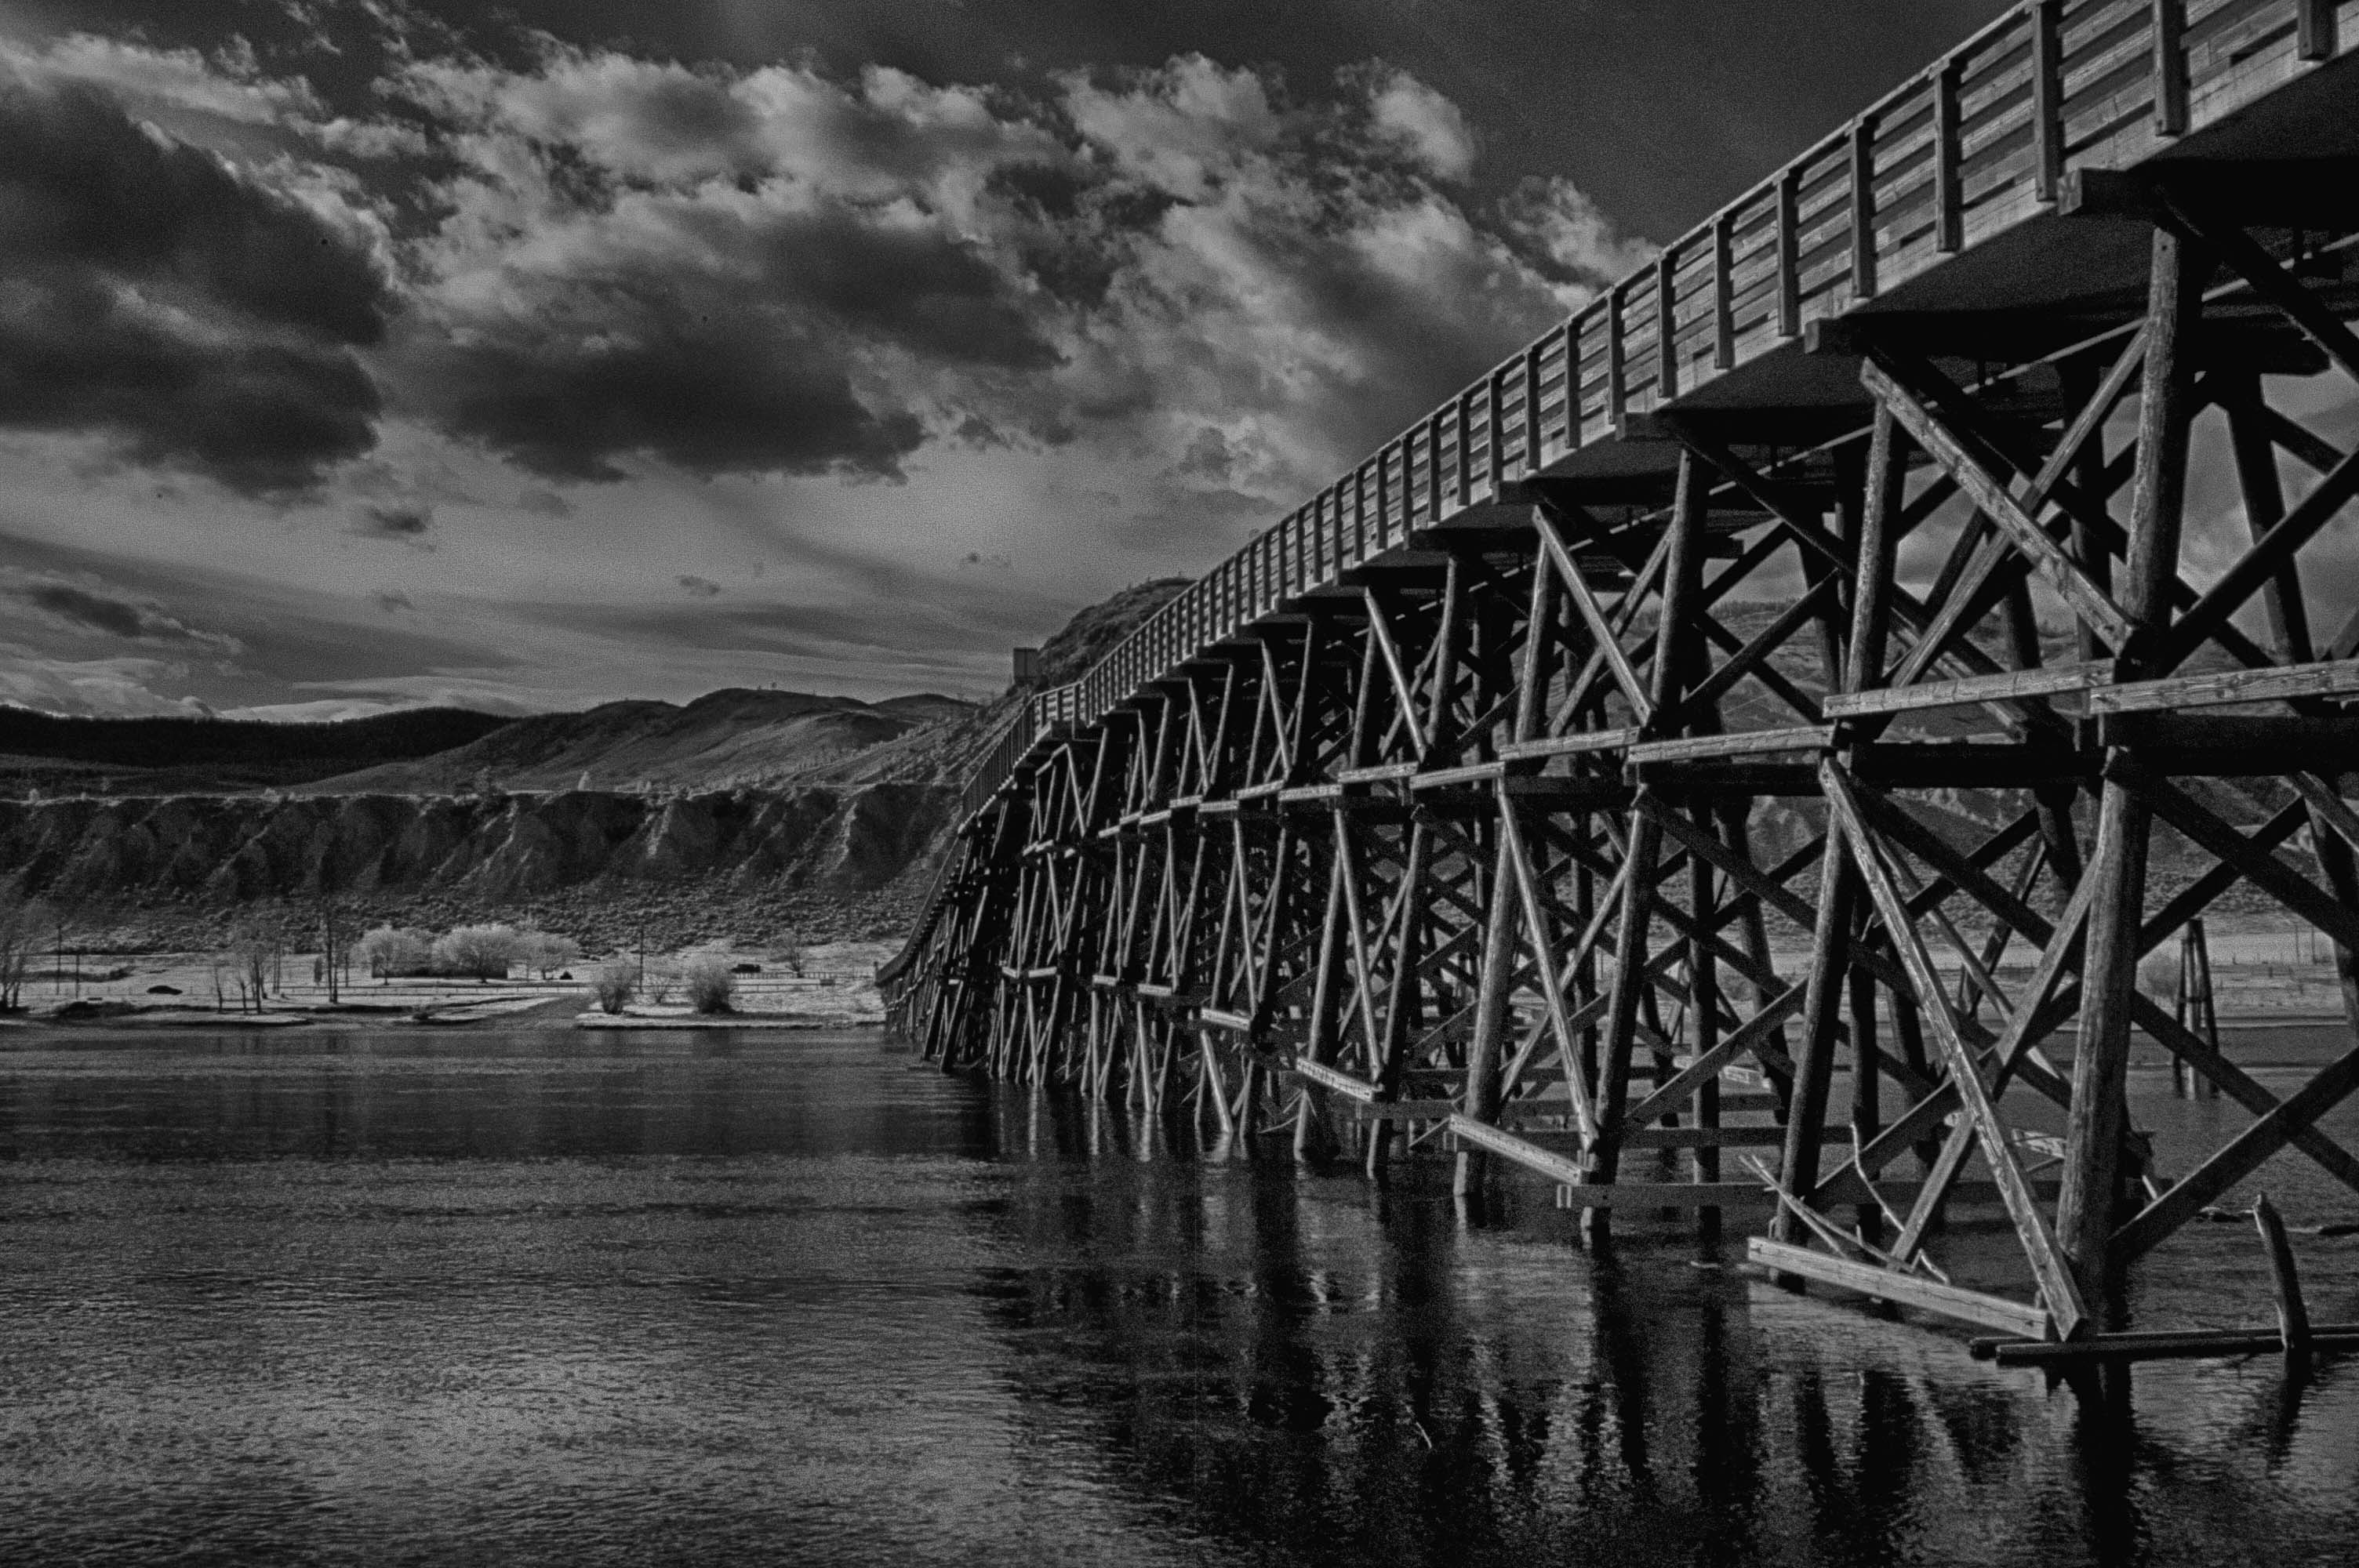
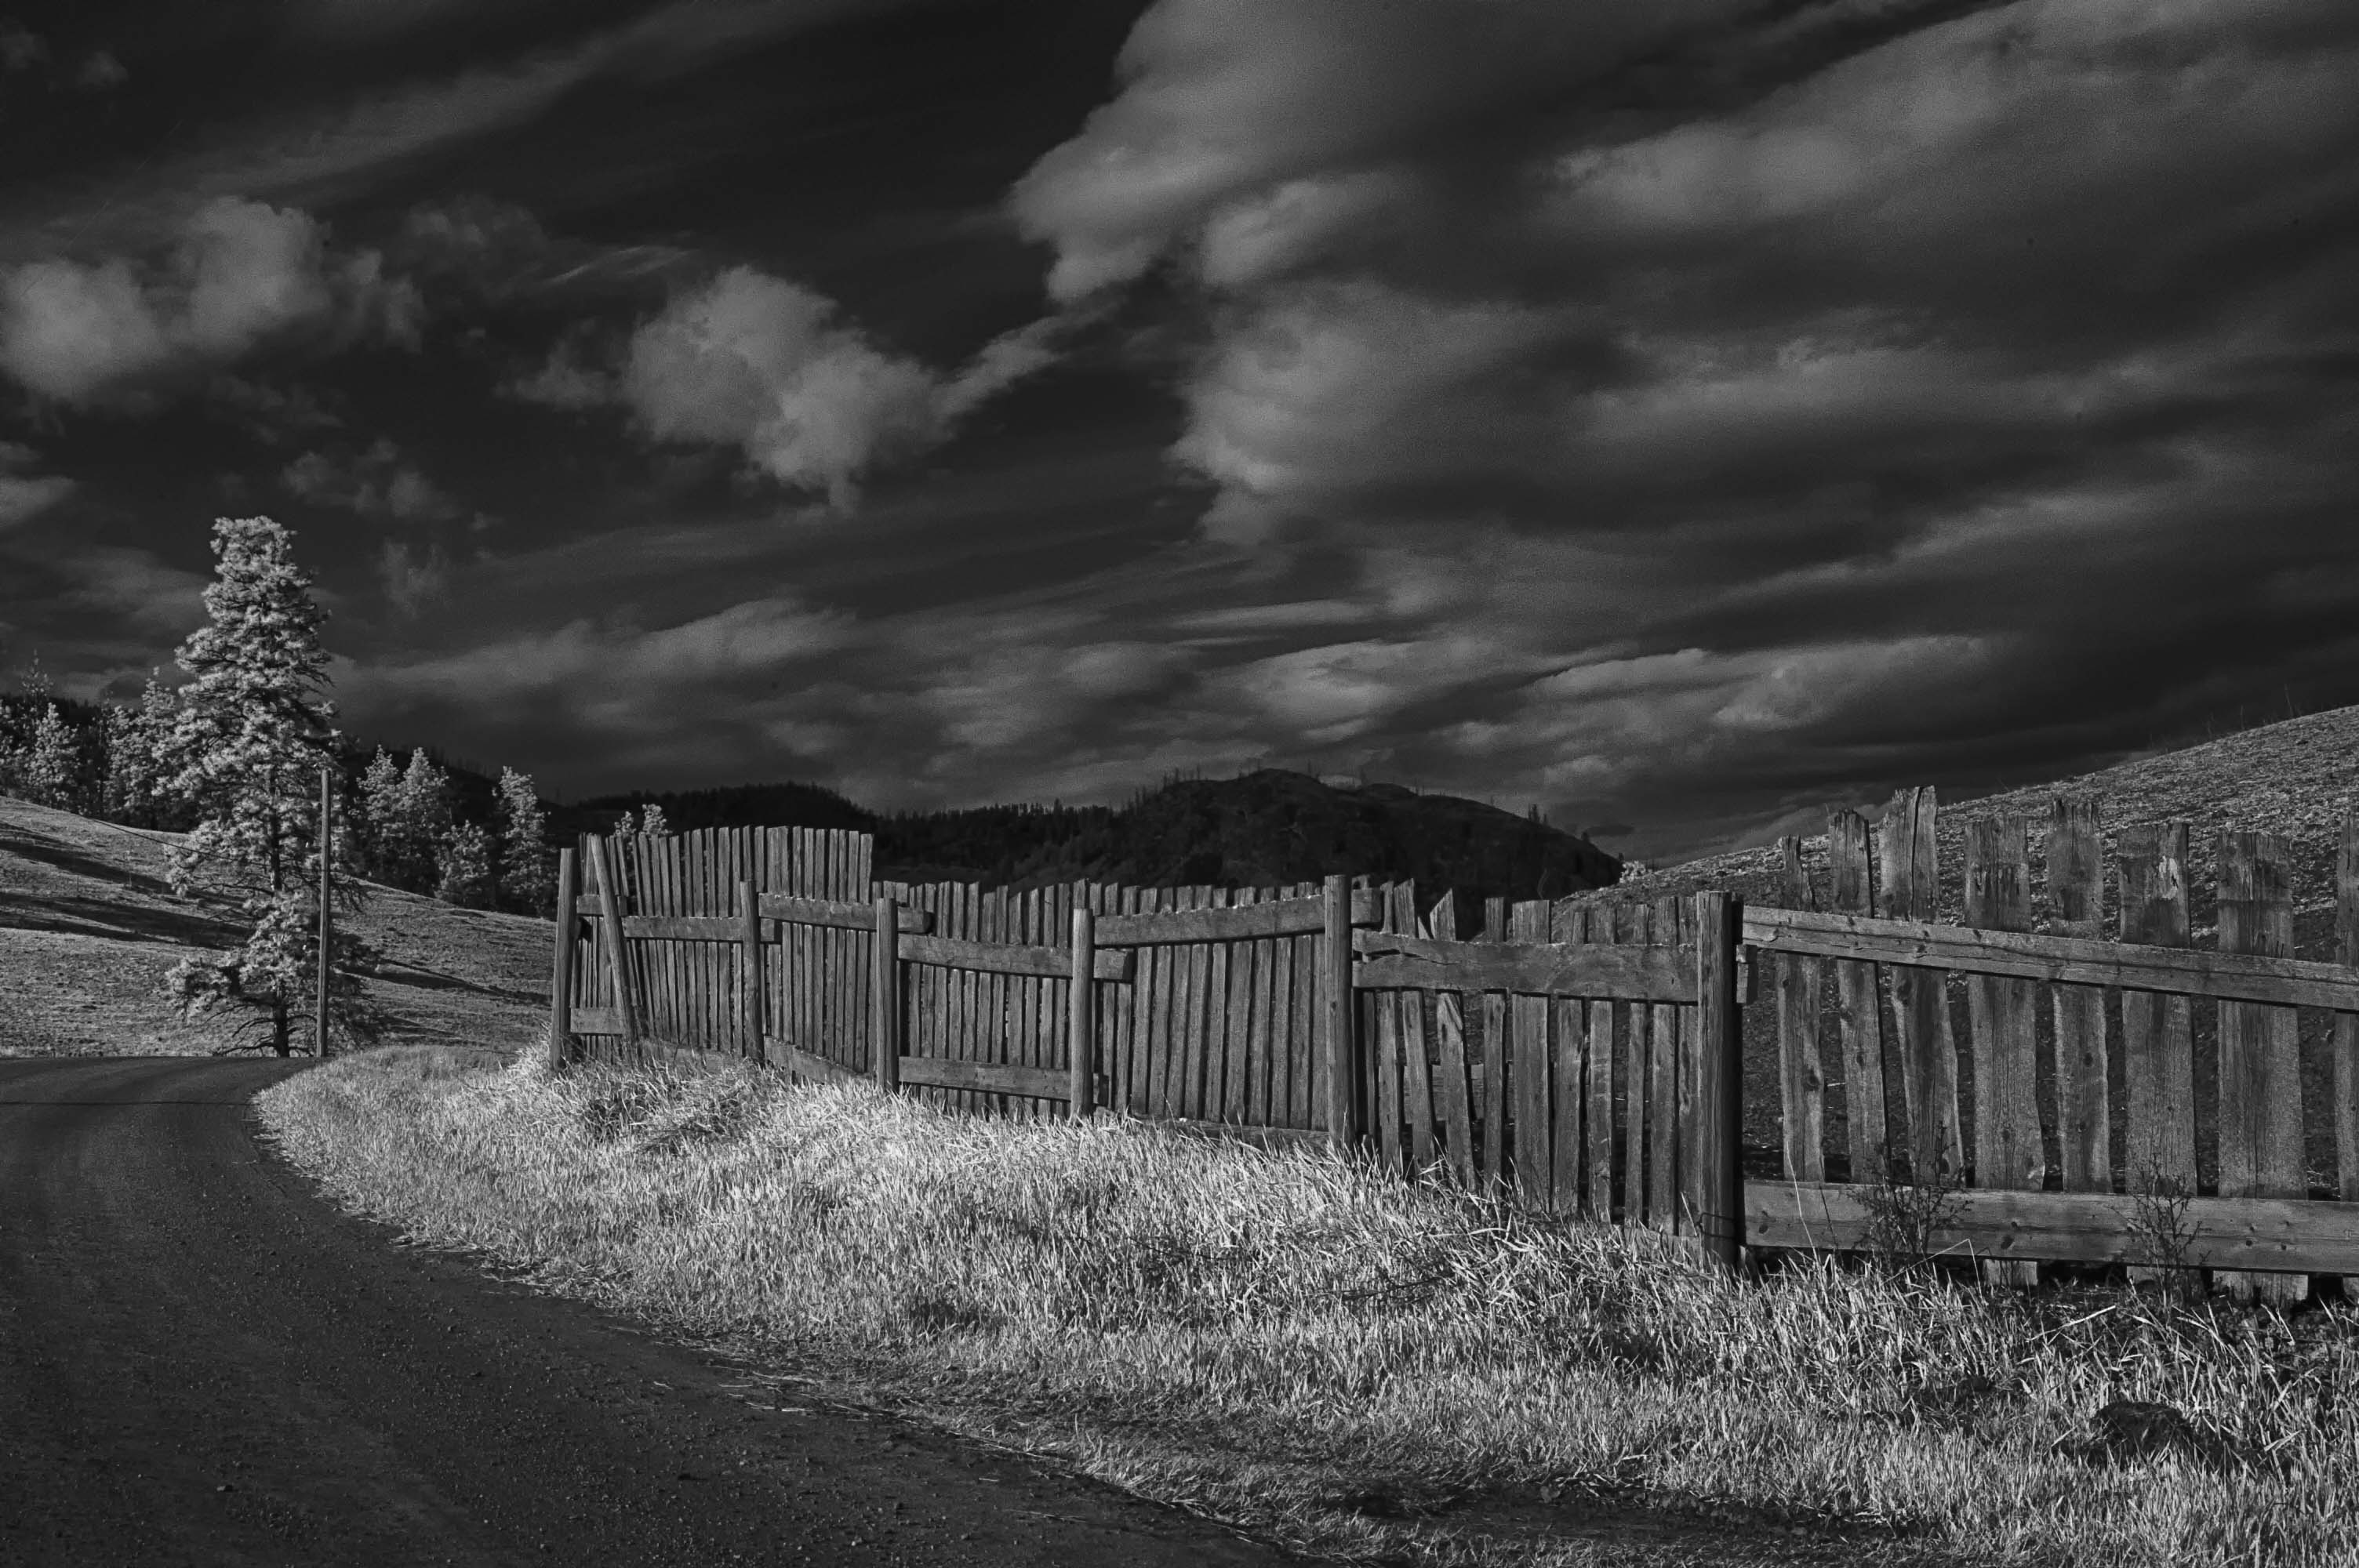
The low, late afternoon coastal light is great for infrared. The trees become an iridescent white, the sky a deep black and anything painted a light colour glows.

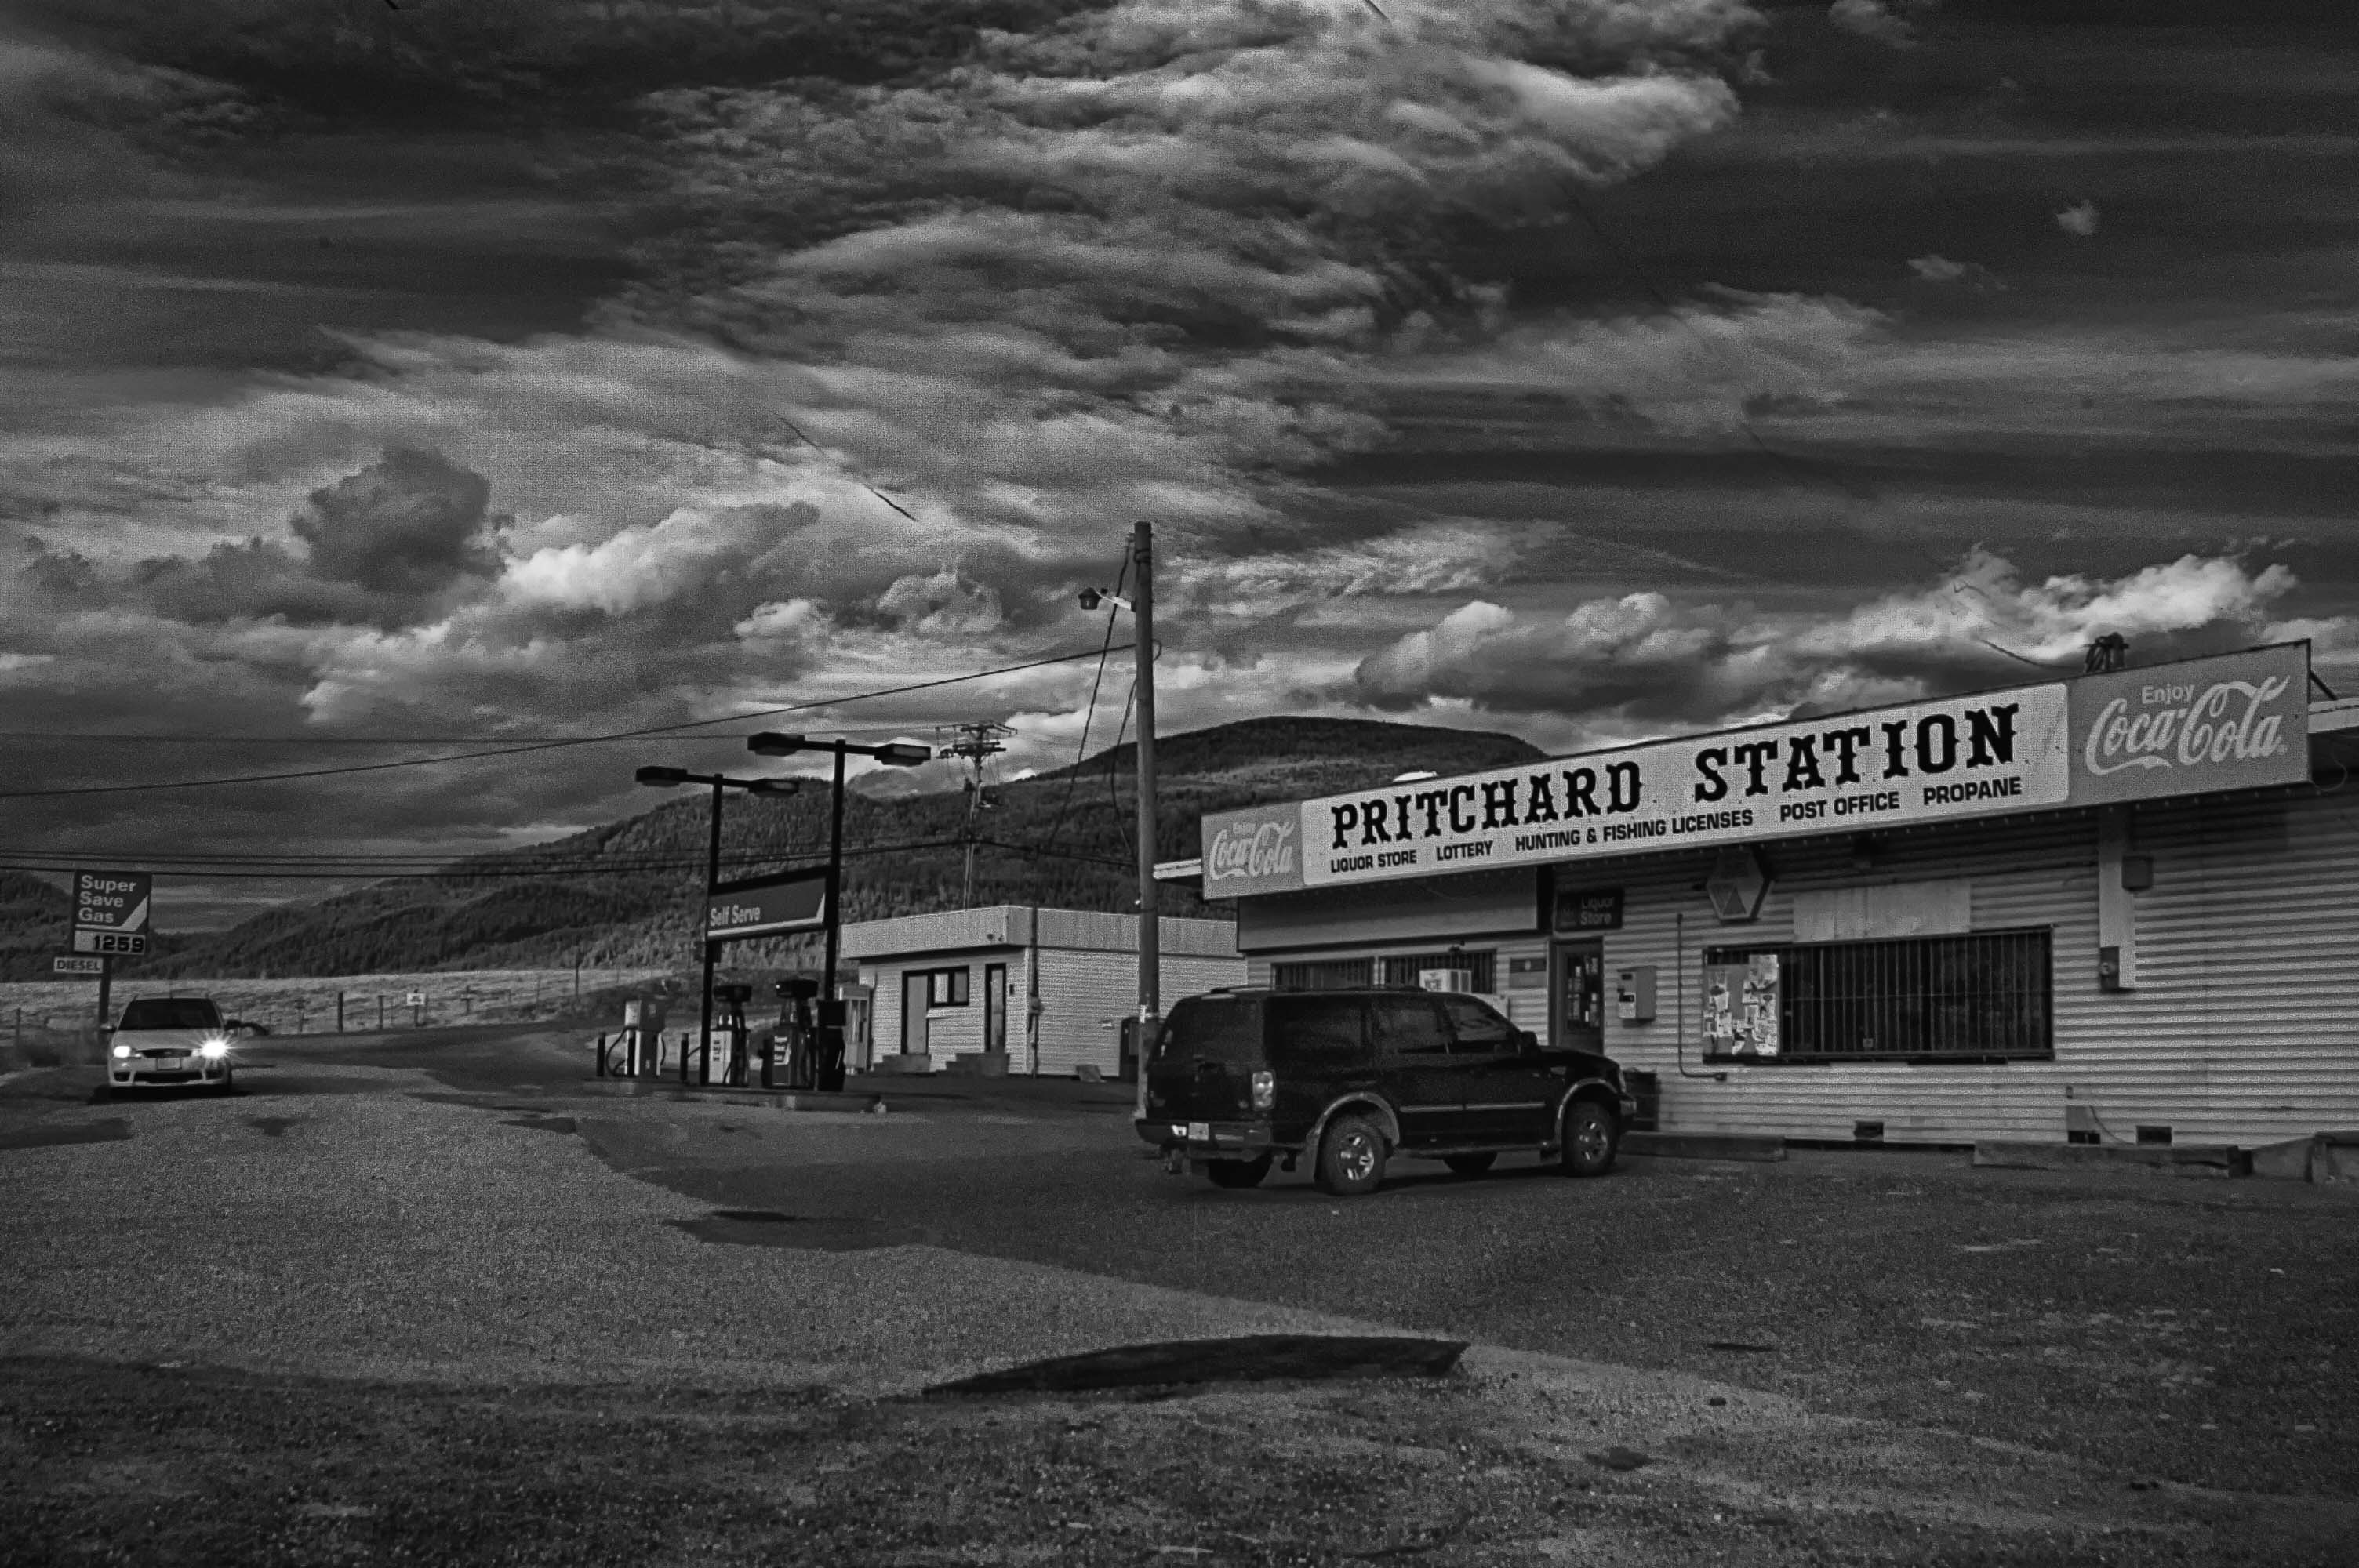
I suppose most of the pictures one takes on vacation are little more than documents of the places visited and end up filed away in hopes that future generations will eventually find the volumes of unmarked computer files and excitedly relive the experience.

Somehow I doubt that actually happens very much.

Just as the closet full of boxed slides from the film generation will likely be discarded when age forces them to downsize, I expect the terabytes of image files stored on memory cards, cell phones and the illusive cloud will follow a similar fate.

I don’t have an answer to that, I guess what will be will be. However, modern digital technology at least allows us to be a bit more creative with the images that come out of our cameras. I don’t know if the memories they retain will last any longer than I will when I am just dusty ashes in some old jar, but what the heck, if anyone does take the time to look through the volumes of photographs I leave I am sure they won’t be bored because very few of my vacation photos fit easily under the heading, “document”.

My vacations, for many years have centered around my interest in photography. My wife used to call them “photo vacations” because everywhere we visited and everything we did when traveling revolved around taking the time to get creative with our cameras.

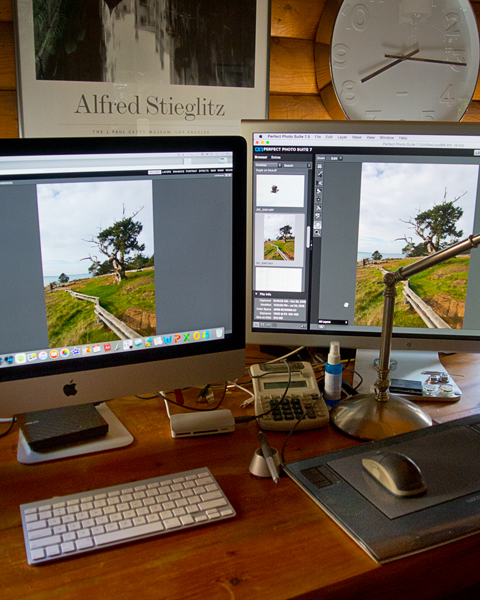
Now with modern digital technology that creative photography is not only “during the excursion” but goes on for many enjoyable hours at the computer when all the gear has been put away at home and the trip is only memories.

Enter infrared.

Infrared files are waiting to be manipulated. In my opinion the need to preserve or enhance the beauty of what was experienced on one’s latest adventure doesn’t apply. Infrared is a different light and different statement about the world we experience.

Infrared creates a completely different feeling for me. When I discussed my infrared photos last May I wrote that when I see a black and white photograph it makes me think about how a subject looks in a particular light and the mood it creates.

Infrared makes me think about the light first and then includes the subject.

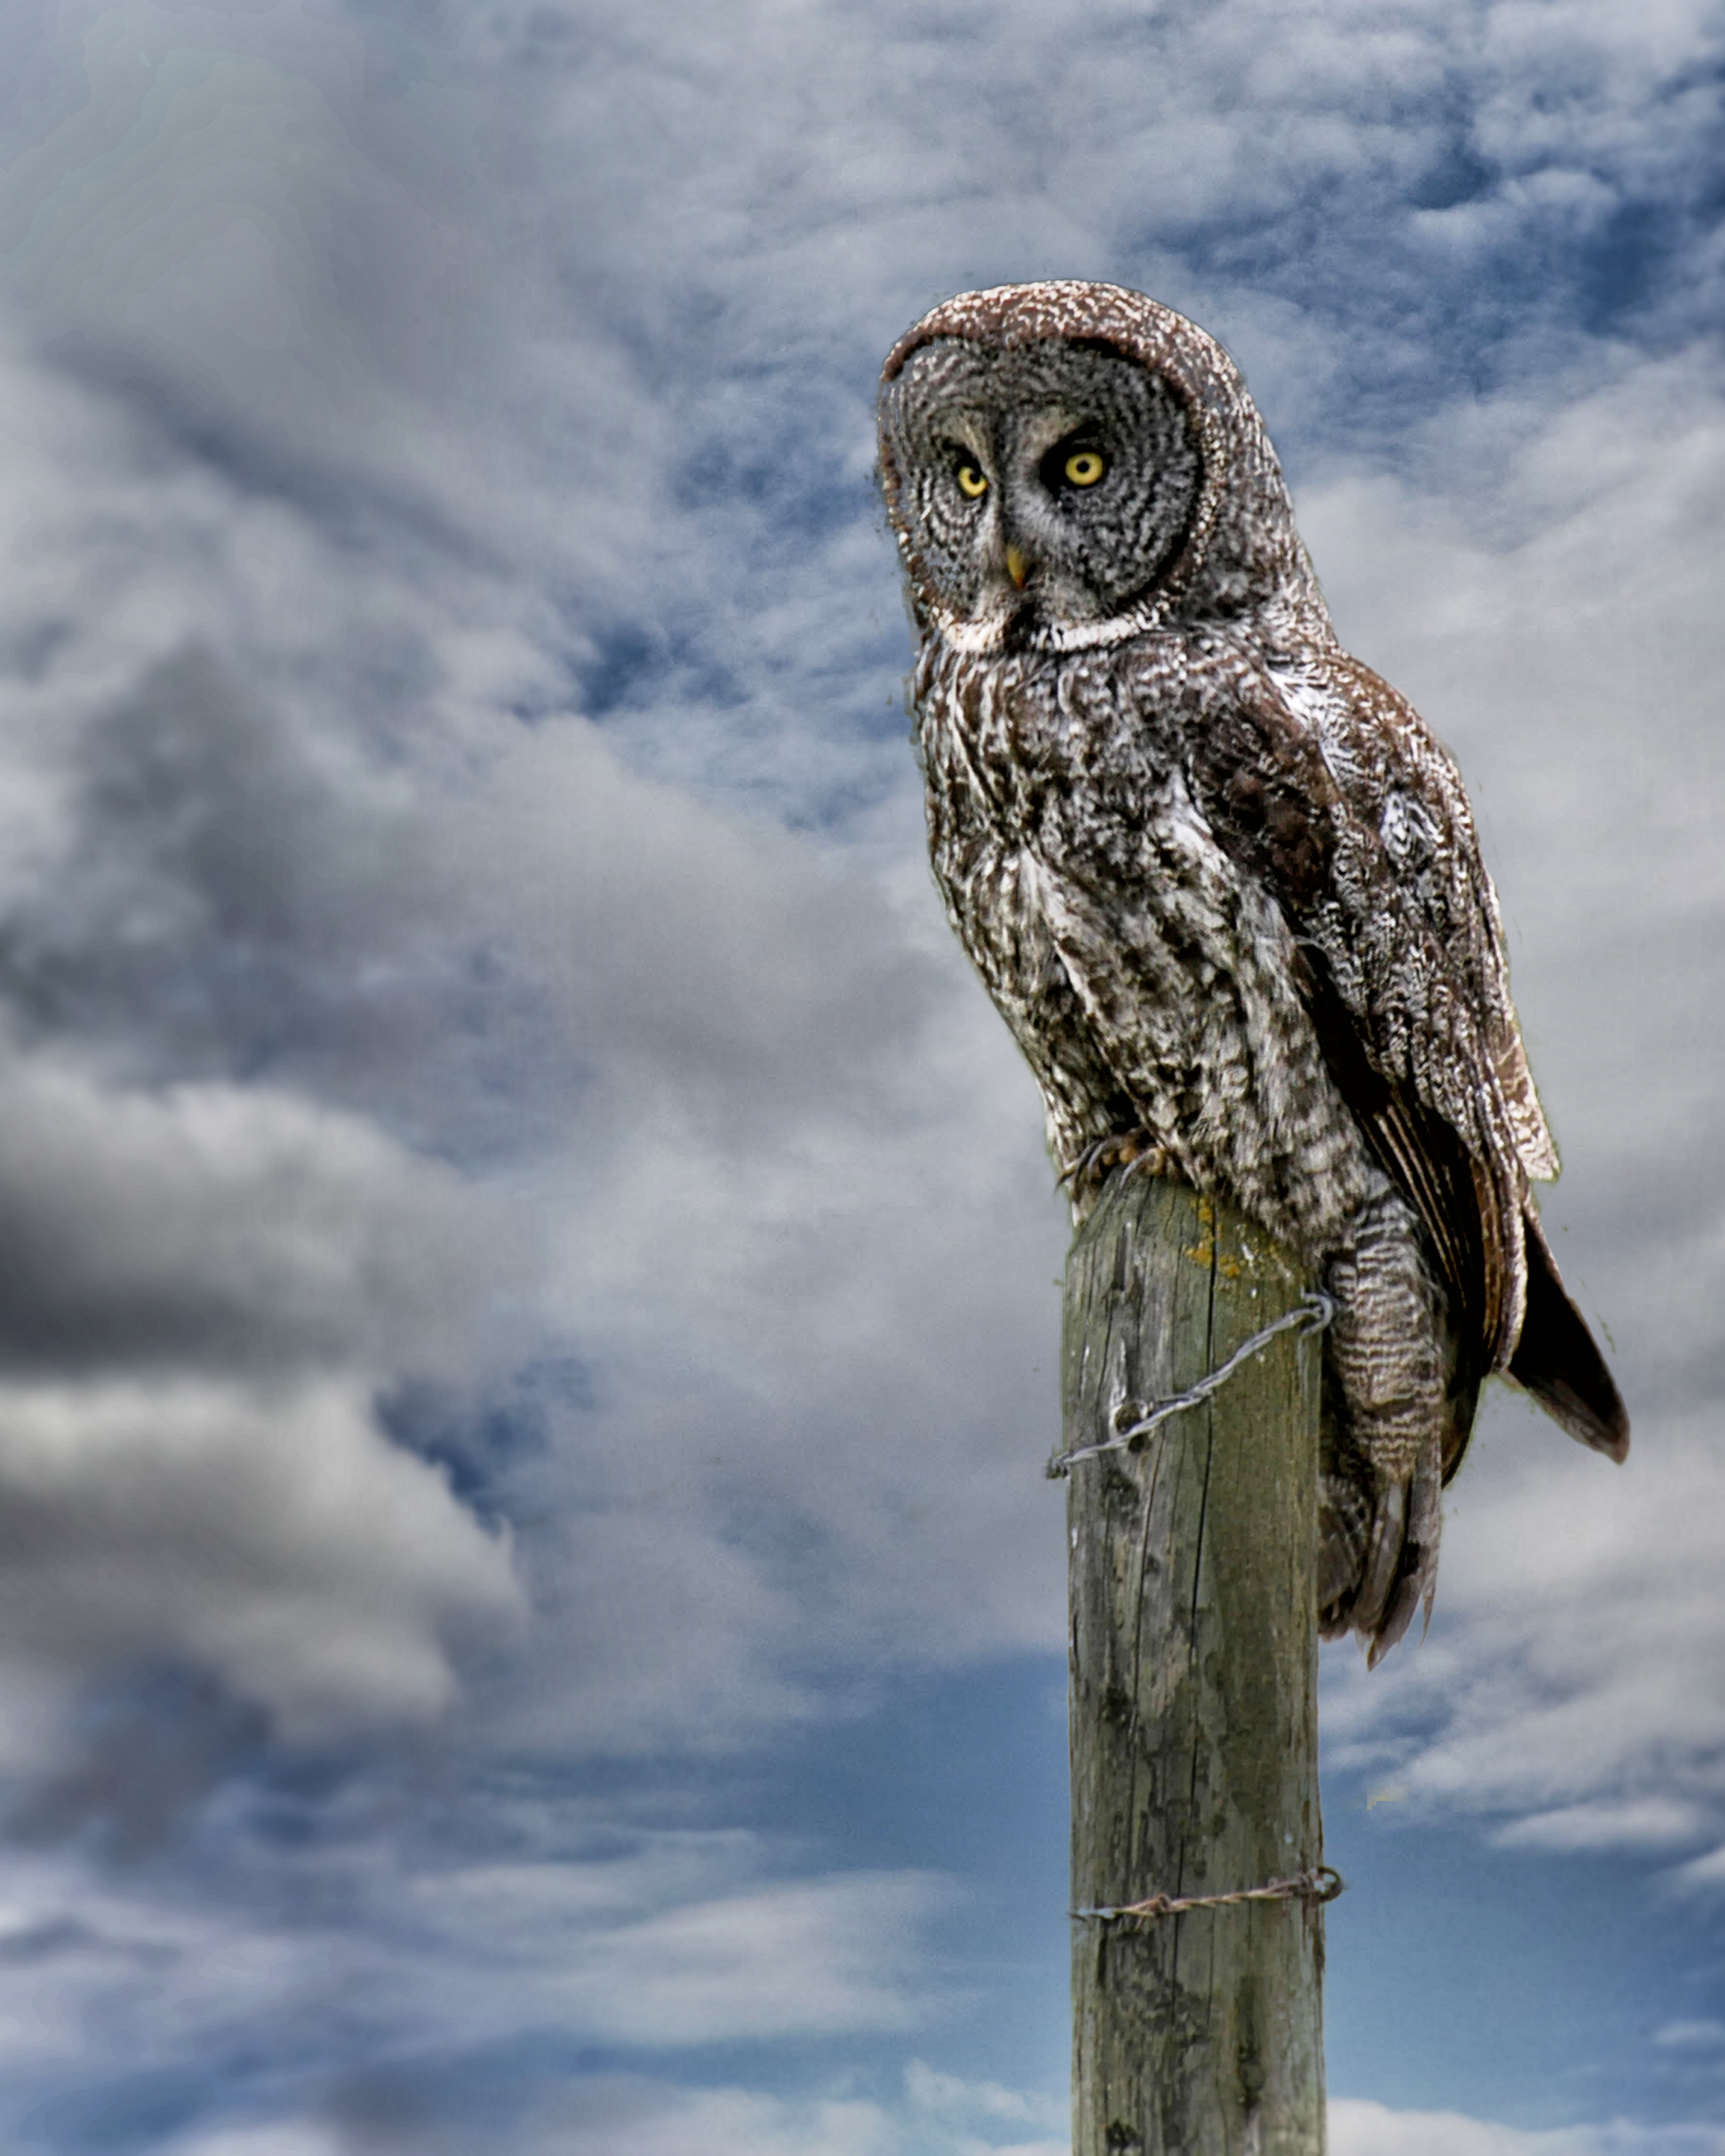
The pictures one makes with an IR camera are always an exploration, a discovery, and are very different from the usual vacation photos.

Copying Photographs   


Violet Walch copy

This week I noticed some pictures that were posted on a Facebook page. They were old, family pictures that were low quality, which I thought were more from the poor copying techniques of the person who posted the photos than a problem with Facebook, and I am sure the person that added them to her FB page in spite of the shoddy reproductions thought she couldn’t do better. Seeing those poor quality images reminded me of an article that I wrote about copying old photos some time ago, and wanted to remind readers how to do this.

In the article, I had been asked if I could make quality copies of old photographs that a family wanted to use for a book of genealogy they planned on publishing. They required image files with enough quality for good enlargements, and reproduction, and had tried to copy several images using inexpensive home scanners meant for documents (not photographs), and thus far were only able to produce pictures that lacked detail.

I recall they told me they also tried copying the photographs with their little digicams, but that exercise resulted in bright, white reflection spots from it’s flash that obscured features giving them unacceptable results.  A camera with an on-camera flash will produce glare on reflective surfaces, and inexpensive document scanners rarely produce good facial identification of old family photos that have languished in boxes for years. The result was much the same as those old, family photos I saw on Facebook.

When I copy photographs I lay the photographs flat and mount my camera on a copy stand that I have had for years, (a sturdy tripod would also do nicely) and use a small level to make sure the camera lens and the photographs are parallel. I use two photographic umbrellas to diffuse the flash. If I didn’t have the umbrellas I could also get reasonable results by placing some translucent material in front of the flashes, or by bouncing the light off large, white cards.  Two umbrellas allow me to balance the light. Then I make a test shot to check the exposure for reflection. In any case, the light needs to softly and broadly, not sharply, expose the old photograph’s surface.

The wonder of digital technology is that it allows a photographer to quickly review the image and retake it if needed. I also recommend taking several shots at different apertures.  And, of course using the camera’s Manual Mode. I prefer working with slightly under exposed image files. That way I can bring the detail up in postproduction without loosing the highlights in the original photographs.

If the next question readers ask is, “What kind of camera?” my answer will be that it depends on what is the desired outcome. If the final image is going to be a print, or something that is to be big enough to identify a person in the background, the file needs to be reasonably large. I prefer a DSLR, but for a small website image, a digicam that will accept an off-camera flash will do just fine.

If there isn’t access to an off-camera flash then wait for the opportunity to photograph the picture on a “flat” overcast or cloudy day.

The final step for me is PhotoShop, (there are several other programs that will also work) which I use to colour balance (and change a sometimes faded old photograph), and then go on to use for cropping, increasing contrast, and sharpening.

One could purchase an expensive scanner that takes up more room on the desk. But photographers that have already invested in their camera and have lenses that work perfectly well, (which I think are faster to use than a scanner) are perfectly capable of producing very high quality final images.

Photographer’s Workflow   

WorkStation

This week there was quite a discussion in my shop about the selection of software for producing quality images. Today photographers are clicking camera shutters more than compared to just a few short years ago when photography was ruled by film. Exposing four or five 36-exposure rolls while on vacation, or at a family event, was pretty much the norm instead of the 600, or 1600, captures filling memory cards today.

We each talked about our personal workflow for editing images. The following is some of what I added regarding my own workflow, and some of the programs I use to speed things up.

When I get home with images in my camera the first thing I do is remove the memory card, insert it in the card reader attached to my computer, and begin
the process of downloading. I am usually excited with anticipation about the 
images I have just captured and I want to see them right away.

I begin with a program called Photo Mechanic from Camerabits.com. Photo Mechanic is a fast and easy way to 
work with and manage groups of photos.  I open up a screen full of pictures, select those I want to keep, batch-rename them, and move them to a 
new folder.  The process is very fast and in a short while I can go through and review what I have just photographed.

I don’t leave my image files waiting very long before I start to work on them. 
I am always excited; I hate waiting, and I enjoy working on my pictures. Years ago I would be in my photo lab, with the stereo turned up, happily developing, and printing enlargements in a darkened room only illuminated with red and amber 
lights.

Nowadays I am still happily “developing”, but with the music coming from bigger speakers in my living room and I am sitting in a comfortable chair
instead of standing on a rubber mat in my basement darkroom.  There are no wet trays; there are no coloured lights, just a couple of big, bright computer displays with colourful 
pictures.

I then start the process of enhancing images and for that I employ several programs. Of course there is the ever-familiar Photoshop, however, depending on how I decide to fine tune my images I might choose to use the feature packed Perfect Suite program from Ononesoftware.com. Perfect Suite is a photo editor that works as either a standalone application, or plug-in editor, to Adobe Photoshop that includes some pretty exciting tools.

For years photographers have used graduated filters to cope with the contrasts of bright sky, and low light foregrounds with deep shadows, or bright highlights, when photographing landscapes. Although I don’t recommend getting rid of those filters yet, there is a program that may save lots of time usually spent in Photoshop lightening 
and darkening those landscape pictures. It is called Photomatix from HDRsoftware.com. Photomatix combines more than one exposure of a single subject that is exposed from the darkest shadow to the brightest highlights by creating an HDR (High Dynamic Range) image.

Finally, I will reach into a powerful and fun collection of fine-tuning programs from Niksoftware.com’s easy to use image editor that allows me to compare and make different adjustments quickly.

Most of my images are pretty good when I finish them in Photoshop. However, in my continual quest to speed up my post-processing of images, reduce my time behind the computer, and still produce quality images I find that combining these five programs fits my workflow perfectly.

I know that new cameras and lenses are what most photographers lust after, but I think if you are trying to justify expensive equipment purchases to your spouse, partner, or banker, it might be easier if you are already making show stopping, eye-catching pictures. Check the programs I have mentioned (always try their trial copies first) and see if they are for you.


Photographer’s 2015 New Years Resolutions


Auld-lang-sine


Marmot-b


It is time for me to write about New Year’s resolutions. The prospect of new opportunities is always exciting and jotting down a personal list of goals (resolutions) at the beginning of each year is a good idea if one wants personal growth.

This past month I have been asking people that come into my shop what their resolutions for the New Year would be. Here are a few from the many I heard that, in my opinion, are good solid resolutions.

Use a tripod more.

Turn off Auto mode.

Buy a new camera or lens.

Try shooting RAW.

Learn more about lighting.

Take more photos.

Learn about Composition and the Rule of Thirds

Learn to use Photoshop or Lightroom.

However, as good as those are I am adding seven that are a bit more inspirational (is philosophical a better word?) New Year Resolutions that I have put together (seven is a lucky number after all) this past year from all the long, coffee fueled discussions on ways to make improvements in the future with this exciting medium.

  1. Pay more attention to creative ideas. Without creativity a photographer doesn’t have a chance at moving forward. “This could be the year to begin evolving creatively”.
  1. There is too much focus on what is the best camera. When we spend too much time worrying and making everything about the camera we forget about the story. How about this year being more concerned with making images that tell a story”.
  1. Take risks photographically and move away from always trying to please. Make this the year to push-the-envelope beyond the comfort zone without being concerned with other’s opinions. Maybe this will be the year to put “me” in the photograph.
  1. Learn a New Technique. I think it’s as simple as experimenting, and definitely taking the time to “read up on some technique and then give it a try”. Photographers should always make the effort to learn new techniques, maybe by taking a class, or at least buying some books, or CDs, written or taught by experienced, educated photographers.
  1. Choosing new subjects to “get out of the rut of shooting the same thing over and over”. While practicing portraiture or landscapes is good, photographing the same thing the same way over and over can result in a lack of inventiveness and creativity. Sure it’s nice to stay in a comfortable rut, but as with Resolution #4, “Maybe this will be the year to put “me” in the photograph”.
  1. Make every shot count and stay away from the “spray and pray” shooting style. It should be about making each image a quality photograph, not massive picture snapping sessions hoping that a few to turn out.
  1. Become more ruthless with one’s photography and what is done in post-production; conditioning oneself to throw out the crap is the only way to keep improving.

Finally, I’ll wish everyone a great 2015, and end with a quote by award winning English author, Neil Gaiman. “I hope that in this year to come, you make mistakes. Because if you are making mistakes, then you are making new things, trying new things, learning, living, pushing yourself, changing yourself, changing your world. You’re doing things you’ve never done before, and more importantly, you’re doing something.”

Do you have any to add? I will be happy to read them.

My website is at www.enmanscamera.com. Thanks, John


Thoughts about Neutral Density Filters for Photography

Chase falls in August

Cool waters

White water

A neutral density filter is a clear, colourless, filter that reduces the intensity of all wavelengths, or colours of light, equally. It is usually a colorless (gray) filter that reduces the amount of light entering the lens. A photographer can select exposure combinations that would otherwise produce overexposed pictures. Using a ND filter allows a photographer to achieve a very shallow depth of field, or motion blur.

I’ll begin by saying quality ND filters have always been expensive. During the days of film, the exposure you made was the exposure you got. And when one used colour film one didn’t get a second chance if there was a colour shift, usually a purple cast, with less expensive filters. Some cheap filters weren’t all that sharp either.

I thought about that when during a workshop the leader loaned me a couple Lee filters (over a hundred dollars each) to try on long exposures of the waterfall we were photographing. He indicated if I were to order through him I could get a discount.

I’d already spent a bundle on costs including travel and lodging, and owned ND filters that worked well so I passed on the deal and came home thinking about maybe a future purchase.

My memory of ND filter problems were from the time of film. Film has a permanence that data files created in our modern digital camera don’t have.

Colour balance in film means colour correction filters. Where as, with digital I mostly leave my camera on auto white balance, and fix any shift when I open my RAW files in Photoshop.

A photographer could somewhat help a soft image when shooting black and white film by increasing the contrast, but with colour it was permanent. Nowadays, we have a number of software possibilities that can almost (well, almost) fix a not-quite-in-focus image.

With all that in mind I thought that unless I was making very large prints that those cheap ND filters might be usable. So I ordered several very inexpensive, no-name ND filters thinking the $60.00 or so I spent might be foolish, but I’d have some fun and discard them if they didn’t work.

I bought them, put them away and forgot about them. Then this past week as I sat looking at the overcast sky after a much-needed shower in the parched hills around my home, I decided to give those filters a try. I grabbed my camera, tripod, and the bag of filters, talked my wife into coming, and drove to a local waterfall.

The Chase Creek falls weren’t the raging torrent of spring or early summer. This year’s long, hot, dry spell has had an effect and capturing an exciting waterfall wasn’t possible. I tried a couple different angles, scrambling around the rocks and down to a now sandy shore, and then a group of young people came to splash in the cold water so I moved downstream in the creek. I was getting bored anyway and didn’t mind giving up my spot to those kids and their blanket.

Returning home, I loaded my RAW files in the computer, easily corrected the white balance, added contrast and sharpened the image in Photoshop.

My conclusion is those inexpensive ND filters are great if one is willing to shoot in RAW and make post-production corrections. I think an out-of-the-camera JPG would be disappointing.

I expect there will be opinions by experienced photographers who read this. However, the images look pretty good on my calibrated 30-inch Mac display screen. I haven’t made any prints, but I expect 8×10’s might be just fine, and if just sharing images on-line I think inexpensive ND filters will be fine.

I look forward to any comments. Thanks, John

My website is at www.enmanscamera.com

The In Camera or Post-Processing debate

I wonder at going to far, but with low, flat, grey lifeless light anything helps.

I wonder at going to far, but with low, flat, grey lifeless light anything helps.

Infrared camera with edited contrast.

Infrared camera with edited contrast.

I removed the dim, flat, busy background.

I removed the dim, flat, busy background.

The discussion about manipulating an image, or altering it, from the original capture has been going on ever since I began working as a photographer for the Los Angeles Office of Education in the 1970s.  Nowadays its called “post-processing”, and in the past we just called it “working in the dark room” when the majority of photographers were handing their undeveloped film over to a film lab and hoped the results would be worth keeping.

At that time, and as exists now, there were those who that claimed straight from the camera was the only true photography. I recall being accused of being unfair at a local exhibition around 30 years ago, because I used exotic photographic papers, hand retouched my prints, and mixed my own chemicals.

As I said, the discussion on right out of the camera vs. alteration of the original is still going strong, however, the beauty of this exciting medium is that there is no one-way to capture an image.

Photojournalists and street photographers like Margaret Bourke-White, Henri Cartier-Bresson, Robert Capa and Dorothea Lange documented events and life as it was at a particular time. As photojournalists and street photographers still are. And as to that type of photography, I absolutely agree, any type of alteration is sacrilege. But I need to introduce those righteous photographers that decry alteration of the negative, print, or digital file, to icons of photography like Andy Warhol, Jerry Uelsmann, and Duane Michals, to name only a few that pioneered different techniques in this ever-changing medium of photography.

Documentary, representational, or candid photography is used to chronicle significant and historical events attempting to capture reality.  Fine art photography is the vision of the photographer or artist. And restrictions as to how the image is finally produced do not, and should not, apply.

Modern technology allows much easier creativity for those who wish to use it. That might be nothing more that purchasing the camera with the best sensor, and mounting the sharpest lens on it, and with patience and practice learning to make exposures that are as close as possible to reality. Or it might be using that same camera is nothing more than the first stage of many in an extended and manipulative process.

As to the debate, should image-editing software be used to alter the image, or should the image be left as an unaltered record of the scene?  I think that depends on the goals of each photographer.

As always, I really appreciate any comments. Thanks, John

My website is at www.enmanscamera.com

Wandering my Neighborhood with Infrared

Pritchard store infrared  Crossing infrared Riverside infrared Bridge infrared Wolf ranch infrared Tree & fence infrared

Spring is here with cool nights and warm days. The snow has finally disappeared in my neighborhood, except on the mountaintops that surround the river valley in which I live, and everything is starting to get green.

I had decided this should be the week to wander the roads near my home. I selected my camera that I had converted to infrared some years ago, attached a 24-120mm lens, and headed out.  Over the past 37 years I have photographed everything in my nearby landscape again and again, and I won’t try to guess at the number of different cameras, films, and film formats and, of course digital cameras, I have used.

My goal this time (I always like to have some type of goal or plan), was to wait for a cloudy day and make use of the low, dramatic, and directional light at day’s end. I wanted to use my infrared camera as I have many times in the past.

Using infrared is always fun. The resulting images are always different and interesting. Before the days when I had invested in an infrared camera conversion, I had used Kodak infrared film. There wasn’t an exact ISO rating or even very consistent settings for that film. One would make test exposures for the filter density one used and the developing times. Good results would finally be obtained, but always after exposing several rolls of that expensive infrared film.

Nowadays my camera no longer requires a specialized infrared filter, and I don’t have to spend time in a lightless room developing the film. Yes, there was a cost to having my DSLR camera modified so that the image sensor is only sensitive to infrared light, but it has since paid back generously, because it is well worth the expense to be able to create unique images.

Most experts say infrared radiation peaks around noon, however, in my experience morning or evening is better, and the accompanying long shadows makes great pictures in infrared. So I waited a bit after 5pm before stepping out.

I went along the road searching out features I knew well, and that I thought might be perfect in the late afternoon light. My main interest was the sky. I wanted the very dark, hazy skies one obtains with infrared that are so dramatic, compared to those with visible light. As I stood alongside the road I thought about how the pictures I was making would be nice as colour images, but infrared and the black and white conversion I intended to apply would create more impressive, or as one writer called them, “otherworldly” scenes.

All my images from that day received some post-production using PhotoShop and Niksoftware. I shoot RAW so the original files from my camera are red and white. I convert each photograph to black and white, increase the contrast, and sharpen and strengthen the highlights and shadows. The final vision isn’t supposed to be a pretty, scenic document as much as it is my personal artistic vision.

It is possible for photographers who want “infrared-like” pictures to manipulate their normal captures using Photoshop, or any of several other programs that emulate the effects of infrared. However, those photographers like me that are interested in something different can find an older DSLR and send it out to be modified. Since I had my camera modified, there are several companies that have appeared, like www.lifepixel.com. These folks’ webpage begins with the question, “Are you tired of shooting the same stuff everyone else is shooting?”   So I suggest, if you would like to do something completely different, try infrared like me.

I look forward to your comments, John

My website is at www.enmanscamera.com

Infrared Photography on a winter day

old truck in infrared Infrared roadside Farm in Infrared

Photographers always tell me that they are participating on some kind of photo challenge or another: a photograph-a-day for a year, or once-a-month for some specific time, or some have even decided to follow a particular subject through each season. I like the idea, however, I expect dedicating time to making a photograph every day (unless one works in a busy studio and is doing it as part of the work day) could become quite a chore.

Personally, I have tried projects that require that kind of stick-to-it dedication, but I get side tracked easily and rarely complete what I started. Last February I thought I might photograph a bridge a month. I live near a big river so how hard could that be? I did get a few and then I just forgot.

When it comes to my personal photography fun stuff just happens. For example, it was one of those days when I was too lazy to do the stuff around the house that I should have been doing.  I was reading some and just thinking about photography in general. OK, for me thinking about photography isn’t that unusual, it is actually what I prefer to do.

I was lazy, reading and thinking about how I should have a photo project. OK, the project: drive up the road a couple miles and photograph neighbour’s places poking out of the snow and do it with my infrared camera which is fun.  Criteria: Hope for some sun.

I have an older digital SLR camera (Nikon D100) that has been modified to only see infrared light. Infrared (IR) light is light that has longer wavelengths on the red edge of the spectrum and is invisible to human eyes.

The sensors for digital cameras are sensitive to more than just the visible light spectrum. This causes problems with colour balance, so camera manufacturers place a filter in front of the sensor that blocks the infrared part of the spectrum that only allows visible light, and not infrared, to pass through. The modification for my D100 was accomplished by removing that filter, and installing one instead that blocks visible light, allowing mostly infrared light to reach the camera’s sensor.

The camera still functions normally with full autofocus and autoexposure, except that it’s now able to record the infrared wavelengths that are just beyond what the human eye is capable of seeing.  When infrared photographs are produced as black and white the photographs show trees with glowing white leaves and black skies opening up new visual opportunities for photographing the world around us.

Many think of infrared photography as the stuff of military night reconnaissance, or, as frequently portrayed in movies, as aerial thermal imaging that finds the bad guys. With thermal imaging one sees the heat the subject is producing, however, infrared as photographers use it, with our modified cameras, is about capturing the light or radiation that is reflected off a subject and doesn’t involve thermal imaging at all.

In 1800 Sir Frederick William Hershel described the relationship between heat and light and let the world know about the existence of infrared light in the electromagnetic spectrum.

I don’t know how conversions are accomplished with modern sensors. With my old D100 I need to preset the white balance and be aware of a meter that is easily tricked with the white snow. I must check my camera histogram after every release of the shutter and usually make two or three exposures just in case. However, everything appears normal through the camera’s viewfinder.  Also, because so much light reaches the sensor one can use high shutter speeds and so it is easy to hand hold while exposing a photograph.

I would have liked a clear sky with more sun to increase the infrared effect, but the high clouds let in just enough light to make things interesting and challenging. Some subjects don’t work very well with infrared, so I just experiment, take lots of pictures and hope for the best. I knew on that not-so-bright-day my images would take some work with PhotoShop and NIK’s SilverEfex.

Infrared photography is fun. I was only out wandering my neighborhood for a little over an hour before I hurried home to work on what I got. Everything changes when one is working with infrared, forcing even the least creative among us to think creatively. I can leave my images with blue trees the LCD displays or move the white balance off the preset to cloudy and get red and black pictures instead. Opening an image file in PhotoShop is always a bit of a surprise and from there on its all experimenting and personal vision. Yes, infrared is fun.

As always, I appreciate your comments.

My website is at www.enmanscamera.com

Photographing models at a Strobist meet.

Stephanie4 Molly 2 Monica 1 Stephanie 2 Molly Monica3 Stephani 3

Last Sunday I joined six other photographers and three models at photographer, Dave Monsees’, rural studio for what Dave organized and referred to as a Strobist work session.

The rustic studio, nestled beside a stream in a picturesque treed valley, is a short ten-minute drive from city center to the rural community of Cherry Creek, British Columbia. I had heard about it from other photographers and was looking forward to his Strobist session so I could check the studio out, and, of course, spend the afternoon with like-minded photographers. Now what could be better than that?

This Strobist get-together was the third held in my area that I have been fortunate enough to attend, and as with the first two, it had its own uniqueness.

Some of the participants had experience using off-camera lighting and got right to the business of arranging lights and posing our three models for the day, Molly Lampreau, Stephanie Johannesen, and Monica Nicklas.  I had agreed to begin with a mini lesson and to be available to answer questions for those invitees that were just beginning to enhance their portrait photography with artificial light, and with a few minutes of instruction and a bit of prompting before long everyone was in the act of portrait photography.

The word, Strobist, and gatherings like the one I was invited to have become popular because of American photographer, David Hobby’s, Strobist.com lighting blog that promotes off-camera lighting techniques among photographic enthusiasts, with an emphasis on the practical knowledge rather than just the gear. Those that think our meets in Kamloops are unique should try searching Stobist meet on the Internet. There will be page after page featuring Strobist meets all over the world.

My regular readers know that I rarely make a photograph of people, indoors or out, without using a flash. So getting together with other photographers, experienced or not, that like to use off-camera light for their portrait work is fun. The studio was jam packed with lighting equipment set up with wireless camera connection. There were two different backdrop set-ups and we had our choice of several larger studio type lights in the larger space, and some smaller hotshoe flashes on stands in the more intimate space. There were also lots of light modifiers, softboxes, umbrellas, snoots, barn doors, and so on for us to employ.

How a person in a portrait appears does have a lot to do with how the subject(s) are posed, but I think light and how it is applied is just as important. Using flash, on or off camera, to modify light gives a photographer more control than just using the sun, or relying on a high ISO.

In addition photographers always need to explore and experiment to learn how to balance the background, or ambient light, with flash, and get-togethers like a Strobist meet are perfect for practicing off-camera lighting in a studio, with willing subjects without the pressure of actual clients, and watching other photographers work is always fun.

I was in a hurry to download my images from that day and began sorting, editing and optimizing as soon as I got home. As I opened PhotoShop and began, I thought of a quote by American supermodel Tyra Banks that fit the day of photography from beginning to end, “There are three key things for good photography: The camera, lighting, and…PhotoShop”.  In my opinion there might be a few more important things for good photography, but to a model the final picture is everything.

I appreciate you comments.

My website is at www.enmanscamera.com

Printmaking – 10 Tips to Make Better Prints

Last week a previous PhotoShop student of mine stopped by my store to discuss printmaking. We talked about a lot about techniques, papers, and one of my favourite topics, how to make black and white prints.  Consequently, for this week I decided to pass along a summary of that discussion in the form of 10 tips for readers that should help them to make better prints.

1. I’ll begin with the most important tip for getting a good digital print, which is a good quality image. You will need a good original image in order to get top quality digital photography printing. It’s like the old saying, “garbage in, garbage out.”

2.  Learn to white balance your camera. Proper camera white balance means the camera’s sensor reproduces the “colour temperature” of a light source, or the relative warmth, or coolness of white light. Setting the camera’s white balance corrects all the colours in your pictures, taking into account the light in which they were shot.

3.  If you are using a DSLR (digital single lens reflex) camera be sure to clean the sensor regularly. Even if you never remove the lens, dust will get in and show up on your prints.  Some cameras have self-cleaning, but that doesn’t remove all the dust from the camera, it only shakes it off the sensor and it will eventually find it’s way back, so to make sure I regularly clean my sensor with a clean blower.

4.  Calibrate the computer monitor. Do this about every two weeks with a new monitor, and then every month or so after it is a year old.  Adobe Photoshop provides the Adobe Gamma Wizard or use a more a specialized product by Color Vision, Monaco, Digital Light, or other manufacturers.

5.  Choose a colour space for the camera’s image files.  The two most common with digital images are sRGB and Adobe RGB 1998.   Check the camera’s menu for that initial selection.  If you are making enhancements to your images in PhotoShop you will do better with Adobe RGB 1998; it covers a wider colour gamut.  Wider range of colours mean more precise colour adjustments. These are subtle.

6.  Improve contrast.  Photographs from digital cameras are sometimes pretty flat and lack the contrasts that were once provided by films like Velvia and Ektachrome VC.  If shooting JPGs learn how to use levels and curves. With RAW it’s easy using the sliders in Adobe’s RAW converter.

7.  Resize your image.  Choose a resolution from 250 to 300.

8.  Sharpen.  All digital images whether scanned, or direct from the digital camera, require sharpening for a satisfactory print. I leave my camera at normal and do the real work in PhotoShop. Sharpening isn’t all that hard, there are many ways. Just spend some time searching the Internet and choose a method that isn’t complicated. I like sharpening to fit easily into my printmaking workflow.

9.  Choose the right paper.  Just like traditional photography, the paper you choose to print with will make a big difference. In Photoshop select print with preview and choose your surface – matt or glossy.  Be sure to go on-line and download the correct profile into PhotoShop for the paper you are using.

10.  Set your printer’s driver.  To maintain the colour accuracy of your image, it is essential to set your printer driver correctly. When you are ready to print, select the print preview option in your file menu.  There are several steps – you should learn them by reading your instruction manual for your printer.   It is important to let your printer know the amount of ink for the type of paper and surface.

And lastly, after printing save those images on archival CDs, DVDs or on external hard-drives. Don’t make the mistake of leaving all those image files on your computer, that’s the best way to loose everything.  Cheap bargain discs will degrade with time. Don’t store them in the sun and don’t write on them.

I really appreciate your comments.

And my website can be found at www.enmanscamera.com