Photographer’s Workflow   

WorkStation

This week there was quite a discussion in my shop about the selection of software for producing quality images. Today photographers are clicking camera shutters more than compared to just a few short years ago when photography was ruled by film. Exposing four or five 36-exposure rolls while on vacation, or at a family event, was pretty much the norm instead of the 600, or 1600, captures filling memory cards today.

We each talked about our personal workflow for editing images. The following is some of what I added regarding my own workflow, and some of the programs I use to speed things up.

When I get home with images in my camera the first thing I do is remove the memory card, insert it in the card reader attached to my computer, and begin
the process of downloading. I am usually excited with anticipation about the 
images I have just captured and I want to see them right away.

I begin with a program called Photo Mechanic from Camerabits.com. Photo Mechanic is a fast and easy way to 
work with and manage groups of photos.  I open up a screen full of pictures, select those I want to keep, batch-rename them, and move them to a 
new folder.  The process is very fast and in a short while I can go through and review what I have just photographed.

I don’t leave my image files waiting very long before I start to work on them. 
I am always excited; I hate waiting, and I enjoy working on my pictures. Years ago I would be in my photo lab, with the stereo turned up, happily developing, and printing enlargements in a darkened room only illuminated with red and amber 
lights.

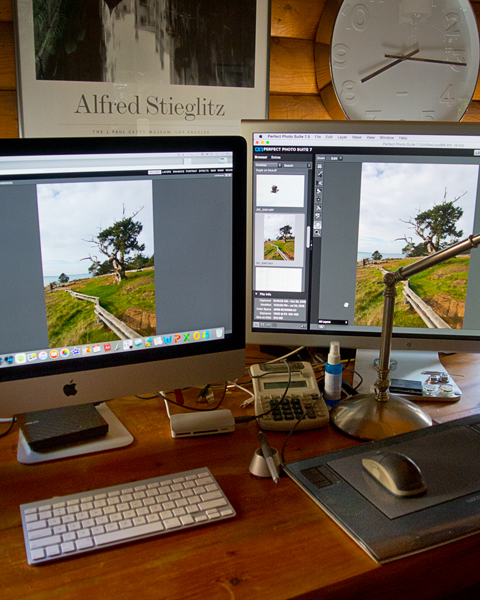
Nowadays I am still happily “developing”, but with the music coming from bigger speakers in my living room and I am sitting in a comfortable chair
instead of standing on a rubber mat in my basement darkroom.  There are no wet trays; there are no coloured lights, just a couple of big, bright computer displays with colourful 
pictures.

I then start the process of enhancing images and for that I employ several programs. Of course there is the ever-familiar Photoshop, however, depending on how I decide to fine tune my images I might choose to use the feature packed Perfect Suite program from Ononesoftware.com. Perfect Suite is a photo editor that works as either a standalone application, or plug-in editor, to Adobe Photoshop that includes some pretty exciting tools.

For years photographers have used graduated filters to cope with the contrasts of bright sky, and low light foregrounds with deep shadows, or bright highlights, when photographing landscapes. Although I don’t recommend getting rid of those filters yet, there is a program that may save lots of time usually spent in Photoshop lightening 
and darkening those landscape pictures. It is called Photomatix from HDRsoftware.com. Photomatix combines more than one exposure of a single subject that is exposed from the darkest shadow to the brightest highlights by creating an HDR (High Dynamic Range) image.

Finally, I will reach into a powerful and fun collection of fine-tuning programs from Niksoftware.com’s easy to use image editor that allows me to compare and make different adjustments quickly.

Most of my images are pretty good when I finish them in Photoshop. However, in my continual quest to speed up my post-processing of images, reduce my time behind the computer, and still produce quality images I find that combining these five programs fits my workflow perfectly.

I know that new cameras and lenses are what most photographers lust after, but I think if you are trying to justify expensive equipment purchases to your spouse, partner, or banker, it might be easier if you are already making show stopping, eye-catching pictures. Check the programs I have mentioned (always try their trial copies first) and see if they are for you.


I like Photographing Buildings

Red wall & Stairway1 blue door1 parking1Northern Junk co.  Captain's ride  porch couch1Brick doorway 1 the yellow door1 Waiting

Strolling along sidewalks with my camera, in cities, large or small, is exhilarating. And whether the architecture is low and flat, or skyscraping, or old bricked, or shiny metal and glass, I always find something different to photograph.  Usually, I approach urban areas with a plan and I don’t just wander about hoping to find something interesting. That’s not my way.

Sometimes I am after the cityscape and watch for shadows, highlights and interesting sky. On other occasions, my plan might be to select a particular area and visually capture the story of how structures and features interact. I might be more interested in the colours, and spend my time using the colour evidence to make a story.

In October 2012, I wrote about images I made while walking along the waterfront in Victoria, and, in February 2013, I showed photographs and discussed the small South Thompson River town of Chase, in the BC interior.  In each instance I approached the municipalities with different photographic goals. Goals that were not so much defining visuals as they were photographic thoughts about the architecture in each place.

Some years ago I spend three days wandering the side streets of Anacortes, a town along the coast of Washington. Although I enjoyed both the downtown and harbor districts of the small American town, what struck me most were those places where people lived. The inhabitants appeared to go out of their way to differentiate each dwelling and my plan came about to document the entrances of the places where people lived.

In that instance and whenever I decide to work my way through, or around, some city I always take some predetermined course of action. I remember a late afternoon in Port Townsend, WA and on that trip I spent my time photographing the unique turn of the century buildings along the narrow, main street using an infrared modified camera. I wasn’t so much documenting the well-known seaport town, as was trying to create a distinct impression of the ornate Victorian architecture.

I once read a quote by an anonymous writer that said, “The difference between the recorder photographer… and the artist photographer… is that the artist will, by experience and learning… force the camera to paint the imagination…the emotion… the concept and the intent… rather than faithfully and truthfully reproduce an unattractive and unflattering record.”

I must admit that my intent isn’t usually to document the cities I visit, as much as it is to create a personal vision of the buildings I photograph. That vision, although uniquely mine, rarely strays much from reality other than when I use my infrared camera. I haven’t entered the artistic world of HDR (high dynamic range) image making yet. HDR is the process of merging multiple exposures into one image.  I expect that it is only laziness on my part, because I am intrigued by how well HDR post-processing with software like Photomatix, http://www.hdrsoft.com lends itself to the creative architectural work. I anticipate that I will tackle that process at some time in the future when I make plans to photograph my way along another city’s streets.

I will mention that I rarely use lenses that are wide enough to exaggerate the foreground or make those dramatic vistas. My camera isn’t a cropped sensor so an 18mm lens would be, effectively, only a 28mm. That allows me to include lots of visual details and limits the distortion between near and far objects.

Summertime is quickly approaching and with that my wife and I expect to do some driving around British Columbia and possibly stray into Washington State, and those trips will always include architectural photography opportunities in the towns and cities we pass through, or stop and visit.

As always, I appreciate your comments and please let me know you were here.

Thanks, John

My website is at www.enmanscamera.com