Printing Your Own Digital Photographs    

Printing Photos

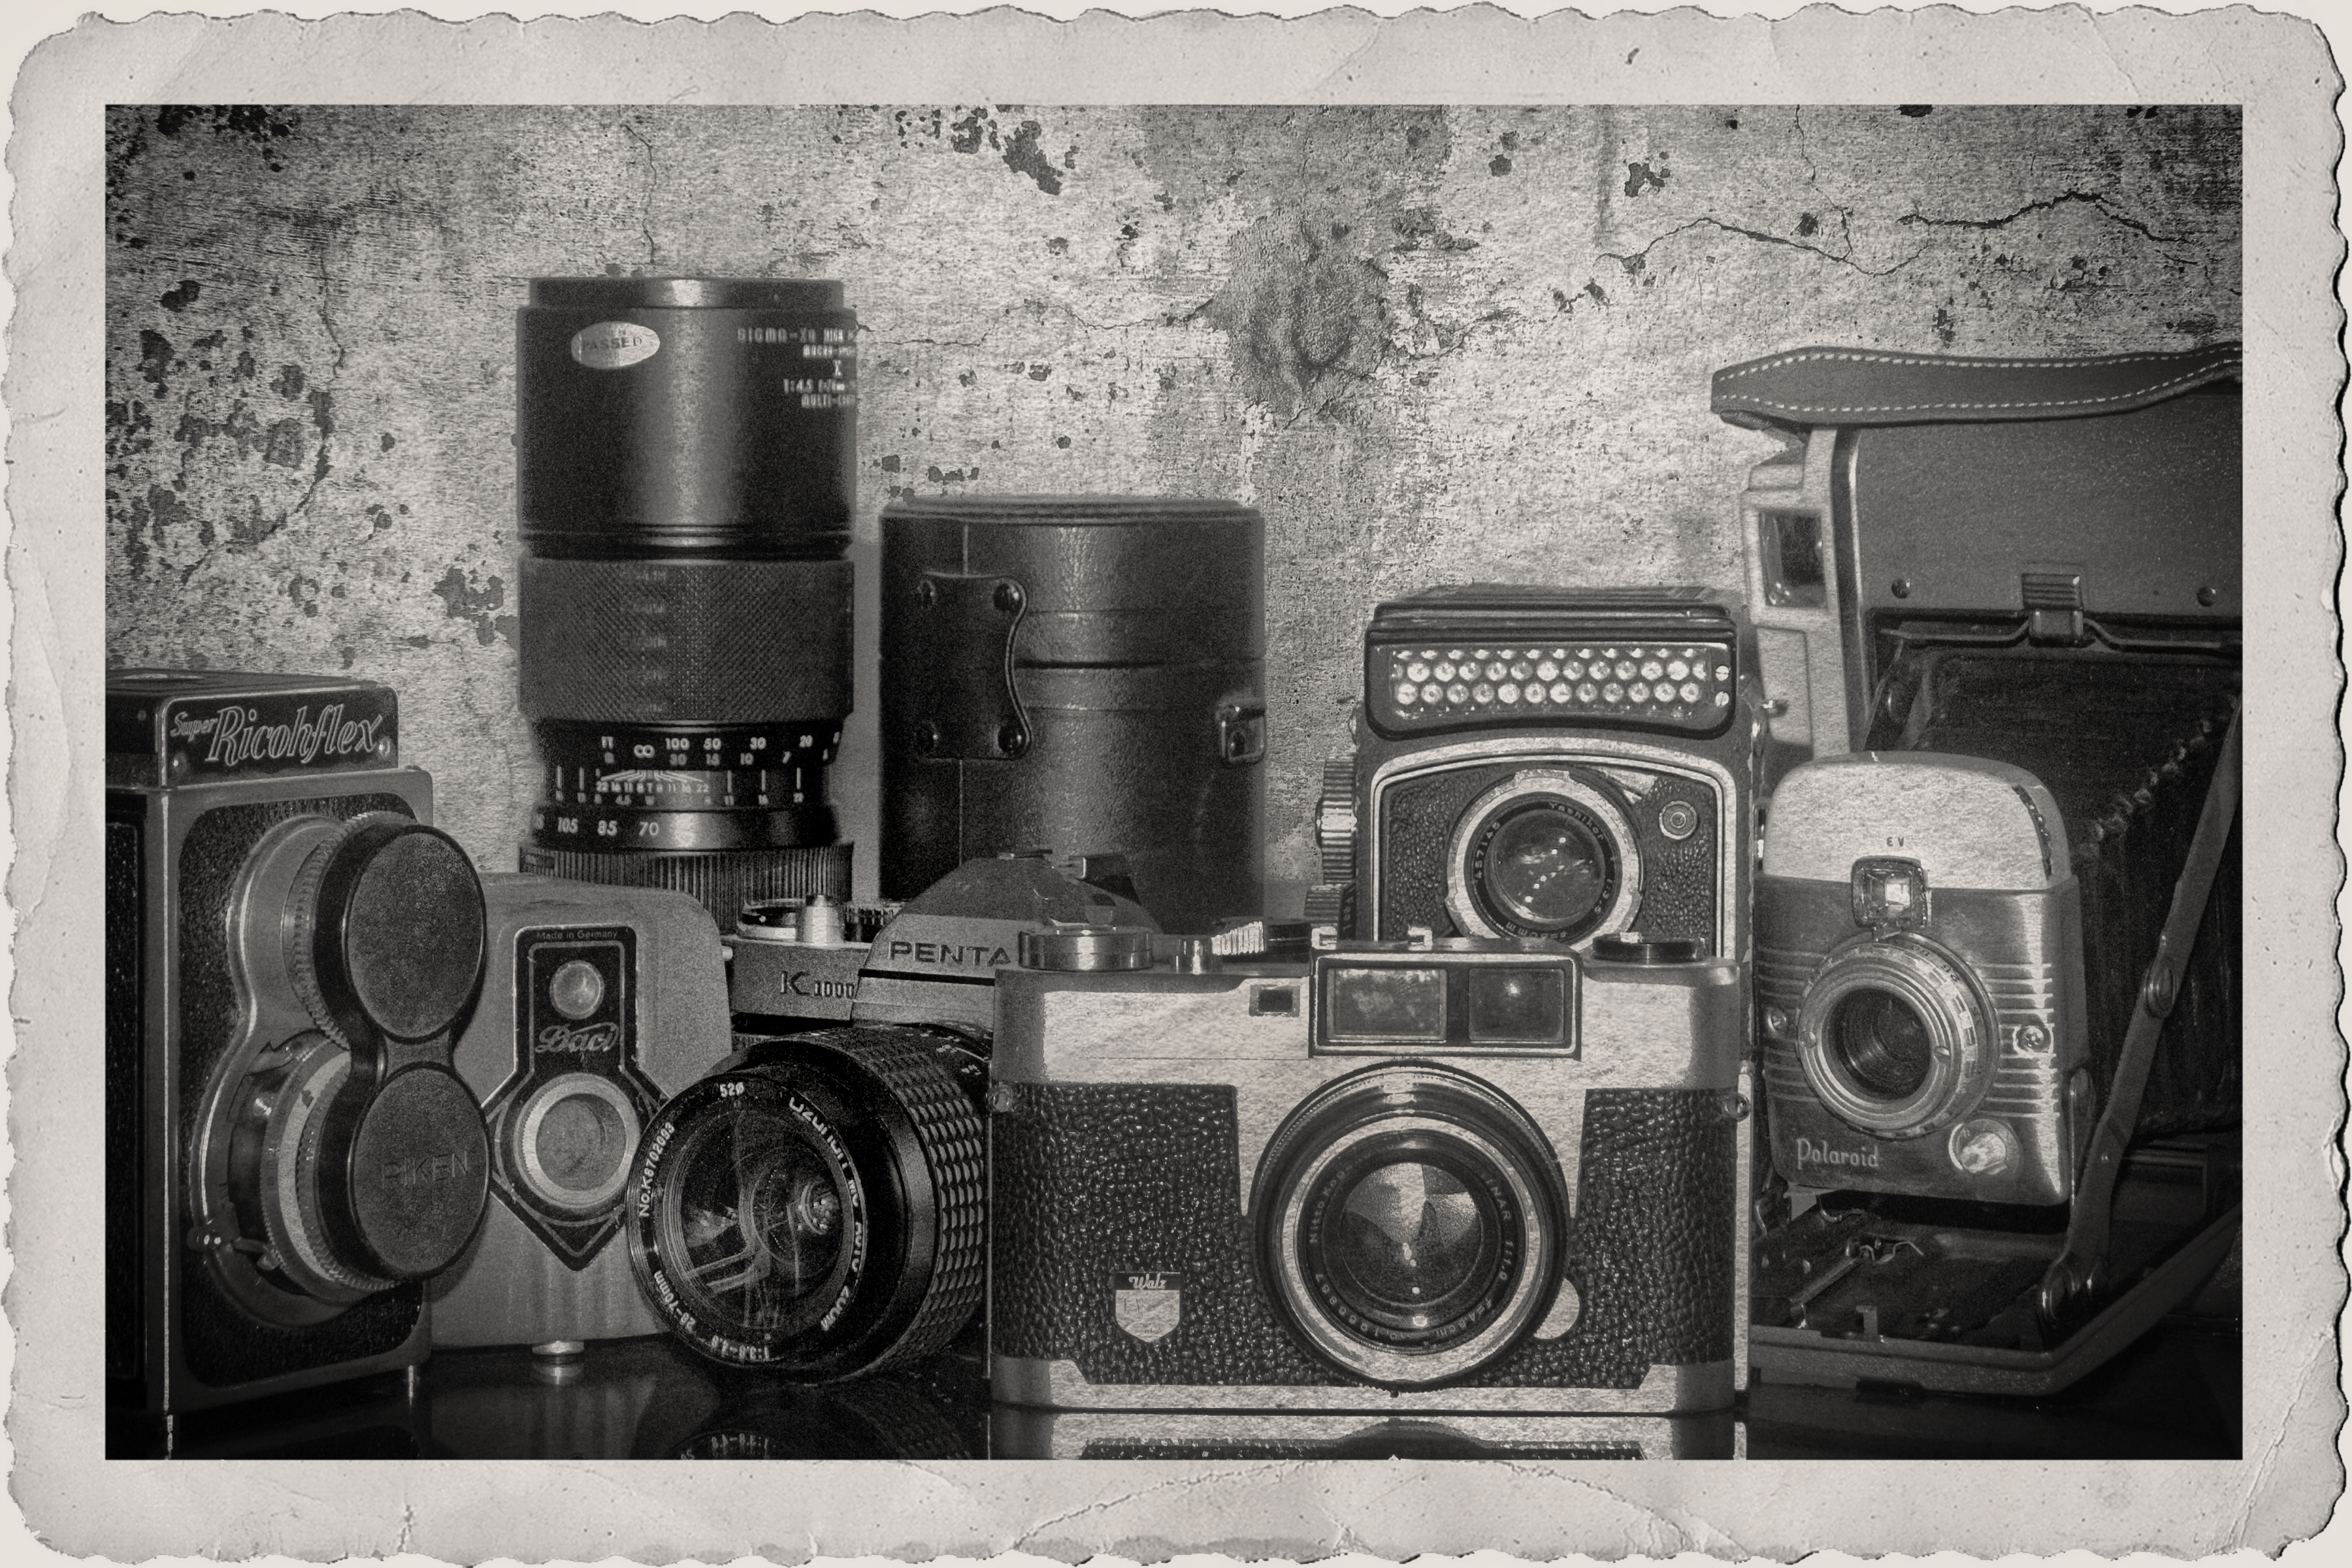
I had a good time this past week talking with a couple of long time photographers about printing photographs. It was a walk down memory lane as we talked about using film, and how we would spend hours in darkened rooms printing black and white photographs, and about the exciting, and enjoyable, shift to digital images and modern printmaking.

Just like those days when commercial photo labs struggled to match what, with a little practice, a photographer could produce in his or her basement darkroom, I have no doubt that today’s affordable high tech home printers allow us to produce fine art prints that can surpass what most big box commercial labs will give us.

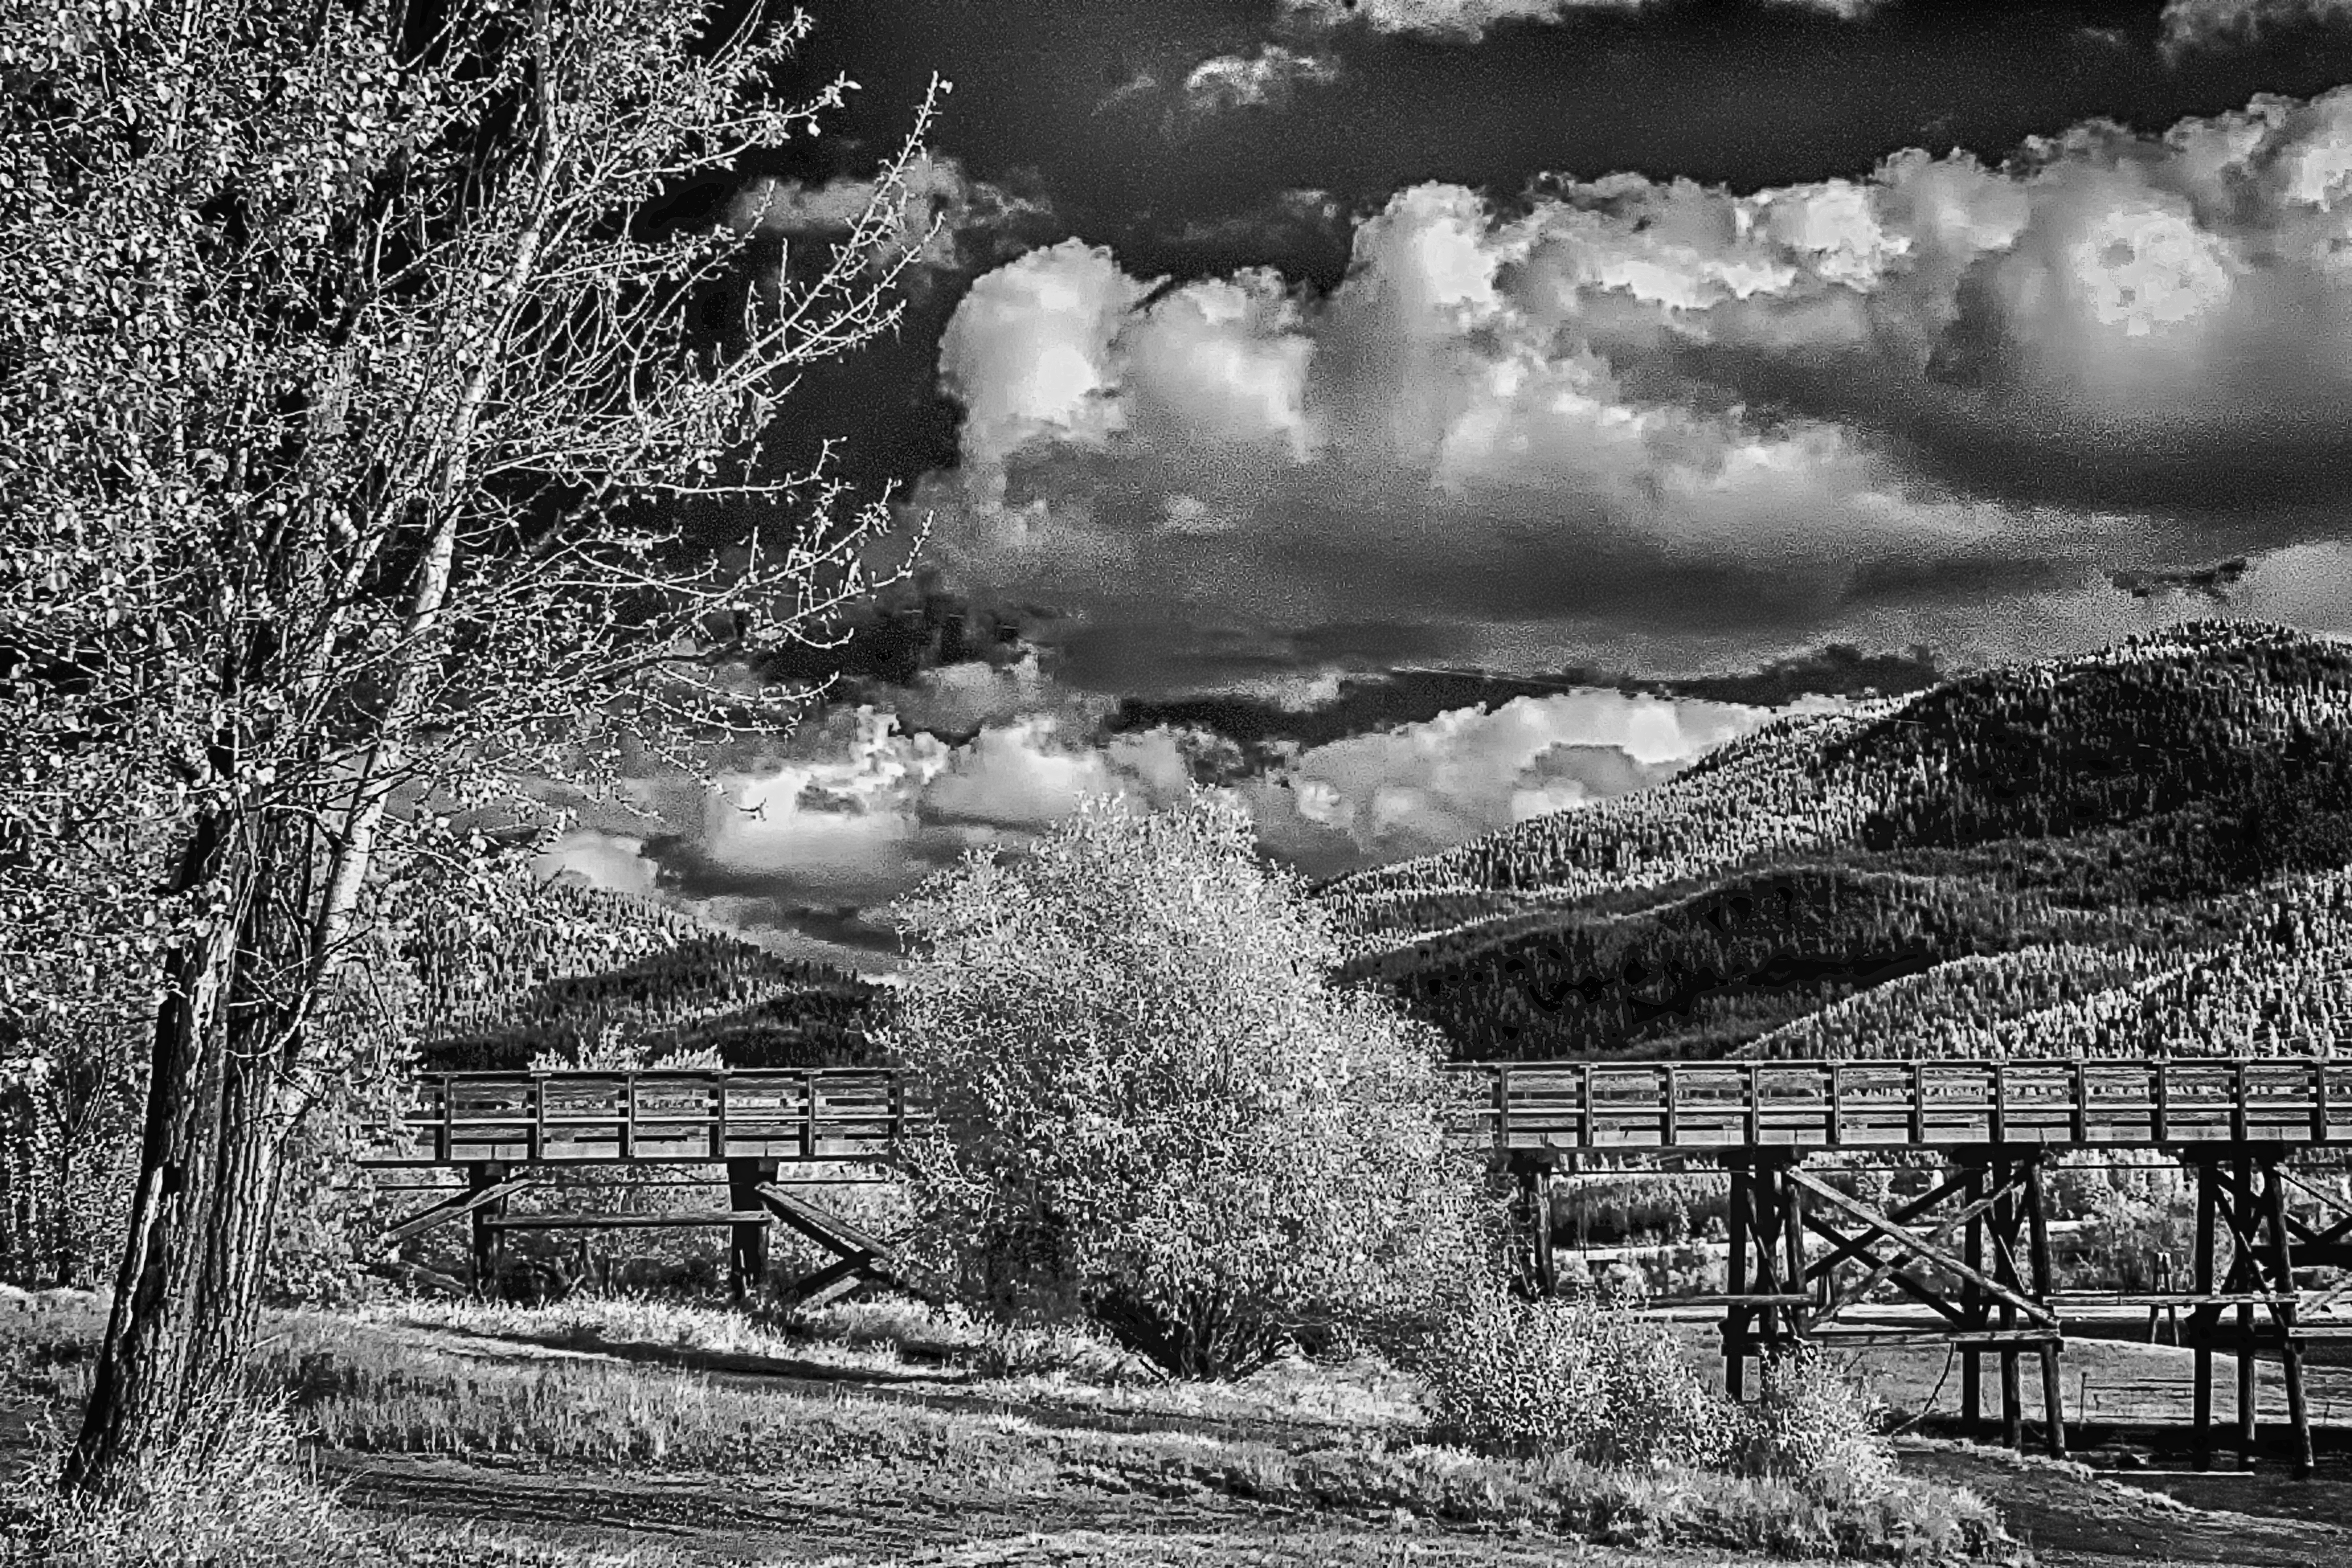
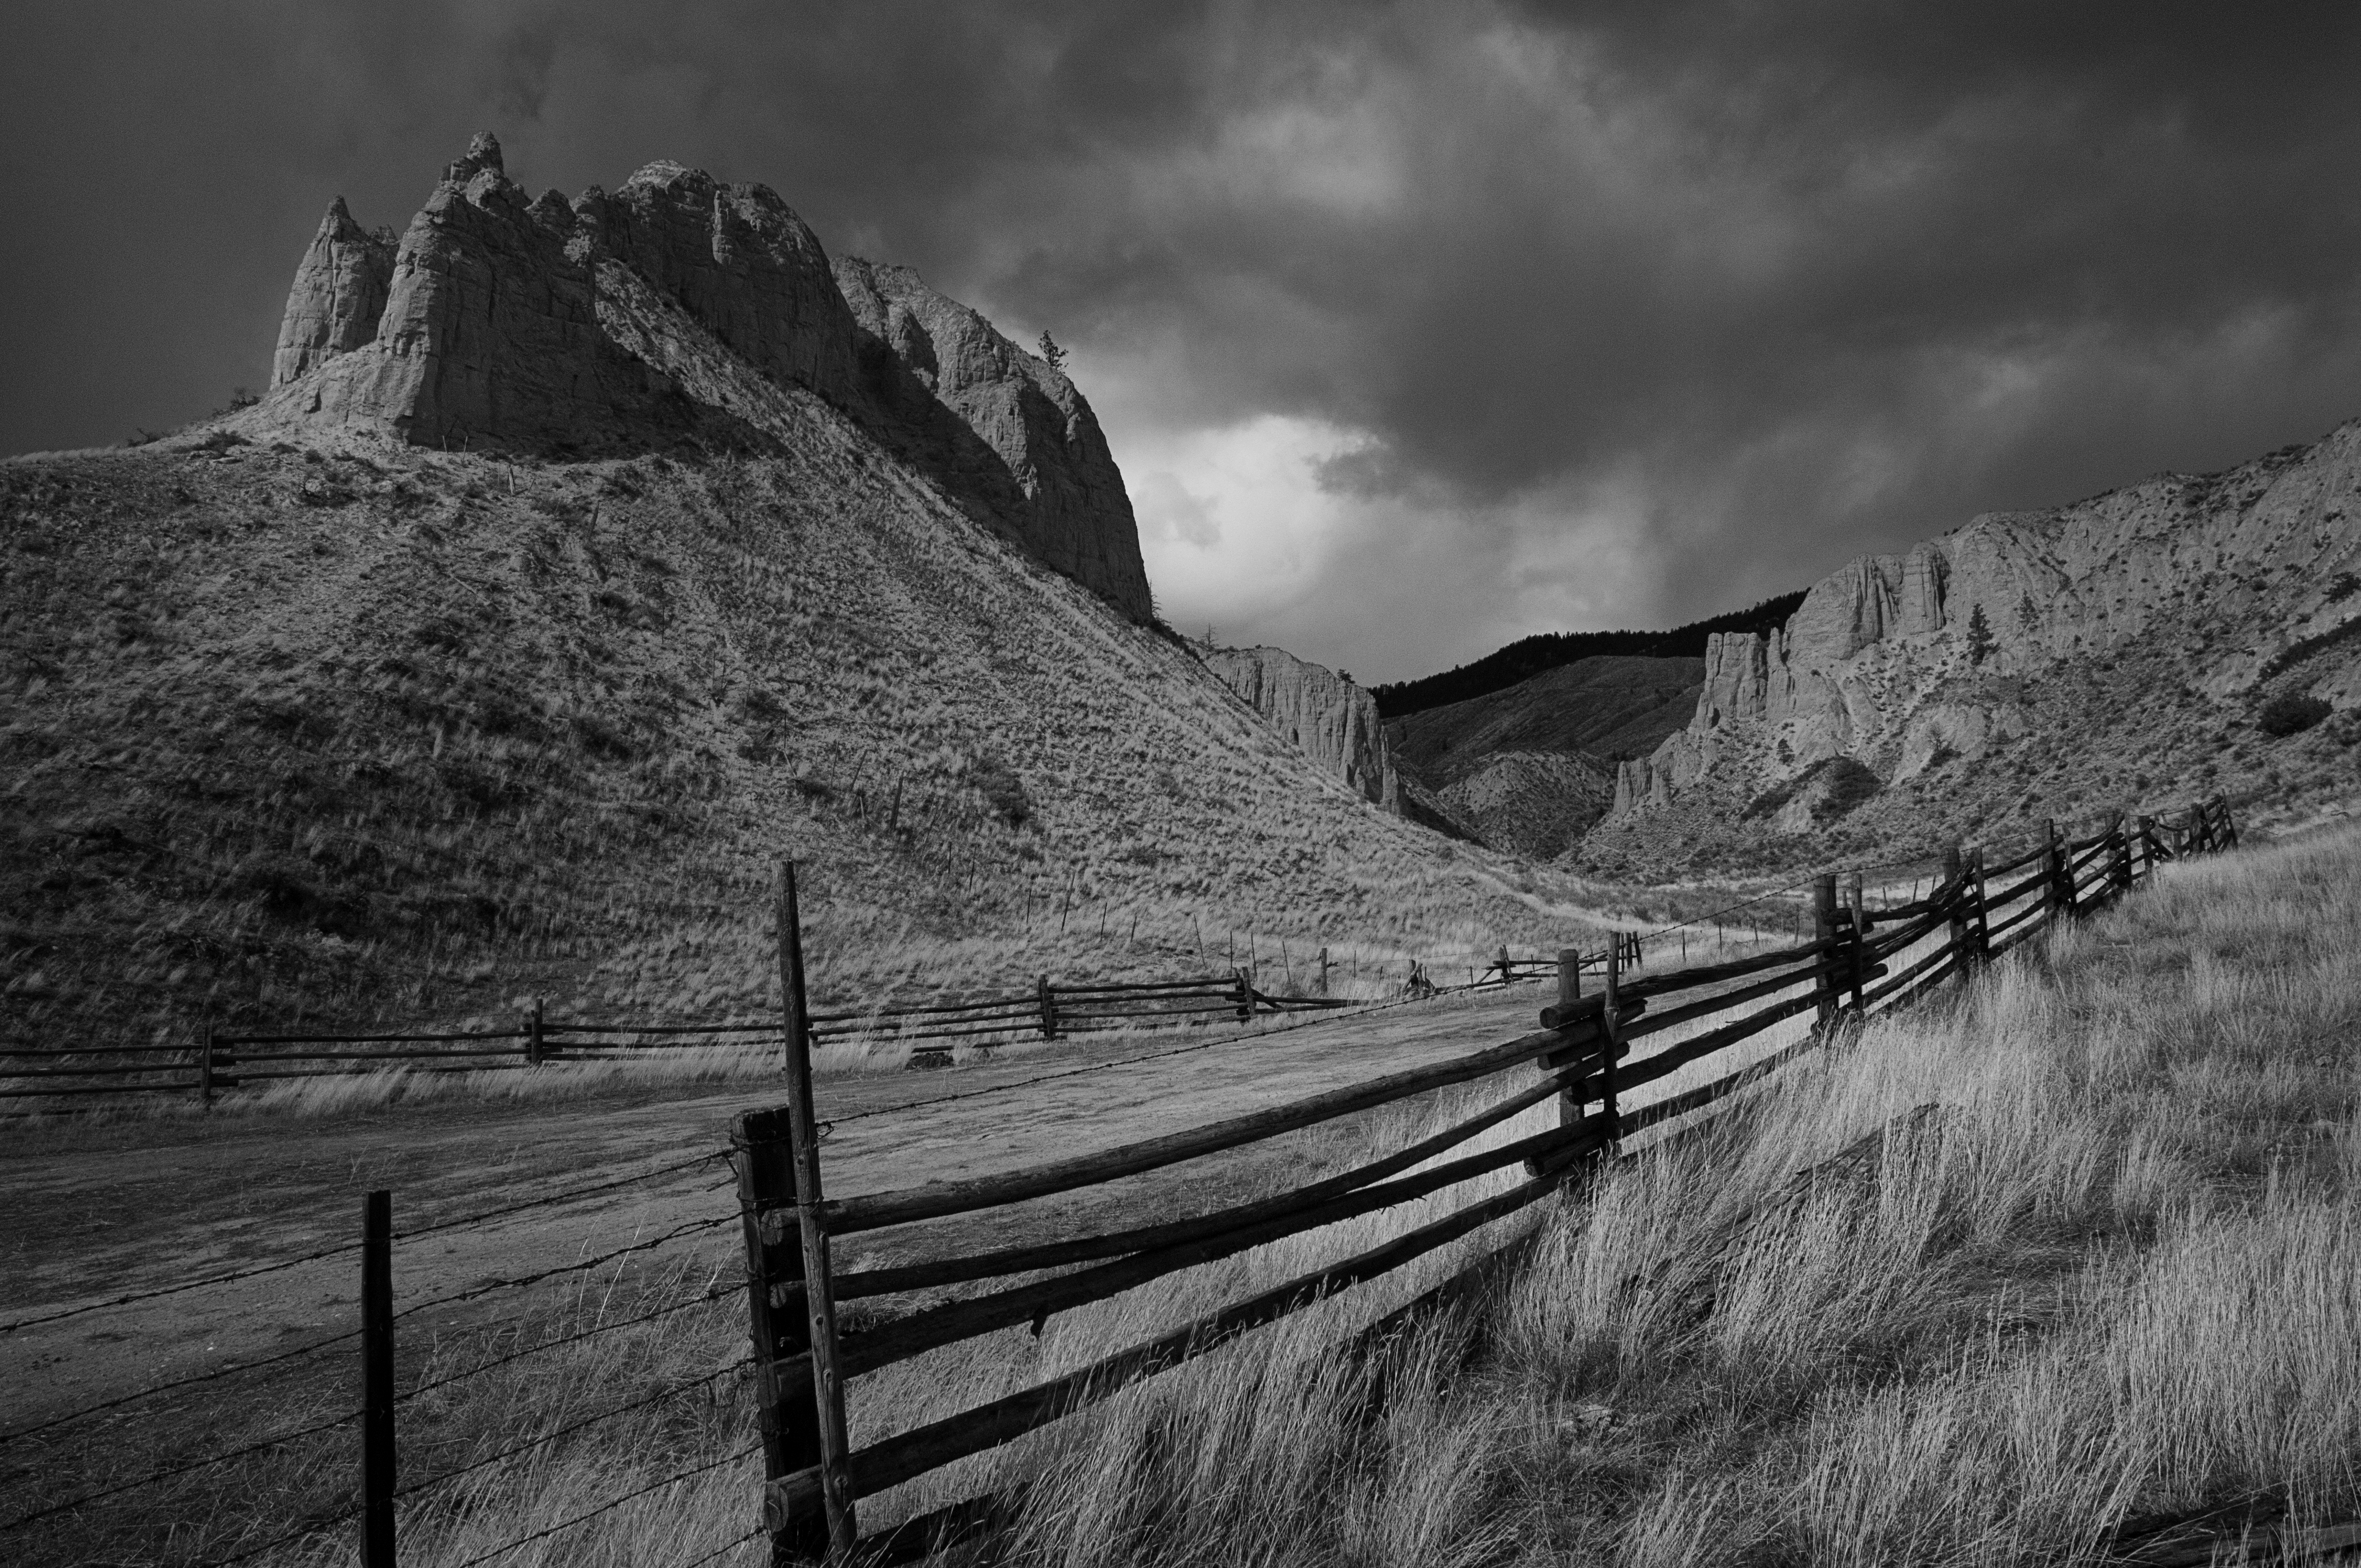
In my opinion it comes down to a battle between visions: The Lab’s or ours. For example, imagine packing your camera equipment off to some isolated location, waiting for hours for the light to reach a colour and effect that matched the artistic vision you desire. Then setting your cameras’ controls with all the experience and skill that you have, and finally releasing the shutter.

Until recently when photographers shot in colour they had to rely on the skill of lab technicians who would hopefully process the images the way they wanted.

Lab technicians, even though well skilled, could only guess at what the conditions were like when the photographer released the shutter, and I suspect much of the time found it rather difficult to recreate and could only guess at the shooting conditions.

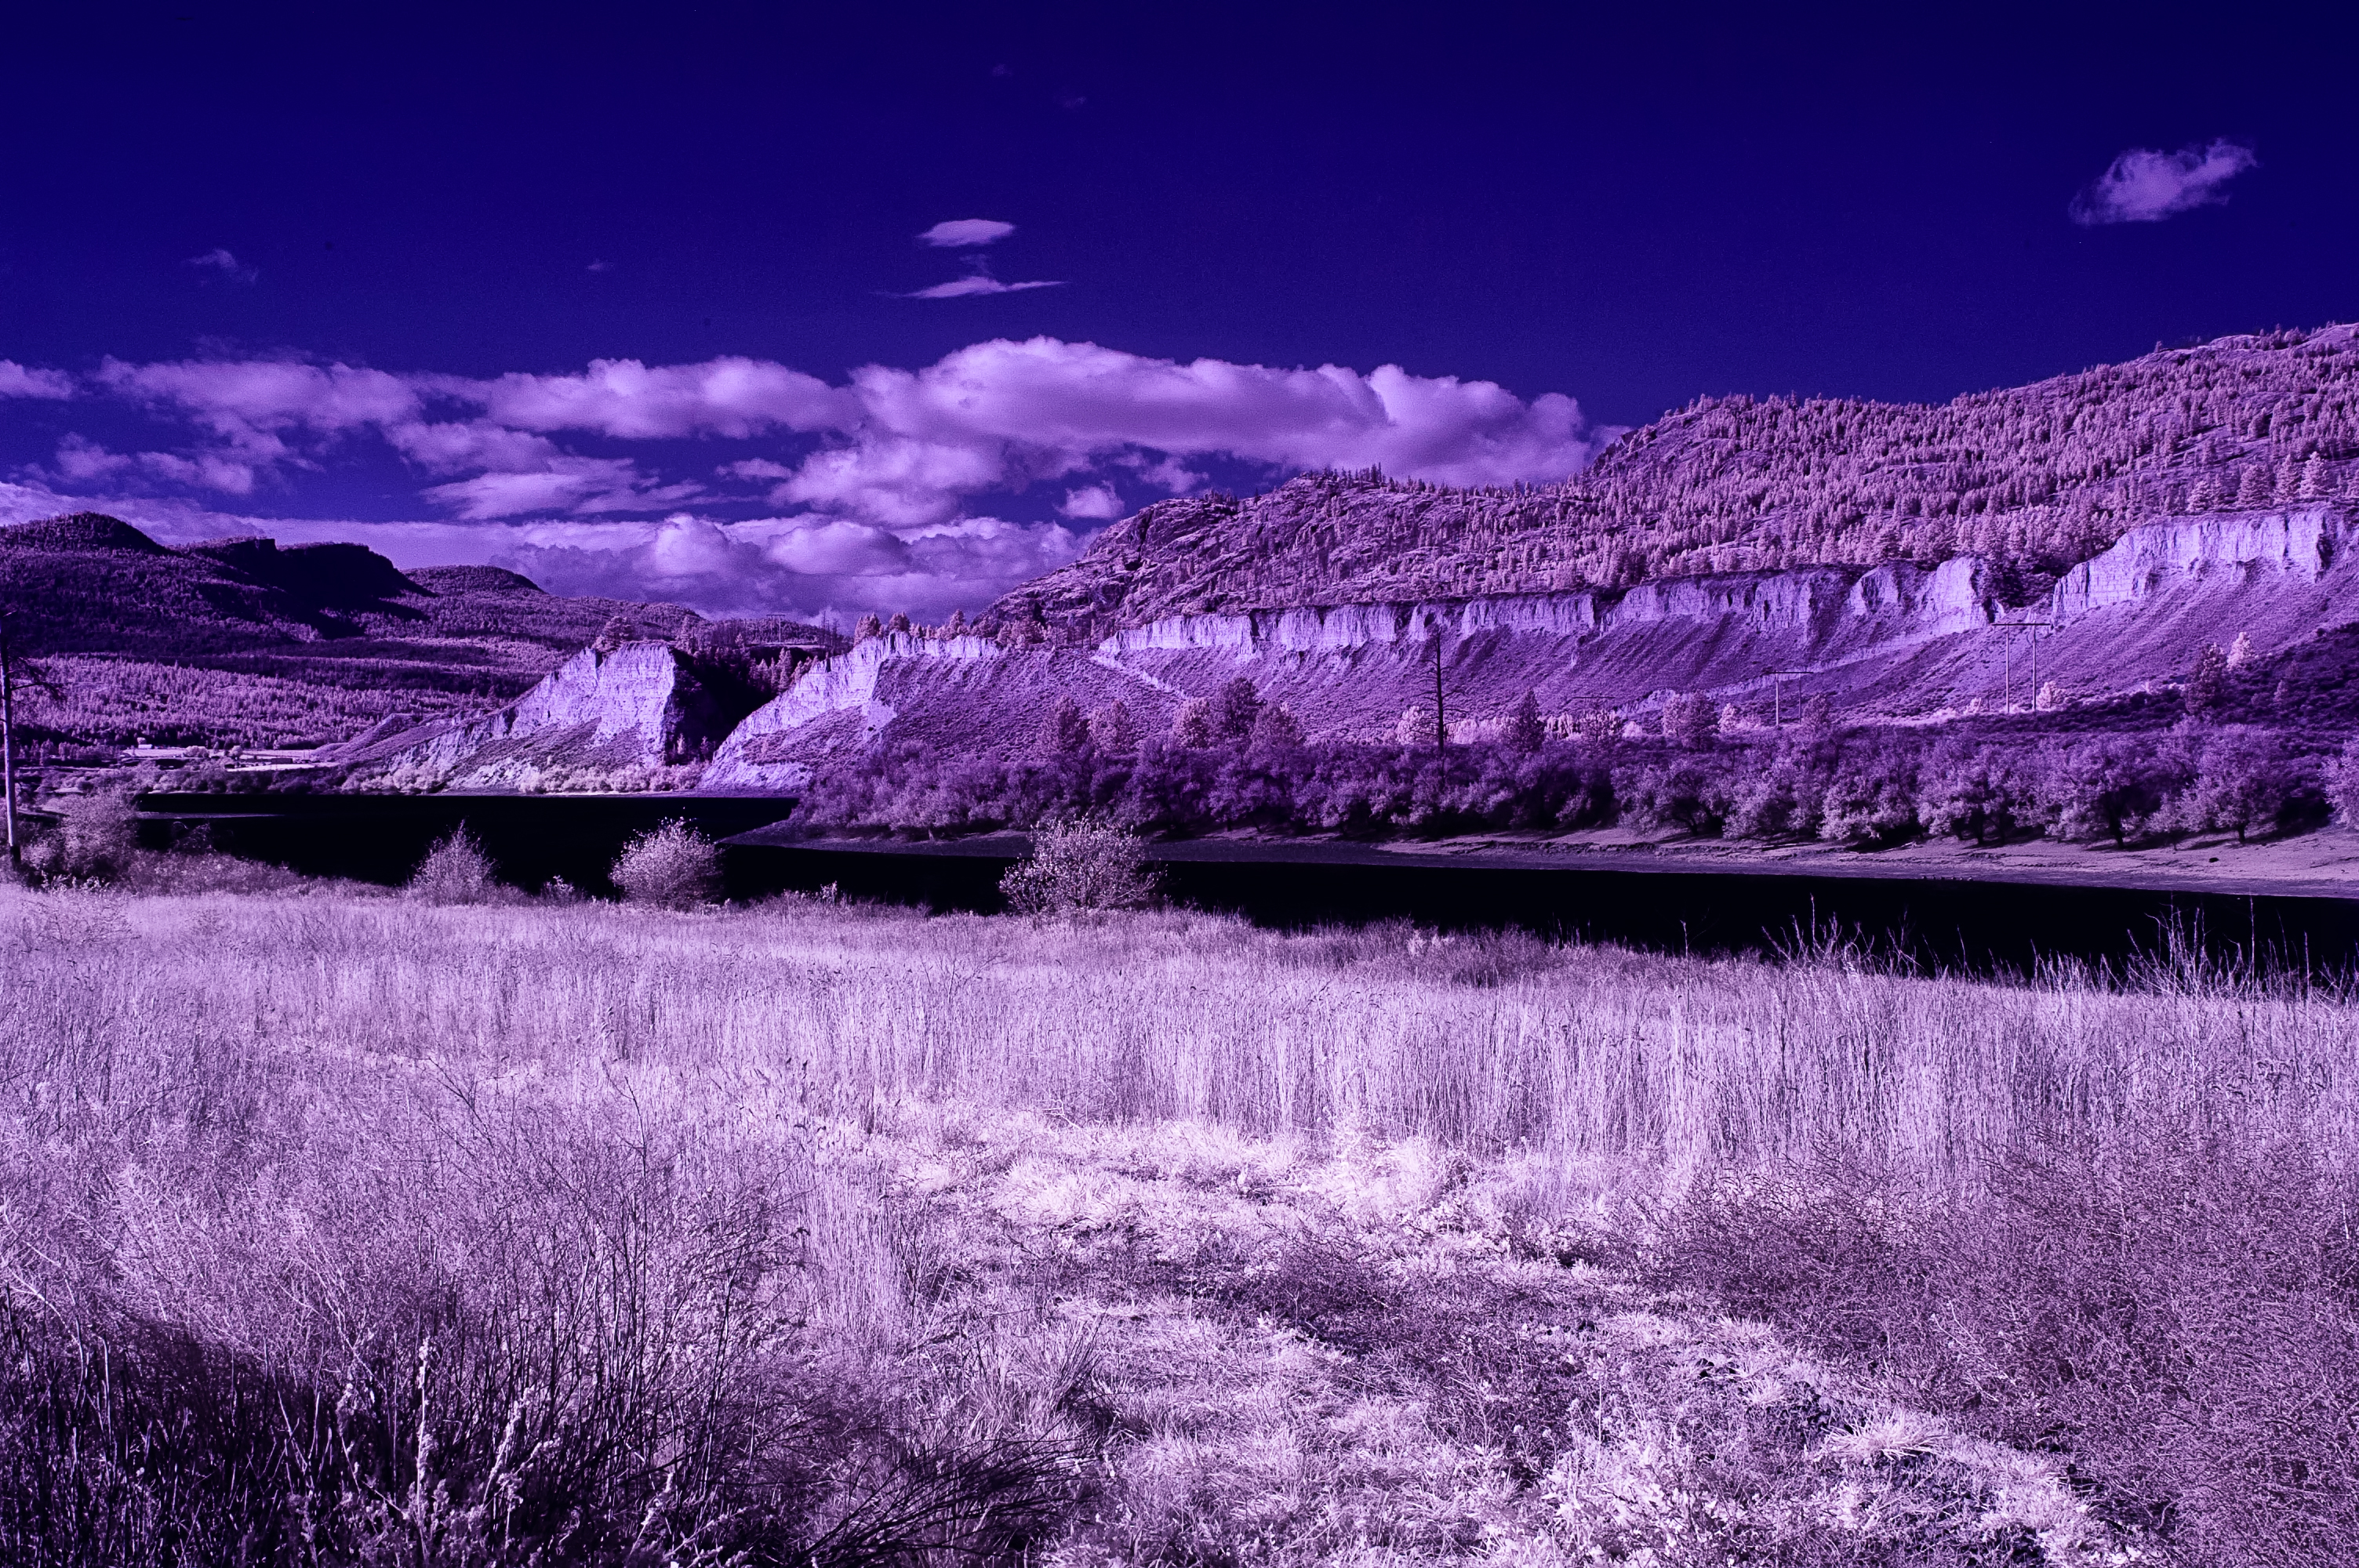
Sometimes a slight change in exposure or shift in color will make our photograph stand out, and only we can determine that. For example, those photographers that have bracketed the exposure values of an image know what I am referring to when they are frustrated because they got back several differently exposed prints all printed exactly the same from the lab. The vision in that case becomes the Lab’s; not theirs.

Yes, if we are unsatisfied we would return the film and prints to the lab for a redo. However, more often that not, we just give up and accept the best the lab can do, or try other labs till we get close to what we remembered trying to capture on our film.

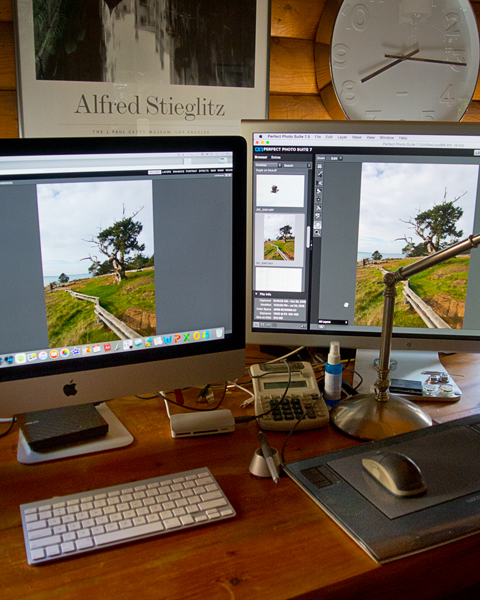
I am not going to get into a discussion of printers and papers right now – I’ll save that for another time. I want to go back to where I talked about what happens after we have captured that image we took at that isolated location.

We look on our digital camera’s LCD screen, and check the Histogram to make sure we have captures from which we can work. Now, instead of leaving our vision to the choices of an unknown technician and waiting for the photographs, we download our memory card into our computer, enjoy immediate visual feedback on our photographs, and by using whatever post production software we have we can follow our vision with precision to the final outcome: a photograph that shows exactly what we want it to show; our personal vision. How exciting is that?

With today’s digital technology we can follow our photographic vision from start to finish, from idea to finished print in a way that is far better that ever before possible. And, by using quality photographic printer equipment, photographers can make spectacular enlargements that will give their photography another dimension of control and creativity.


Which Button is for the Composition Mode?        

Pritchard store

Open Gates bw

Forest path

Canon Beach 2

Palouse falls 2

Which button is for the composition mode?     Yes, I did get asked that question the other day, but it is not as silly as it first sounds. I’ll go back to the conversation from which it comes.

A customer stopped by my shop wanting to get a different camera other than the one he had been using for over 20 years.

I was showing him a couple of cameras and explaining the different modes like “aperture priority”, “shutter priority”, “program” and “manual” when he made the statement, “All that seems a bit complicated, just show me which button is for the composition mode because mostly I like taking scenics”.

The other customer in the store stopped her browsing, turned, and just looked at me. I’m not sure if she was troubled by his statement, or also wanted to know about this secret button.

I replied, “Composition is what you do, not the camera, to position your subject within the viewfinder frame,” and added; “composition also deals with perspective and the relationship you create between subjects in the foreground and background.”

Does all that seem too complicated of an answer? I was making squares and rectangles with my hand and moving things around on the counter as I explained it hoping to make it clear to him. Now, however, let us go back to his question of the “composition button” and what he was trying to achieve with his camera. Remember his last camera was from the 1970’s. Even auto focus was new to him.

Cameras programmed since the 1980s are pretty capable of getting the exposure correct in all but the most contrasty lighting conditions. If he were to get serious now that he was about to get a DSLR he would be trying to discover how other successful photographers compose a scenic. Or he would be doing some reading, joining a camera club, or taking some classes that would teach him composition. My impression was that he just liked to take pictures and capture memories of the places he has been. So I think either the mode with the “little mountains” or with the “running person” on the dial of the camera I was showing him would give him exactly what he was looking for and we could, if we wanted to, call them composition modes.

The exposure mode I feel most comfortable with is manual and I am continually thumbing through the different menus on my camera to reset things. I make my living using a camera so I have a camera in my hand a lot of the time. I think each of us needs to use our cameras in ways that make us comfortable so we won’t happen to be confused and experimenting with the settings at that moment when the action happens in front of our camera.

I used to call that a “Kodak moment”. Hmmm, I think I need to find a new phrase now that I am no longer using Kodak films and that company has pretty much disappeared.

In any event, I recommended that he not worry too much about composition and experiment with the different modes his camera has to offer other than “P”. Hopefully he’ll stop by again and I can get him using his DSLR as more than just a point and shoot camera.

In closing this article that started with thoughts of composition, I particularly like this quote of Alexander Lee Nyerges of the Art Institute of Dayton, Ohio, when discussing an exhibition of Ansel Adams of the American West.

“His landscapes were operatic in composition, complete with lighting, tragedy and drama—luring those who viewed his works to seek Nature and capture the spirit of the wilderness.” I am certain Adams had a special button for composition.

Photographer’s Workflow   

WorkStation

This week there was quite a discussion in my shop about the selection of software for producing quality images. Today photographers are clicking camera shutters more than compared to just a few short years ago when photography was ruled by film. Exposing four or five 36-exposure rolls while on vacation, or at a family event, was pretty much the norm instead of the 600, or 1600, captures filling memory cards today.

We each talked about our personal workflow for editing images. The following is some of what I added regarding my own workflow, and some of the programs I use to speed things up.

When I get home with images in my camera the first thing I do is remove the memory card, insert it in the card reader attached to my computer, and begin
the process of downloading. I am usually excited with anticipation about the 
images I have just captured and I want to see them right away.

I begin with a program called Photo Mechanic from Camerabits.com. Photo Mechanic is a fast and easy way to 
work with and manage groups of photos.  I open up a screen full of pictures, select those I want to keep, batch-rename them, and move them to a 
new folder.  The process is very fast and in a short while I can go through and review what I have just photographed.

I don’t leave my image files waiting very long before I start to work on them. 
I am always excited; I hate waiting, and I enjoy working on my pictures. Years ago I would be in my photo lab, with the stereo turned up, happily developing, and printing enlargements in a darkened room only illuminated with red and amber 
lights.

Nowadays I am still happily “developing”, but with the music coming from bigger speakers in my living room and I am sitting in a comfortable chair
instead of standing on a rubber mat in my basement darkroom.  There are no wet trays; there are no coloured lights, just a couple of big, bright computer displays with colourful 
pictures.

I then start the process of enhancing images and for that I employ several programs. Of course there is the ever-familiar Photoshop, however, depending on how I decide to fine tune my images I might choose to use the feature packed Perfect Suite program from Ononesoftware.com. Perfect Suite is a photo editor that works as either a standalone application, or plug-in editor, to Adobe Photoshop that includes some pretty exciting tools.

For years photographers have used graduated filters to cope with the contrasts of bright sky, and low light foregrounds with deep shadows, or bright highlights, when photographing landscapes. Although I don’t recommend getting rid of those filters yet, there is a program that may save lots of time usually spent in Photoshop lightening 
and darkening those landscape pictures. It is called Photomatix from HDRsoftware.com. Photomatix combines more than one exposure of a single subject that is exposed from the darkest shadow to the brightest highlights by creating an HDR (High Dynamic Range) image.

Finally, I will reach into a powerful and fun collection of fine-tuning programs from Niksoftware.com’s easy to use image editor that allows me to compare and make different adjustments quickly.

Most of my images are pretty good when I finish them in Photoshop. However, in my continual quest to speed up my post-processing of images, reduce my time behind the computer, and still produce quality images I find that combining these five programs fits my workflow perfectly.

I know that new cameras and lenses are what most photographers lust after, but I think if you are trying to justify expensive equipment purchases to your spouse, partner, or banker, it might be easier if you are already making show stopping, eye-catching pictures. Check the programs I have mentioned (always try their trial copies first) and see if they are for you.


Infrared photography moves a photographer far from the usual.

Horses in meadow

Monty Creek

Pritchard Barn

Spring pond                                                Pond Cattail

Monty Creek Church  Watch for Livestock

Sometimes it is necessary for me to get away from doing the usual things. My time as a photographer is spent being precise. I meter for the light and shadow, striving for the best possible exposure, and not much is left to chance.

On the Easter weekend I spent a day photographing a family Christening. My job was to take a creative approach to photographing that religious occasion and telling the family’s story. At an event such as a Christening nothing waits for the photographer and there is no time to correct omissions or mistakes.

The main rule for me was to keep out of everyone’s way, not to become a focal point of attention, and never to miss any thing that happens.

The next morning as I sat at my computer working on the post-production photo editing of the Christening my wife mentioned she would like to finish off the roll of film she had been saving for a sunny day. It didn’t take much convincing to ignore the day’s “to do” list and as I looked out at the clear blue sky I realized I needed something to take off the stress I had been feeling.

There is nothing quite like infrared photography. It is always an exploration when I use the well-worn Nikon D100 that I had modified many years ago to only “see” infrared light.

Vegetation appears white or near white. Black surfaces can appear gray or almost white depending on the angle of reflected light, and if photographed from the right direction the sky becomes black. The bluer the sky, the more the chance there is for an unworldly, surreal effect. And white surfaces can glow with a brightness that illuminates the sky.

I have written about infrared before, but for those that are new to this subject here is the gist of it.

Digital camera sensors are as sensitive to infrared light as to visible light. In order to stop infrared light from contaminating images manufacturers place what they call “a hot filter” in front of the sensor to block the infrared part of the spectrum and still allow the visible light to pass through. My infrared modified D100 has had that filter removed and replaced with a custom filter that allows for infrared only.

My wife wanted to visit a marshy area not far from our home that on wet years fills up with water, and is annually visited by birds, ducks, and geese. But this year’s early dry spring has not given the marsh much water, and when I walked up to the dam two ducks quacked loudly and flew away, and that was the only wildlife sighting for the day.

The back roads always have something to photograph, so we moved on and chose our subjects depending on the light. Linda was shooting with her old medium format 1950’s Ikoflex and was looking for interesting features like fallen trees and rock formations. That particular old film camera doesn’t have an automatic mode, or an in camera meter and requires a hand held light meter. I am sure the few passers by wondered at a woman standing roadside with a boxy thing hanging from her neck while she peered at something in her outstretched hand.

I just explored, and unlike Linda’s limited, 12 exposure roll of film, I had an almost endless supply of digital choice, and besides, infrared changes the way we see things. So I pointed my camera at anything that caught my eye.

I began this discussion with the words, “I spend my time being precise.” And “Not much is left to chance.” However, not so much with infrared. I only use the meter as a not-so-precise guide, and don’t worry about much else. I do try for interesting angles of the subjects I photograph, but sometimes I am in for a surprise when I bring the images up on my monitor.

Shooting infrared is always an exploration, a discovery and moves a photographer far from the usual.

I look forward to all comments. Thanks, John


The Photographic Composer’s Score and Performance

Spring storm

A storm o the prairie


Wind power

Windpower

October Infrared

October walk in Infrared

Trans Canada trucking

Trans Canada Highway – Infrared

River bluffs

Infrared of Thompson River


I taught photography in the 1980s and 90s for the University College of the Cariboo (now Thompson River University) when the only way to make a photograph was using film.

In my lectures I informed students that as well as learning about their cameras, they must become proficient in negative development and printmaking. I would emphasize that those serious about the medium of photography would come to realize that what they did with the camera and the negative it produced was only the beginning, and that it was their final print that would set them apart as a photographer. And I would quote famous photographer Ansel Adams, “The negative is comparable to the composer’s score and the print…its performance…”

Film has now been discarded by most serious photographers, although I expect artists will use film creatively for years to come, nevertheless, even with advancing photographic digital technology Adams’ words from the past are still significant.

The digital camera isn’t making a picture in the sense of light permanently imprinting itself with different intensities on a chemically sensitized surface like film. Instead there are sensors and in-camera computers processing light from thousands of photosites that are transferred to computers as data files for conversion into countless pictorial possibilities. I have become, more than ever, of the opinion that like the negative, the RAW image file, is now the “score” to Ansel Adams – the photographic print.

I know there are those that haven’t bothered to move their camera selector off JPG (Joint Photographic Group). However, choosing JPG files means those images are pre-processed in-camera and the photographer loses control. I prefer shooting RAW (not an acronym like JPG, RAW is unprocessed data) and choosing RAW is like having the negative Mr. Adams discussed, affording us total control over those data files or, more importantly, allowing a personal vision of how the final photograph will look.

A young photographer that came into my shop last week got me thinking about this when, with some kind of misplaced pride, he announced he would never use PhotoShop on any of his pictures because he was only into true reality. Although I didn’t comment, I thought about the manufacturer’s presets that were applied in-camera to his image files, the sensor’s dynamic range of only about five stops from black to white and the very limited number of colour spaces his tiny JPG files gave him.

Some years ago I attended a print-making lecture during which one of the speakers said in the past he would get up early and drive to some scenic location hoping to capture an impressive sunrise, after which he would package up his film and send it to the lab and leave all decisions to an unknown technician’s personal vision. However, now he shoots RAW and transfers his image files to his computer and the decision has become his to control how his photograph will be processed for viewing.

As in the days when I processed and altered negatives in special chemicals and manipulated prints by adding and subtracting light, I now use computer programs to process my RAW images in my quest to perfect my vision of each. And I expect the same thing is true now as it was with my students all those years ago, that what they do with the camera is only the beginning, and to repeat Ansel Adams, “The negative is comparable to the composer’s score and the print (is) its performance…”

I look forward to all comments. Thanks, John

My website is at www.enmanscamera.com

Black and White as a Photographic Medium

1. Cameras  2. Ghost town  3. Kamloops fence & hills  4. Quick turn at the rodeo  4.Chuck the rooster  5. Flower  6. Bailea  7. Monica  8. Church lantern  9. Headwaters

Lois Lane, Kelowna

Black and White as a Photography  has always been my favourite photographic medium. I recall when I first began pointing my camera at different subjects, and started making photographic prints, that I didn’t think too much of colour photography. Yes, colour was fine for documentary work as found in “National Geographic” magazine, or making snapshots of some family, but in the 1970s creative photographers seemed to be working in black and white, not colour.

Photojournalist Ted Grant, who is regarded as Canada’s premier living photographer wrote,

“When you photograph people in color, you photograph their clothes. But when you photograph people in black and white, you photograph their souls!”

Black and white photographs always (and still do in my opinion) seem to create moods and convey an almost tactile quality.

During the period of film photography, photographers had to decide whether their subject would look best in black and white print film, colour print film or slide film and most photographers trudged around with at least two camera bodies weighing them down. However, today that decision to make a black and white image is best left to the computer and some exciting post-production software. And there is no need pack around another camera. (Well, unless one is worried about camera failure.)

Thankfully post-production is no longer contained to dedicated, darkened rooms. I still have an 11×11 foot room in our basement, complete with a six-foot stainless steel sink and custom cabinets. However, it’s mostly used to store photo equipment and for washing my chickens’ eggs. Now my lab is on the main floor of our home and instead of chemicals, the image and print production has become an intricate combination of computer programs, quality printers, and papers that easily rivals the quality of chemical-based, traditional, black and white photography.

A black and white photograph depends on its ability to communicate, it doesn’t need to rely on eye-catching colours for its’ visual presentation. Those B&W images that stand and pass the test of time combine attention to subtle changes in light, composition, and perspective. And it stretches our creativity and forces us to visualize our world in different terms. I remember a photographer once saying that he believed shooting in B&W refined one’s way of seeing. And I heartily agree.

In spite of the many modern photographers that don’t bother with anything more than just accepting what comes out of their camera, black and white photography is far from being left behind in the past, and, in my opinion, with the current processing software, updates in high quality printers, and the latest in printing papers, black and white image-making will continue to be an option for a host of serious creative photographers.

Those photographers that are good at black and white photography learn to exploit the differences in tonal elements in a scene and present viewers with successful B&W portrayals that make excellent use of shapes, textures, light and shadow, and the loss of those original colours becomes irrelevant.

For those that haven’t tried monochromatic (another word applied to B&W) image making, I will mention that it is easier than ever. Most digital cameras have a black and white mode available in the menu. I don’t really like using that, as it does nothing more than de-saturate an images colour data file, excluding control of the different tonal values that make up a black and white image. I suggest trying one of the many great programs available on the Internet that can be downloaded to test for free. Who knows, you might, like I do, really like black and white photography.

Readers by now must know how much I like quotes from famous photographers. So I’ll finish this up with some words from a turn of the century fashion and commercial photographer, Paul Outerbridge: “One very important difference between color and monochromatic photography is this: in black and white you suggest; in color you state. Much can be implied by suggestion, but statement demands certainty… absolute certainty.”

I welcome any comments. Thanks, John

My website is at www.enmanscamera.com

Photographers and Christmas Pictures

tree 2  presents Xmas Cat

Christmas is only a couple days away. Gosh, that was fast! Oh well, I like Christmas with all its trappings. I’ve been listening to Xmas music, watching plenty of not-so-great Xmas TV shows, attending both my granddaughters’ Christmas concerts, decorated our tree and most of our house and I have already been eating candy and lots of holiday snacks.  It’s Christmas.

This time of year is filled with photo opportunities. Yes, pictures of our home and the landscape covered in snow are great, and I have been having a great time wandering around in the fresh snow, but the unique opportunity I am writing about is the pictorial story of everything that happens around us during this holiday season. I have years of film slideshows and digital CDs of my Christmas’ and plan on continuing for many years to come.

Photographers might try to tell a story and take pictures of everything.  For example, the decorated Xmas tree and house, even that Christmas Eve dinner table, and maybe the morning breakfast with the family on Christmas. Then get the camera ready for the gift opening. Yep, photograph it all and approach every photograph as if it’s the most important you’ll make. It doesn’t matter whether it’s for a client or for family archives, all pictures should be printable and viewable. I prefer a DSLR camera and every image gets post-post processed before anyone sees it.

Not one for the point and shoot style, I usually think a bit about how I want to make each picture and I take lots of pictures while things like opening presents are happening. I always use a flash and shoot wide with the intention of cropping for the most dramatic effect later. I sometimes think setting up a couple lights on stands would be great, but my family will only put up with so much, and anyway a stand might get knocked over in all the excitement.

Always use a flash for family stuff and go for as much depth of field as possible. My lens of choice for the past few years has been either my 18-200mm or 18-70mm, either one works fine in the confines of my house. They both focus fast and close and that’s all I need.

My family is used to my photographic demands as I expect most photographer’s families are. When we are at the table there isn’t a bit of hesitation when I get up and move in with my camera, everyone knows what to do. Even my son’s young daughters pose. Please don’t embarrass people with pictures. Good photographers shouldn’t be the kind of picture taker that crouches down in everyone’s face as they eat.

My family and friends know that I’ll delete those that don’t live up to my personal expectations. Well, I think they know. Maybe my family and friends think I only take good pictures. Yes, lets go with that. They don’t need to know how long I spend editing in post-production.

As I began, Christmas is only a couple days away. Give that camera’s sensor and lenses another cleaning and make sure flash and camera batteries are charged up.  Yes, I am already having a good Christmas and that’s going to continue with lots of holiday picture taking that I’ll extend into the New Year.

From my wife, Linda and me, have a great Christmas and take lots of pictures.

My website is at www.enmanscamera.com

Photography on a Foggy Day


I like taking pictures on foggy days. I suppose I could have stayed inside and watched TV or read a book. I know that many photographers would have done just that as they complained about the damp, flat, lifeless-looking fog, but I like foggy, windy, snowy, and even rainy days. Inclement weather makes for unusual and interesting photographs, so when I woke on a morning with thick fog I knew I was going to have a fun day. Fog can conjure up feelings of mystery and awe, and of the many different conditions we encounter in landscape photography fog is one of my favorites.

Yes, the light was low, but October fields here in the British Columbia interior are mostly shades of gold, so there really is lots of colour. All a photographer has to do is select a subject angle carefully. I began by wandering through the wooded area across the road from my house, but I didn’t really get very far, the fog was so thick in the pines that there wasn’t much that I liked. I jumped in my car and I made the short, five-minute trip down to the Thompson River, and was happy to be just a bit under the fog, and that made for lots of great opportunities.

I really didn’t have any particular subject in mind. I had hoped the bridge that crossed the river would be embraced in fog, but there was a strong, wet, breeze in the river valley that had pushed the clouds and the fog away. I wanted fog or at least low clouds, so I lingered higher up, along the valley rim, searching out and photographing fences, stacks of hay, and abandoned buildings. And I even took a few pictures of cows and horses, as they looked for food in the damp foggy conditions.

I always meter for the mid tone in my composition. The foggy flat light can easily trick the meter and I prefer manual exposure where I personally can determine my aperture and shutter speed. I had remembered to bring my tripod, so even when the light was low and required a slow shutter speed I could still keep an acceptable depth of field using an aperture of f8 or smaller.

Outdoor photographs taken in fog often look flat and dull. The fog and the low light decreases image contrast and colour saturation significantly. However, for modern photographers this isn’t much of a problem since the contrast and saturation of a digital photo can easily be adjusted.  Fortunately, we can turn the problem into an advantage because an image with low contrast is easier to manipulate than an image taken in harsh light with strong shadows and highlights.

With most digital cameras the contrast can be adjusted before the photo is taken. But in my opinion, it is better to do a rough adjustment during post-production in the RAW converter, and a fine adjustment in Photoshop. In-camera adjustment is not always the best since we don’t know in advance what the right amount is, and clipping of shadows/highlights can occur.

Modern technology gives us a hand up on the flat, contrast less light even if some elements in a picture are improperly exposed they are easily corrected during post-production, and increasing the contrast on important subjects in flat light is easy.

I have always liked my photographs to be about my personal vision of a scene and not to be limited by what a particular film or camera sensor can record.  Even Ansel Adams said, “You don’t take a photograph, you make it.”

Fog forms when a humid, cool air mass moves under a warm air mass and those conditions seem to be recurring for a second day. I know that might cause problems for drivers, but I am hoping to see some in Kamloops when I go to my shop today. And if so, I will be out on the street with my camera.

I enjoy your comments, Thanks.

My website is at www.enmanscamera.com

Pictures Shot in the Bright Hot Sun


Bright sun and clear sky might be great for some scenic photographers, but it can cause many problems when photographing people.  My assignment this week was to photograph an event that began at 2:30 under almost clear skies, and where even in the shade the temperature hovered in the mid-30 degrees celsius. The location was on a south-facing, treeless, hill top with a sprawling vineyard in the background.

The event, other than a large group shot of all the guests, was held under five large, white tents, and my goal was to balance my flash and exposure to lighten up my subjects without glare, or shadows, and properly expose the field’s sun-drenched background.

The contrast in light from shadows to highlights on a very sunny day can be too extreme for a camera’s sensor to capture. I always look for open shade, or place the sun behind my subjects and use a flash.

I meter for the mid tones like the grass, or, in this case, large open field, and underexpose about two stops, then balance the overall image using my flash. My flash sits on a bracket and the flash is attached to my camera with a wire so I can remove the flash and hold it at different angles if I need to. I did notice people wielding point and shoot digital and a couple photographers with DSLRs trying to use their pop-up flashes, but I am sure they were disappointed with their results on that sunny day as the extremes from black to white are just too much for digital sensors.

Fortunately, photographers can load images into PhotoShop and no matter if they are JPG or RAW files can be optimized using Adobe RAW – an amazing application that gives additional control over exposure, shadow, and highlight detail. Adobe RAW can even help with those not-so-well focused images.  I use that program to polish my images and make them all that they can be which is much better than settling for photographs mass corrected at a big box lab.

After selecting the best images I correct the white balance and colour using Photoshop.  I make the photo look pretty much the way they appear through the camera and the images taken in the bright sun now have lots of detail.

Another program I regularly use (and think is amazing) is by Nik Software Inc. and is called Viveza.   Viveza allows selective control of light and colour. With that program I can maintain the colour and tonality while changing the background and blending the effect exactly.  All this isn’t much different than I used to do in my old film darkroom except now it is more precise, the process can be duplicated, and overall everything is easier.   Between the two programs I am able, without spending too much time in post-production, to provide my clients with polished and balanced images that do not show the harsh environmental realities of that day.

Sure, sunny clear days please us all and when planning an outdoor event we prefer that to rain, but for photographers the sun and harsh unflattering shadows on people’s faces isn’t the best outcome. My advice is not to approach this type of photography the same way as a scenic and to begin with test shots and constantly pay attention to the exposure and absolutely use a fill flash for the best outcome.

My website at www.enmanscamera.com

Some thoughts on Post-Production and photography

During the time period of film photography people rarely commented on the fact that professional images were manipulated or retouched.  Photographers used oils, dyes, special pencils, small paintbrushes, and airbrushes.  These tools were used to open eyes that were closed, to whiten discoloured teeth, to improve hair and clothing colours, to remove and replace backgrounds, and to turn black and white images into colour photographs. To increase the contrast one could select special filters, paper, or chemicals. However, in all my years of using film to make photographs I do not recall anyone being critical of that post-processing by saying that the work done by photographers to original images, after shutter release and processing negatives, removed that image from the realm of photography.

I bring this up because last week a friend stopped by and told me that after showing some of his work to a local camera club, that he was criticized soundly because he advised members that when he made the original exposures he always kept in mind how he would finish the photos using PhotoShop. He said that he always “tweaked” his studio photography and was surprised that it bothered some people.  Personally, I think it is that “tweaking” that help make his images so good, and they are very good photographs in my opinion.

Since the introduction of digital many photography contests and exhibitions exclude images that have been post-processed. I do understand that those organizations want to show the photographer’s talents at capturing an image and not retouching skills. However, it must be very hard to apply that restriction when many of the latest cameras can post-process (reprocess might be a better word) the original images in-camera using computer software supplied by the manufacturer.

There are those that consider themselves purists and loudly denounce programs like PhotoShop, although I don’t know what a purist really is in this technological time, because most images are no longer made on light sensitized material and are now computer generated image data files.

Photojournalists are expected to capture the truth about some event or subject and should not be altering the original image in any way.  But artists?  The work in question was studio photographs of custom motorcycles, which in my view easily fits in the realm of photographic fine art, and, certainly, not photojournalism. I suppose it depends upon whom the photograph is for and who the viewing audience will be.

I do not usually work as a photojournalist, and those that do get my respect when they are able to pull interesting photographs out of what are sometimes are pretty crappy conditions for a photographer.  In my opinion, those photographers that don’t work for magazines or newspapers should include post-processing as part of photographic methodology. It’s all about making the best possible photograph for others to see.

My portrait clients expect that I will post-process, and I usually tell them I intend to. I try to light in a way that not only looks good at the moment the shutter clicks, but makes it easy for me to enhance in post-production. I employ not only PhotoShop, but I also use other programs made by NIKsoftware.com and OnOnesoftware.com. And personally, I would never let anyone see images of mine that were not post-processed, because I know I can improve and enhance them in post-production.

My point is that photographers have been retouching their photographs for years, perhaps since photographers started making pictures for the pleasure of others. Now it is just easier than ever before, and so is taking a photograph for that matter.  There may be instances where the way an image is produced should be limited to how the camera’s sensor captured it, but I think something must be left to the photographer’s vision, and producing that vision might need a little help from post-production programs like PhotoShop. There is nothing like a well-executed photograph hanging on a wall for the enjoyment of all to see.

My website: www.enmanscamera.com