Trying Street Photography   

delanys-coffee

morning-riders

metro-free-daily

street-window

walking-down-the-street


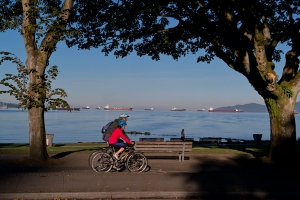
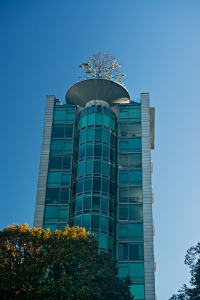
Last week I wrote about my short adventure wandering Denman Street and the Stanley Park area of Vancouver, BC, with my camera.

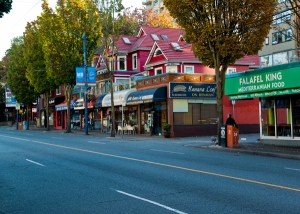
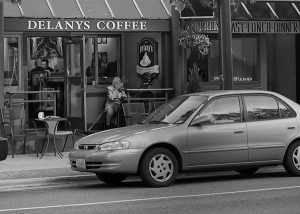
Each morning I got up early so I could stroll Denman Street before the sidewalks filled with too many people. I wanted to try to find the kind of people some street photographers do find, but I’ll admit that I am not very comfortable with that invasive type of photography.

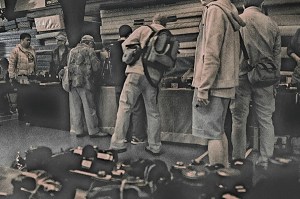
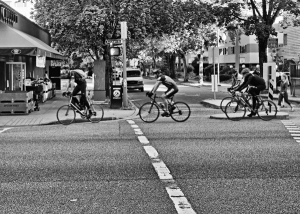
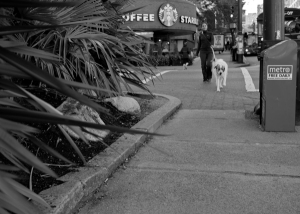
I am sure there are some street photographers that might laugh at my reticence at photographing people going about their life in any area, be it city street or a back alley, with their various paraphernalia of shopping carts, back packs, box houses, or bicycles. I really like the genre of street photography; I mean to say I really enjoy looking at photographs made by photographers that are good at street photography.

I think that successful street photography captures a moment from the society around us. It’s a moment in time that is an important for the present and future.

I am sure some photographers shoot for the challenge, and there are some that wander the city with their cameras as a release of stress from everyday existence, while others have a need to make some statement about the world in which they live.

I try to do a bit but I expect it will take me more preparation than a few early morning walks to get my head in the correct creative space it takes to do street photography.

I searched for some street photography tips and here are a few I found.

  1. Use a wide-angle lens.
  2. Get close.
  3. Look for juxtaposition.
  4. Focus on the essential.
  5. Look for the light and shadows
  6. Look at the foreground and the background.
  7. Tell a story.

I read that in a good street photograph it is possible for a viewer to see and maybe imagine more than the original photographer intended. Practicing street photographers capture fleeting moments, interpreting life around them, and challenging our perceptions of the world.

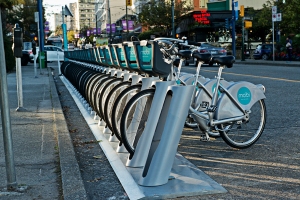
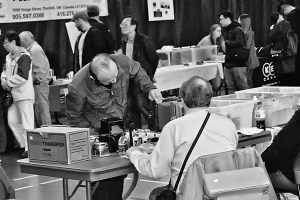
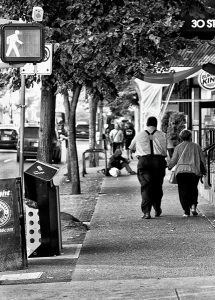
I have had some limited success at country fairs and city festivals in the past. This time I intended to get pictures of people going about their daily life on Denman. There is so much happening on a city street, or even within a small neighborhood, that it takes a good eye, and a fast camera, to capture it all.

Most of the street photographers I follow online shoot with small mirrorless cameras and are good at getting up close, but, personally, I would have been more comfortable with a mid-range telephoto. However, attaching a big lens on big DSLRs makes a photographer stand out. When I pointed my camera along the walk people would actually stop and wait for me, or change course to walk around me. Oh well, there will be another time and I can plan on trying again.

Wikipedia defines Street photography as ”Photography conducted for art or enquiry that features unmediated chance encounters and random incidents within public places”.

The genre of street photography is an old one and since the early days of photography there are those that have left us with their own styles of street photography that affects each viewer on an emotional level.

I welcome the comments of street photographers.

 On Vacation in Vancouver.     

2-laughing-sculpture

3-group-laughing

4-denman-street

5-bike-rentals

6-bicycles-only

7-english-bay-bike-path

8-english-bay

9-tree-top

9a-mounted-police

9b-harbour-air

9c-grandville-bridge

9e-night-harbour

9f-expo-sales

9g-vancouver-harbour-lights

9h-park-goose

“We should go on some kind of trip”.  When my wife said that a month ago she didn’t have to do much to convince me.  So about an hour later we had reserved a top floor room at the hotel on the corner of Davie and Denman Streets in Vancouver.

We chose Monday, Tuesday and Wednesday, so we would miss the weekend rush.  After a picturesque five-hour drive through British Columbia’s coastal mountains I was carrying suitcases and my bag loaded with our cameras up to our room.

What a great location. Not only were we moments away from the restaurant and bar scene of one of Vancouver’s most exciting areas that divides the city from the magnificent 400-hectare natural rainforest of Stanley Park, but right across the boulevard from our hotel was picturesque English Bay.

I discovered Denman Street when I first moved to Canada in the 1970s. Maybe it was the curiosity I had for a street that sounded and was spelled pretty closely to my name, I don’t know. But in any case the street was just as much fun then as it is all these years later.  One can either join others people watching while sitting at an out door pub, or choose food from almost any country in the world. We chose Greek at the English Bay for our first evening meal of the trip.

The next morning, while my wife slept I put a 24-70mm lens on my camera and headed out. There wasn’t much traffic on the street, or people walking along Denman. It was easy to photograph the buildings and I picked out a funky little coffee shop that we could go to later.  I walked the street and wandered the alley behind our hotel, (I like alleys) then headed for the beach.

My mother always told me to look both ways and be careful of cars when I crossed the street, but she never told me how dangerous it was to cross the bike path along English Bay. I dodged several riders and jumped to the lawn covered with slippery geese droppings when a woman rider zoomed by yelling, “Bikes only!”

I suppose I have become one of those hick tourists gawking at all the sights of the big city, but I reached the safety of the beach where I could meander along pointing my camera where I pleased.  Gosh, I even got to meet local Vancouver photographer Trent Watts, who was kind enough to take time out of his morning to talk with me.

Linda finally got up, and after coffee at the little shop I found earlier, we decided to drive into Stanley Park to take pictures of the harbour and stopped for anything we thought might make a fun picture. We also were looking for a good vantage to take some night pictures of the bright city across the harbour. Gosh, we had so much fun we overlooked having lunch.

Much later we wanted to try our hotel’s fish n’ chips special being offered for supper, however even that had to wait because I stopped to photograph and talk with the two Canadian Mounties who have special dispensation to rest their horses after touring through the park in the cool pleasant entrance of our hotel’s basement parkade.

After supper I went out for night shots of the Granville Street Bridge that crosses both a boat filled water way into English Bay and the shopping district of Granville Island and joined several other photographers on the beach as the sun went down. Then just after 8:30 packed up and drove off for more photos at the location we had chosen in the park.


The next morning I must have been tired after all the previous day’s activities, because after I had photographed a white goose honking loudly at me on the beach I checked my watch and it was a late 7AM.  Oh, well I had a good time and anyway I was on vacation!

Camera Care On Wet Days    

linda-shooting-in-the-rain

Barriere, British Columbia Star Journal newspaper Editor, Jill Hayward, asked me to discuss the use, care of, and protection of cameras, lenses, and other photographic equipment during wet conditions. She worried about people carrying and using their cameras under the wet conditions at the North Thompson Fall Fair this past weekend. She also mentioned that she meets many local photographers that have scratched lenses.

I rarely let wet days limit my photography. Nevertheless, with the exception of those expensive pro level DSLRs and, of course, a few small waterproof cameras, most of the cameras photographers use don’t have much resistance to water.

Several years ago my wife, Linda, and I took a photography vacation on Vancouver Island. The weather was forecast to be completely rainy, so we prepared with plastic bags to cover our cameras, umbrellas to deflect water off our viewfinders, hairdryers to dry out cameras and tripods every evening, and wet weather attire because we didn’t want wet clothing. The trip was a bit uncomfortable, but the coastal downpour didn’t stop us from doing photography, and we didn’t waste a day of that trip huddled indoors. We were outside, cameras in hand, every day of that excursion and returned with great pictures, and a fun experience of shooting in the rain.

We had a good experience because we were prepared. That’s the secret. I always carry an old towel in my camera bag. And when water (or soon snow) begins to gather on my camera I continually wipe it off. Those areas I worry about are around the pop-up flash, where the lens mounts, the LCD, and the info window, and anywhere else that I think water might find a way into my camera.

I keep a lens cap on my lens. But what about when one is taking pictures? I know there will be those that advise putting a UV filter on every lens.

UV filters are from a time when we had a necessity to colour balance our film and in the spring we would use (U)ltra (V)iolet filters to warm the colours. Using an old UV filter is fine, as are any of the many different clear filters manufactures are selling for lens protection, but digital sensors no longer need colour correction filters and many photographers worry that inexpensive filters placed in front of their expensive lens glass might degrade the image.

Whether you agree with that notion or not, I think that using a lens hood is much better insurance than clear protection lenses. My advice is to get a plastic lens hood for every lens. Plastic lens hoods protect our lenses by bending, bouncing, and sometimes even breaking in the process of absorbing the impact and saving the lens. Personally I feel safer with a lens hood than a tight fitting glass filter. Anyway, we should always be using lens hoods to keep glare off the lens front.

When I return home after a day of photography I remove the lens and check my equipment. I remove the memory card for downloading to my computer, recharge the battery and, especially after rain, wipe my camera and lenses.

As I already wrote, I don’t let rain limit my photography. And there are times when the rain adds something to a picture.

Country singer Roger Miller wrote, “Some people walk in the rain, others just get wet.” Those are good word for creative photographers. And for those afraid of taking pictures in the rain, another singer, Cher made me laugh when she said, “Don’t take your toys inside just because it’s raining.”


A process of observation.       

Salmon Arm

Street rest art

Town sculpture

Shuswap Lake

Pier view

Dragon boat

Lakeside residents

Smugglers love

My wife, Linda, has been wanting to really put her new 135mm lens to the test.   Even though the 135mm focal length is normally used for portraitures, she wanted to give it a roadside work out and suggested we take a short drive. We decided a morning drive along the meandering South Thompson River ending in Salmon Arm, just short of an hour away, for coffee and some photographs.

The British Columbia city of Salmon Arm with it’s unique, picturesque downtown and what residents claim to be the longest, curved wooden wharf in North America is located on the Shuswap Lake, midway between Calgary and Vancouver on the Trans-Canada Highway. The lakeside city also became infamous in August of 1982 when then Canadian Premier Pierre Trudeau raised his middle finger at protesters from his seat inside a private rail car.

When I’m not making portraits I prefer zoom lenses. Using a multi-focal length lens when photographing buildings and other features that one finds along a busy city street makes photography easy to do because it’s simple to crop out people, cars and other unwanted elements. Nevertheless, Linda wanted to use her 135mm and I decided to follow suit and brought my 105mm.

We wandered the downtown photographing anything that caught our attention. It was Sunday and most shops were closed and the streets, other than a couple of people walking to the grocery store or, like us, driving to Tim Horton’s for coffee, were almost empty.

It was a perfect day to walk around, and there was plenty of room to step backwards on to the street or move around in front of shops with our prime lenses. We spent a leisurely hour or so just taking pictures in town before driving to the lakeside park to sit in the shade, take in the view, and talk about our pictures.

My preference would have been to use my 24-86mm and although Linda really liked the 135mm, she wished I had brought along her 70-300mm. However, we both thought using the long prime lenses was a good exercise. Placing a subject and composing the final image took longer than just zooming the lens length forwards or back. Our fixed focal length lenses required that we had to physically move about to get the image we desired. There was also a change in perspective because of the mid-range of our lenses.

I have been trying to think of some words that would sum up our experience. Maybe American documentary photographer and author, Elliott Erwitt, got the closest to what I was experiencing when he wrote, “To me, photography is an art of observation. It’s about finding something interesting in an ordinary place… I’ve found it has little to do with the things you see and everything to do with the way you see them.” Perhaps our exercise wasn’t so much, “an art of observation” as it was an “act of observation”.

Photographing the Chase Falls    

Chase Falls 1

Chase Falls 2

Chase Falls 3

It is just over a year since I talked about my spring visit to a waterfall about 20 minutes from my home. Photographing the Chase Falls is, as the name infers, the falls just across the Trans Canada highway from the center of the small lakeside town of Chase, British Columbia.

Spring with its warm, snow-melting temperatures sure rolled in very early this year. Gosh, who would have thought we’d experience 30+ Celsius at the beginning of June. With that warm weather I was positive I wouldn’t see high, murky, water rushing over the falls.

I arrived around 11am and took the short walk along the sandy path to the falls. And sure enough, although there was plenty of water coming over Chase falls, the creek level was low enough that I was easily able to scramble among the large rocks along the bank and found many comfortable locations to set up my tripod. Ansel Adams said, “A good photograph is knowing where to stand.”

I guess that’s right when it comes to photographing a waterfall, I leaned against a big bolder and pulled out a couple of neutral density (ND) filters so I could reduce my shutter speed by a few seconds, and slow the water down in my shot. Then began moving my tripod from place to place, in hopes of finding that “good photograph.”

Photographing waterfalls and getting that smooth water that is so popular is really easy to do, and not complicated at all. All one needs is a camera, a sturdy tripod and a neutral density filter.

I put my camera on the tripod, focus, place a ND filter in front of the lens, and release the shutter. I rarely bother with a cable release. I usually just select my camera’s self-timer. I use 4-inch by 4-inch square ND filters that are well worn and a bit marked up.

When I purchased the filters they came with a filter holder to attach to the lens front, but that’s just more stuff to carry and instead I hold them by the edge in front of my camera lens and move them up and down so anything on them won’t show up when I take the picture.

I had a nice time taking pictures and even sat for a while on one of the large, smooth boulders just enjoying the cool air and the sound of the water. I think I might go back next week to try out a fish-eye lens that came into my shop.


Selecting a Tripod


Tripod & Hat        In his book, “Backcountry Journal, Reminiscences of a Wilderness Photographer”   Dave Bohn writes, “The trouble with photographers, and anyone else attempting anything creative, and in fact doing anything, is that they get addicted…(and)…I was addicted to the tripod as a necessity for the photography of large landscapes.”

I remembered (and liked) that quote from an article I wrote in October 2013 and thought I should post it again. I can’t say that I am addicted like Mr. Bohn, but I, too, really enjoy using a tripod when I shoot landscapes.

I reread my 2013 article on tripods and decided to repost some of my discussion after talking with a friend about tripods. He is planning on getting a new one as a gift for his wife, and we were discussing what might be the best for her.

When I select a tripod I want one that extends above my head so I can use it on hills. I don’t like bending over to peer through my camera’s viewfinder. I also prefer tripod legs that can be extended out horizontally when the ground is uneven.

I don’t want a crank to raise the center column as that is just added weight, and becomes one more thing to get caught on things. I like a column lock that turns to lock and unlock so I can easily adjust it up or down.

An important feature on the tripod I select is a strong and easily available quick release on the tripod head. The tripod head is another subject completely and my advice is get one that has a reasonable size ball surface and that is lightweight.

A tripod shouldn’t be so heavy that it’s a bother to carry. Nevertheless, it must be sturdy and capable of supporting my camera without shaking. I am always amazed when a photographer uses a cheap, little tripod to hold their camera and lens that are worth well over the thousand dollars plus mark.

I am pragmatic in my approach to photography. Sometimes the conditions are fine for just pointing and shooting, but if I really care about the picture I know I will have better success getting a quality enlargement if I return to the car and get my tripod. That’s just good sense.

I know there are many modern photographers are of the belief that the difference between a blurry and a sharp enlargement is megapixels or vibration reduction features. I can’t disagree with that altogether, but I do think a good, stable tripod is just as important and in some cases more.

Using a good tripod that allows one to stand up straight, take time to analyze the scene, problem solve, compose, and contemplate is an excellent experience. In addition, it keeps the camera from moving.

I suggest buying from people that have used, or at least can discuss, the tripods they sell.  The department stores will allow you to bring it back if you aren’t satisfied, but I am sure they are not interested in paying for the damages to your camera and lens that crashed to the ground while using their bargain tripod.

In recent years more and more quality tripods have become available and are worth owning and using. All one needs to do is spend some time researching and checking reviews.

Photographers spend lots of effort selecting that DSLR and lenses for each purpose they want to use it for. My advice is to take the same amount of effort with that purchase a really good tripod.


Off-Camera Flash in Daylight  

Whatcha Got?

Perfect lighting

A little to the left

Teamwork

The right light

Ya gotta get wet

Who cares about the water

Lets see

Flash the Cadillac


This past weekend I lead another workshop for photographers about using off-camera flash when photographing portraits outside in bright light. As with past lighting workshops my goal was to help participants understand how to use flash in different environments during daylight, and gain techniques that I hoped would help them transform the harsh daylight of outdoor portraits into beautiful light.

I was fortunate to have a great rural location where participants began in the morning photographing our model using a speedlight and a diffusion panel in a bright meadow, then moved to a large, well lit, open barn with two-flash lighting using a shoot-through umbrella and softbox until lunchtime.

After a healthy lunch provided by Versatile Studio we set up by a small tree covered stream, getting both our feet and our model’s feet wet. We finally finished the day photographing the model posing beside an old 1970s Cadillac in a nearby field.

I enjoy guiding serious photographers through their first attempts to use flash as a tool to create better photos, I want them to think of the flash being more than an uncontrollable device perched on top of the camera when it’s too dark in a room to take the photo.

I have been offering off-camera flash courses since the early 1980’s, and still believe they are an important segment of a portrait photographer’s education.

So much has changed in photography, and yet here I am 35 years later, still helping photographers learn how to use off-camera flash. Modern cameras are amazing with sensors that are so much better at capturing light than film was. But just as 30 years ago, serious photographers realize how much more flattering off-camera flash is on someone’s face than just harsh daylight.

Off-camera flash gives a photographer the ability to choose the best direction of light.

There are times when I am forced to photograph a person without using a flash. I think “forced” is the best word, because I will always use flash if I can, and as those that have taken my advice have learned, in most instances using flash for portrait photography indoors or outdoors is better than not using a flash.

Those attending last weekend’s workshop began to get comfortable using flash.

David Hobby, lighting guru and founder of the blog, http://strobist.blogspot.ca, wrote,

“Learning how to light is incremental, creative and fun. There is almost no math involved, nor any difficult technical know-how. In fact, good lighting is less like math and more like cooking. It’s like, you taste the soup and if it needs more salt you add some salt. You’ll see that when we learn to balance a flash with the existing, ambient light.”

“Controlling harsh natural light – one of the most important things to know as a shooter is how to use bad light well. Taking hard, nasty daylight and turning it into beautiful light is actually pretty easy.”

What Shall I Photograph when its windy? 

Lilac

Oregon Grape

Allium

Oriental Poppy in wind

Iris in wind

B&W Iris in wind

I looked out the kitchen window at my wife’s garden. It was late afternoon, the sun was peaking out under the clouds after a light rain, and the garden was glowing with a gusty, light breeze.

Linda mentioned that we hadn’t taken any pictures of the spring garden yet and suggested that it looked so fresh after that rain that I should be able to get some good flower photos in spite of the wind.

Wind? Wind is not a problem if photographers take the time to problem solve. I could increase the ISO or shutterspeed, but that wouldn’t do much for the ambient light, and I like more control. My normal technique for photographing flowers is to underexpose the ambient and illuminate the subject with a flash. I recall years ago having given my photography students a “stop action” assignment. They were to go out at night or find a large, dimly lit room, and use a flash to stop a moving subject in a photograph. All they had to do was select enough flash power at a specific distance to illuminate their subject properly when they released the shutter.

Those were assignments given before modern, computerized cameras and TTL dedicated flash when the flash would always produce the same amount of light and the aperture controlled the amount of light exposing the subject.

My technique for my windy garden was the same. I placed my 200mm macro lens on my camera and attached a ring-light on it. I really like is using a ring light on rainy days. I keep it on manual mode and stay at a specific distance so it won’t under or over expose the subject I am photographing. My ring flash also has ¼ and ¾ power increments to reduce the flash power output if I need it.

Just as my photography students learned all those years ago, when I pressed the shutter the flash stops the movement of the flowers in the wind. Nevertheless, the wind was quickly drying out the plants, so I had to quickly search for leaves that still showed raindrops.

The movement problem was almost solved. I took extra shots when I thought some motion had wrecked my shots, however, it was the sun that became the biggest concern. I had hoped the high clouds would block the sun, but instead of getting more bad weather, I got less, and with the clearing sky I began to struggle with the bright light.

The bright light would have been fine if all I wanted to do was document plants in the sun, but I wanted to go beyond that. Just pointing and shooting is boring. I would have liked to get out lightstands, a couple of off-camera flashes, and even a black backdrop, but the wind continued on, and would probably blow all that stuff over and I never followed up on that option.

So while other photographers might have celebrated the sunny, clear sky and be willing to put up with windy landscapes, I was done for the day.

I think I am pretty lucky that I don’t have to go far when I want to take pictures. Over the years I have looked hard into what is close to me and instead of being one of those photographers that depends on a car to find a location to get inspired. I just look around the yard and adjust my thoughts and camera for what awaits me.


A Rainy Day in Hope, BC – Photographing with Infrared

Wecome to Hope 1

bear crossing 1

Town clock 1

Animal totem 1

Driving thru Hope 1

After leaving the Vancouver Camera Show and Swap Meet last Sunday I decided that rather than make the long drive all the way back to Kamloops and then Pritchard, I would make a stop for the night in Hope along the way.

Hope, British Columbia, is usually just a location to make a quick pull off at a fast food restaurant, or coffee shop. as I drive between Vancouver and Kamloops.

I have always liked the appearance of the picturesque little town just off the highway along the Fraser River. That was first settled when explorer, Simon Fraser, arrived there in 1808. The Hudson’s Bay Company started a trading post in 1848.

In more recent history Hope received acclaim when it was the location for the Sylvester Stallone Rambo movie, “First Blood”, and then, “Shoot to Kill”, staring Sidney Poitier and Kirstie Alley. The area’s mountains also stood in for the Himalayas in the movie “K2″.

However, in spite of all that the main reason for my stop was I knew I’d be tired after my long day at the swap meet, and, in addition, I thought it would be fun to wander around town with my camera the next morning. I chose to bring the camera I had converted to infrared. I thought shooting infrared would bring a fresh and very different visual interpretation to the heavily forested setting.

There is a poem by Robert Burns wherein he writes, “the best laid plans of mice and men often go awry”. I thought of his prophetic words as I checked out of my motel room the next morning under a pouring rain. Disgusted with my crappy luck I stopped for a coffee and doughnut before leaving town. I was resigned to just head home. But as I sat in my car sipping on my coffee texting my wife that I was heading out, the rain lightened up and I decided that in spite of the cloudy overcast I would try my infrared camera anyway. I thought, what the heck, any photography is fun and the worst that can happen is I’ll have wet hair for the trip back.

I meandered down to the riverfront and zigzagged back through town. I discovered that at some point town residents began erecting large chain saw carvings everywhere. So I took pictures of them along with those of the city streets until the rain picked up again and my glasses got too wet to see.

The best time to shoot infrared is on sunny days, so the rainy, heavily overcast environment wasn’t all that exciting. But I was intent on the pictures by this time.

I must say that I wasn’t really successful, but there were a few images, that with some postproduction help worked out reasonably well.

The rain won this time, but I think I might go back to that scenic little town nestled in the Fraser Canyon. It’s not that far from my home and a nice easy drive, and I’ll take Linda with me. However, we’ll wait for a sunny, dry day and I definitely will try infrared again.

Infrared is such a fun change from normal digital shooting. And similar to purchasing another lens, the cost of having an old camera converted is well worth it.

The Vancouver Camera Show and Swap Meet       


Lots to buy

Wow a 4X5

Sales tecnique

What about this tripod?

Try this one

One of my favorite photography events, the The Vancouver Camera Show and Swap Meet, has come and gone again this year. For over 20 years I have spent the weeks prior to this long-running event, that has now reached it’s 40th year, looking forward to the day I get to attend this ever-so-fun photographer’s gathering put on by the Western Canada Photographic Historic Association, and organized by Siggi and Brigitte Rohde.

There cannot be a better way to spending a rainy spring day than being surrounded by a vast array of cameras and photography equipment, all the while getting a chance to talk with other photographers.

Again this year I made the journey from Kamloops the day before and lodged overnight so I could arrive bright eyed and eager to join the other vendors setting up at early the next morning.

I go wondering what the latest trends will be, or what is popular with the photographers that attend. And, of course, keeping my fingers crossed that the equipment I have on my table is what they are looking for.

The last few years there’s been a major change in the venders being replaced by a much younger crowd. The stuff they have on their tables is much the same, but the vendors’ faces are younger, and there are a lot more women standing behind the tables discussing and selling photography equipment than there was when I first started attending.

As I have said before, the word “diversity” is the best way to describe the mixture of photographic types coming to this camera swap meet. There were all kinds of lifestyles and interests, and specialties in photography, film, digital, past and present technology. However, what they all had in common was that they all were excited, searching for sweet deals that I am certain they got.

This year was no different than last, in that I spent an exhilarating day talking non-stop with other photographers about their different interests in photography and, as always, it was invigorating.

The Vancouver Camera Swap Meet is a splendid way to meet and exchange information with other photographers, and to look at and check out a grand selection of photographic equipment that would not be so accessible anywhere else in Canada.

I write this every year, but I’ll say it again anyway. I had a great time with the photographers I met this year and the depending on who joined me at my table, the conversations always changed. My day of selling was a success, as it was for most of the dealers and very happy bargain hunters I talked to at the end of the day.

Camera's Shot

And…when the camera decides to take a picture by it’s self….