Using Flash – even – for Sunny Day Portraits

John Mike & Shannon Constable Mike Moyer View from the Bonniville Royal Canadian Mounted Ploice

Using a hot shoe or auxiliary flash is confusing for many photographers, and when I say that I prefer adding flash to all my portraits whether inside or outside, on overcast or bright sunny days, and that I rarely make a portrait without one, will often produce quizzical and disbelieving looks from photographers.

I got one of those looks recently at a wedding I was photographing under a cloudless +35C day. The unforgiving conditions were sunny and bright with participants’ faces constantly affected by strong shadows. A guest, wielding a sophisticated DSLR that was sporting a very wide angle lens, inquired about my bracket-mounted flash and politely listened when I said I always used flash, however, I could tell that he walked away still confused as to why I would bother to use a flash when there was plenty of daylight. I suspect that the unflattering shadows across the subjects’ faces were not all that evident on his camera’s LCD, or he just did not see the problem. Besides, he might have thought himself more of an event chronicler, or, because of the wide-angle lens he was employing, an artist.

I read a query in an online photographer’s forum asking, “I’ve been shooting headshots recently and it got me thinking a lot about metering. How do I meter for flash portrait photography on location? I know that without a flash, I would just spot meter their face…and snap. What happens when I have an off camera flash? Do I just meter normally then shoot? Because when I do this, once the flash goes off, the exposure would be completely different than what I’ve just metered, which would usually mean overexposed. This is so very confusing. Please shed some light on this (no pun intended).”

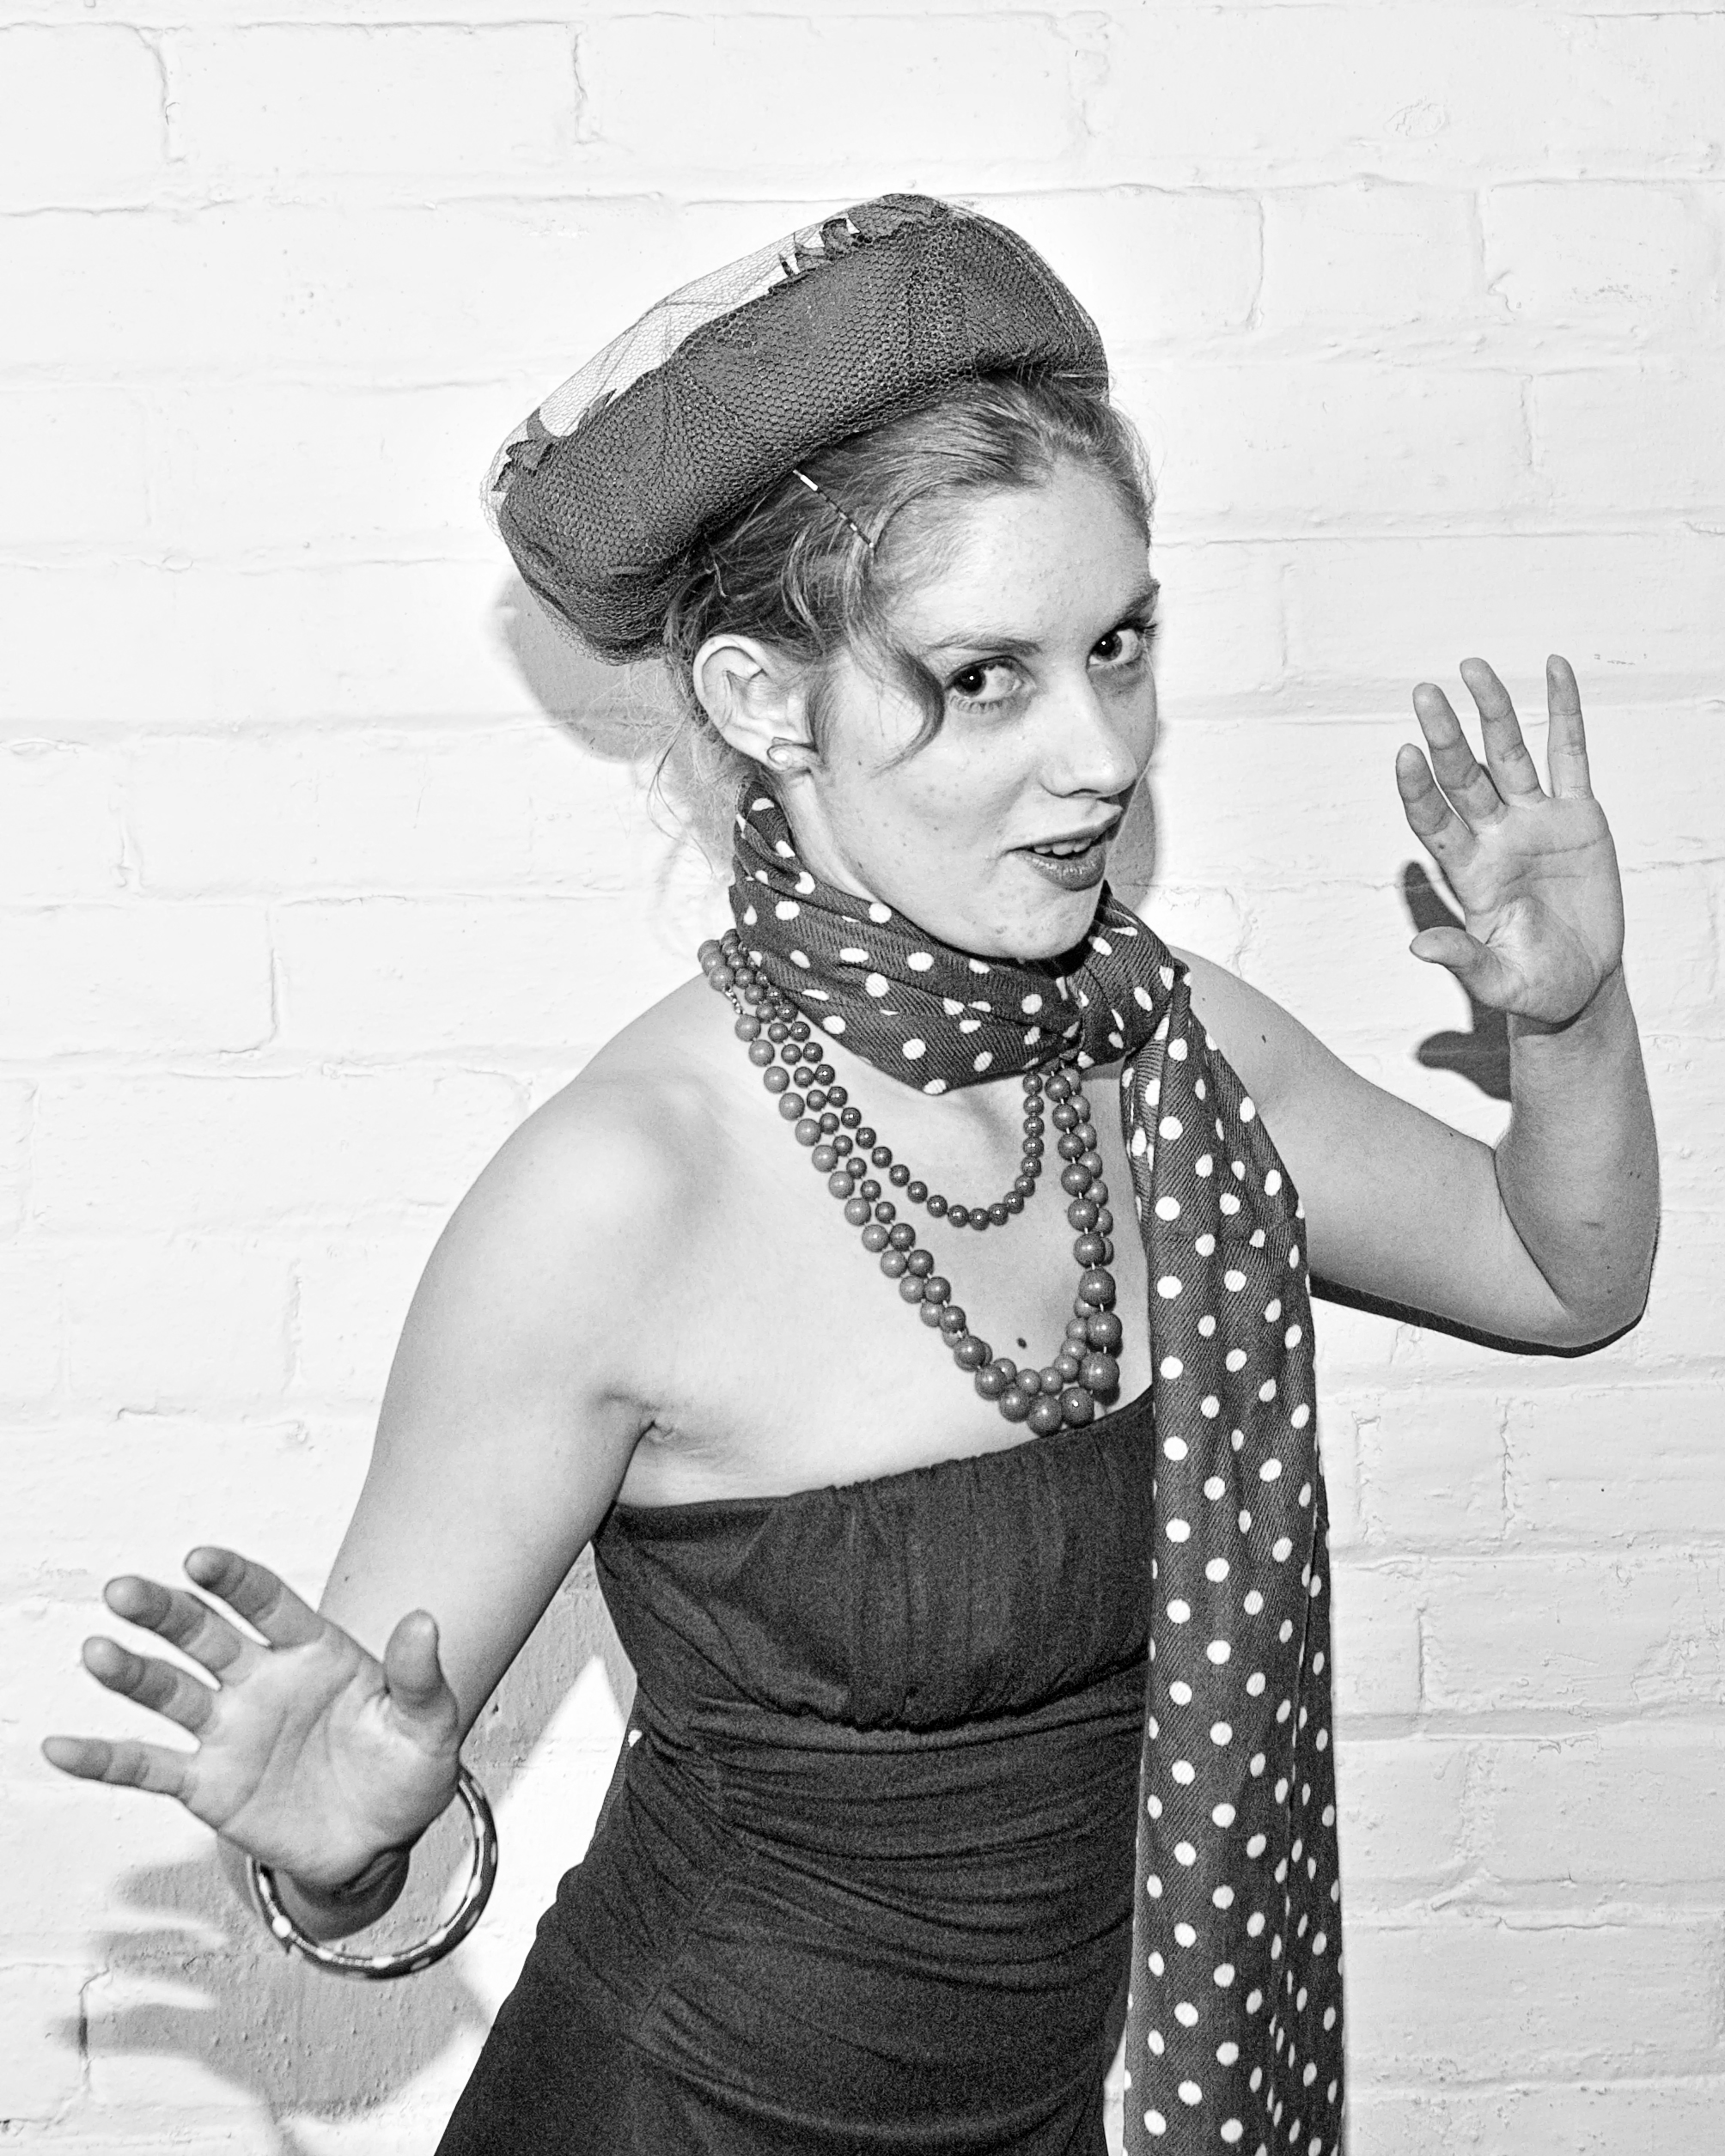
I also recall a friend’s class assignment to photograph someone wearing a wide brimmed hat under the midday sun. (My apologies to those that adhere to the words from Noel Coward that “only mad dogs and Englishmen go out in the midday sun”).

She explained, “Our assignment was to light the shadowed face under the hat and still have properly exposed surroundings.” At that time flash technology only produced constant light. The solution was to diffuse the light by placing a white handkerchief folded once or twice over the flash head to open up the deep shadow.

Fortunately, modern TTL flash is almost foolproof and only a modicum of thought is required on the part of the photographer as to how much light should be added for the subject’s exposure.

My camera is usually set to manual exposure mode. That allows me, not the camera, to choose the overall ambient exposure, and to add flash to those areas that are underexposed by shadows.  I meter the existing light, set the exposure, and make tests using the flash’s exposure compensation feature to increase or decrease the output level. I then check the histogram to see if there are blinking borders around any white areas indicating over exposure, and if I observe them I dial the exposure compensation down, till the flashing borders disappear on further test shots. That highlight-warning feature is set in the camera’s menu.

My photographs from that wedding day are evenly exposed with attractive, open shadows and do not appear as if there was a flash involved. Besides, using a flash really was not much more effort than if I didn’t, and I did not have to spend hours using postproduction software to lighten and darken my subjects from that day.

I use a bracket that places the flash high above the camera that can be quickly removed if I want to light the subject from one side. The bracket isn’t a must, however, I recommend a connecting cord from camera to flash so it can be used off camera.

I also advise reviewing the camera manual to determine if it has a feature called “high speed sync” that allows for a high shutter speed when using a flash. That’s a discussion for another time, but I recommend doing some recon on the web where there is lots of information.

Blending flash with ambient light isn’t really a mystery. The combination of off-camera flash, and a light meter to measure ambient and flash contributions, will give you complete control to craft portraits your friends and family will love.

A burst of flash will reveal your subject’s eyes and soften shadows all round, so it’s definitely a good thing and will improve your pictures.

I appreciate comments. Thanks, John

My website is at www.enmanscamera.com

Thinking about, Just what is a Great Lens for Portraiture

Model 1,   Danielle, 24-120lens at 105mm  Ms. Perault

This past week a friend of mine dropped off his lens for me to try. After talking about the lens’ quality, he added that it was a great lens for portraiture. Now there is a lingering question, “What is a great lens for portraiture?”

Although I hadn’t given his Tokina 50 -135mm a run through yet, I expected he was right regarding it being a good portrait lens.  On my cropped sensor camera the lens would have an effective focal length of approximately 75-202mm.

I mentioned this to another photographer, and he paused for a moment, and then said, “Oh, it acts like a 75-202”. I realized he had no idea what “focal length” meant and although I didn’t go into it at that moment, I’ll mention for those few readers that aren’t familiar with the long used photographic term. A lens’ focal length refers to the distance between the imaging plane, or the sensor, and the point where all light rays intersect inside the lens. A longer focal length leads to higher magnification (telephoto) with a narrower angle of view. A shorter focal length lens has less magnification and a wider angle of view.

The longer focal length, as in my friend’s 50 -135mm will have a pleasing effect on a subject because the minimally curved surface of the lens flattens the perspective between the eyes and ears. The wider the focal length is the more the front element (lens glass) is curved making the distance or perspective between the eyes and ears more visible.  A wide angle enlarges the nose and reduces the size of the ears.

Personally, I want as much focal length as I can get. The longer a lens is the better, and my choice then depends the ratio of length to weight, as in my big 70-200mm would be a perfect lens in the studio, but it’s weight becomes a liability when following a couple around at their wedding.

I have heard photographers say that the 50mm lens is a good portrait lens. Well, that’s 70mm on my cropped sensor camera, but still has too much curve in the front element for my comfort. An actual 70mm lens acts like a 105mm on my camera and that’s much nicer.

I can remember going to a Dean Collins’ workshop. I had worked hard to get an invite to one of his limited participant sessions. Collins demonstrated his shooting techniques on both a medium format (2 ¼ in film) and 35mm cameras. He used a 350mm on the medium format, and 300mm on the 35mm, and with the addition of a slide presentation he discussed how the longer lenses flattered the features of those he made portraits.

Information on Dean Collins can be found at: http://strobist.blogspot.ca/2006/08/review-best-of-dean-collins-on.html

A three hundred millimeter lens is spectacular to use for portraits and I think there are lots of fashion photographers that might be using 300mm and longer lenses, but I have to use a tripod or at least a monopod when using longer than 200mm or I have camera shake, so I defer to a lens that is much easier with which to move around. I have used that 50-135mm for some staff portraits I made for a local business and I must say it was fun to use; most of my shots were at 105mm and longer.

I recently read a post by a photographer who stated that only lenses with an aperture of f2.8 or wider were good for portraits, and his reasoning is because the background should always be out of focus.  I don’t really agree with that. A wide aperture just means one can reduce the depth of field. To me it depends on how far away, or how busy the background is, and I know how to control depth of field when required. The length of the lens, and how it affects my subject, is much more important.

A longer focal length, or telephoto lens reduces the effect of lens distortion and helps keep facial features in proportion. The longer lens also creates a more shallow depth of field that helps one’s subject to stand out from the background. I think those photographers that regularly do portraiture all have their preferred lenses that they are comfortable using. Photography is a creative medium and the final answer as to what is the best is up to the photographer and, of course, whether or not the subject is happy with the result.

I always appreciate your comments. Thanks, John

My website is at www.enmanscamera.com

Don’t Miss Photographic Opportunities

OLYMPUS DIGITAL CAMERA  Eagle Horses in fieldFalkland backroad

As my wife and I were rushing on a two hour drive to an appointment in Kelowna, British Columbia for which we couldn’t be late, we both lamented on the photographs we were missing – a heard of deer along the road, some coyotes hunting in an open field, eagles, a farmers field turned into a lake because of the spring run-off, and the sun glowing on white lakeside cliffs we were passing.

Linda reminded me of a long trip to Utah we made some years ago. Our route was to head east to Calgary, Alberta then turn south, follow the Missouri river as it snaked it’s way through canyons and gullies, and then head west to Salt Lake City.  We left later than we should and we were driving with as few stops as possible because I had promised my brother I would be at his house for a family event the next day. What a wonderfully scenic drive that was.  We kept realizing we should stop again and again, and we didn’t.  Linda said “We will never do that to ourselves again”, we need to leave lots of time, even days, to photograph subjects when we see them.

I think that many photographers have had the circumstance where the chance at a great photograph was missed because of the wrong lens or camera.  I remember a photograph of a moose in the hazy morning fog that I made with a little digicam because it was the only camera I had with me. At least I had a camera with me and I did get the shot, but the photo was lacking because of the limitations of the camera’s small sensor, the lack of a telephoto lens, and a tripod would have helped also. I spent time working on it in Photoshop, changing it to a black and white because I couldn’t correct the purple cast caused by the early morning’s low light on the camera’s tiny sensor.  I was able to make a passable 8×10 print, however, it lacked the quality I could have had by using a DSLR camera with a telephoto lens.

The Boy Scouts state, “Be prepared”, and I think that is a good idea for photographers. When film use was common, most serious photographers had more than one camera; one would be loaded with black and white film, the one with colour negative film, and sometimes one with colour slide film. Since digital imaging began many photographers now own only one camera, as colour, or black and white images can be manipulated in the computer.  I have my main camera, and can borrow my wife’s camera if I require a backup camera that uses the same lenses. My cameras get lots of use and I need to have a backup in case of equipment failure while I am working.

Sometimes I like the portability of a little digicam. I mainly use it for those subjects that are close to me and rarely use it for scenics. If I do, I prefer to use it with an old monopod that quietly languishes in the trunk of my car. It’s pretty beaten up, but it keeps my camera steady. Trying to take a scenic with arms extended and expecting a sharp image is asking too much of the technology.

These days it is easy to carry a camera around, and taking lots of pictures doesn’t cost anything except time, until one starts making prints.  As I began to write this article I thought about my father.  His chances of taking a good picture were pretty good because he was a prolific, dedicated photographer. As a contractor he worked all over the southwestern United States, and he usually had a beat-up, dirt-covered camera jammed under his pickup seat, or somewhere in his excavator, and he rarely missed an opportunity to photograph anything that interested him. The sheer volume of pictures he took outweighed the bad pictures. He mostly used slide film, and, as kids, my brothers and I looked forward to his evening slide shows. There were always lots of interesting (and sometimes unusual) photos and it was fun to view pictures that he hand-turned using our family’s old projector.

Like my father, photographers should be continually looking for photographic opportunities and always be prepared for them by having some kind of camera with us. And when we miss that photograph because the equipment we have is wrong, or because we aren’t using it correctly, we should at the very least learn from that so in the future we won’t have missed opportunities.

As always, I appreciate your comments. Thanks, John

My website is at www.enmanscamera.com

Wandering my Neighborhood with Infrared

Pritchard store infrared  Crossing infrared Riverside infrared Bridge infrared Wolf ranch infrared Tree & fence infrared

Spring is here with cool nights and warm days. The snow has finally disappeared in my neighborhood, except on the mountaintops that surround the river valley in which I live, and everything is starting to get green.

I had decided this should be the week to wander the roads near my home. I selected my camera that I had converted to infrared some years ago, attached a 24-120mm lens, and headed out.  Over the past 37 years I have photographed everything in my nearby landscape again and again, and I won’t try to guess at the number of different cameras, films, and film formats and, of course digital cameras, I have used.

My goal this time (I always like to have some type of goal or plan), was to wait for a cloudy day and make use of the low, dramatic, and directional light at day’s end. I wanted to use my infrared camera as I have many times in the past.

Using infrared is always fun. The resulting images are always different and interesting. Before the days when I had invested in an infrared camera conversion, I had used Kodak infrared film. There wasn’t an exact ISO rating or even very consistent settings for that film. One would make test exposures for the filter density one used and the developing times. Good results would finally be obtained, but always after exposing several rolls of that expensive infrared film.

Nowadays my camera no longer requires a specialized infrared filter, and I don’t have to spend time in a lightless room developing the film. Yes, there was a cost to having my DSLR camera modified so that the image sensor is only sensitive to infrared light, but it has since paid back generously, because it is well worth the expense to be able to create unique images.

Most experts say infrared radiation peaks around noon, however, in my experience morning or evening is better, and the accompanying long shadows makes great pictures in infrared. So I waited a bit after 5pm before stepping out.

I went along the road searching out features I knew well, and that I thought might be perfect in the late afternoon light. My main interest was the sky. I wanted the very dark, hazy skies one obtains with infrared that are so dramatic, compared to those with visible light. As I stood alongside the road I thought about how the pictures I was making would be nice as colour images, but infrared and the black and white conversion I intended to apply would create more impressive, or as one writer called them, “otherworldly” scenes.

All my images from that day received some post-production using PhotoShop and Niksoftware. I shoot RAW so the original files from my camera are red and white. I convert each photograph to black and white, increase the contrast, and sharpen and strengthen the highlights and shadows. The final vision isn’t supposed to be a pretty, scenic document as much as it is my personal artistic vision.

It is possible for photographers who want “infrared-like” pictures to manipulate their normal captures using Photoshop, or any of several other programs that emulate the effects of infrared. However, those photographers like me that are interested in something different can find an older DSLR and send it out to be modified. Since I had my camera modified, there are several companies that have appeared, like www.lifepixel.com. These folks’ webpage begins with the question, “Are you tired of shooting the same stuff everyone else is shooting?”   So I suggest, if you would like to do something completely different, try infrared like me.

I look forward to your comments, John

My website is at www.enmanscamera.com

Photographers and Christmas Pictures

tree 2  presents Xmas Cat

Christmas is only a couple days away. Gosh, that was fast! Oh well, I like Christmas with all its trappings. I’ve been listening to Xmas music, watching plenty of not-so-great Xmas TV shows, attending both my granddaughters’ Christmas concerts, decorated our tree and most of our house and I have already been eating candy and lots of holiday snacks.  It’s Christmas.

This time of year is filled with photo opportunities. Yes, pictures of our home and the landscape covered in snow are great, and I have been having a great time wandering around in the fresh snow, but the unique opportunity I am writing about is the pictorial story of everything that happens around us during this holiday season. I have years of film slideshows and digital CDs of my Christmas’ and plan on continuing for many years to come.

Photographers might try to tell a story and take pictures of everything.  For example, the decorated Xmas tree and house, even that Christmas Eve dinner table, and maybe the morning breakfast with the family on Christmas. Then get the camera ready for the gift opening. Yep, photograph it all and approach every photograph as if it’s the most important you’ll make. It doesn’t matter whether it’s for a client or for family archives, all pictures should be printable and viewable. I prefer a DSLR camera and every image gets post-post processed before anyone sees it.

Not one for the point and shoot style, I usually think a bit about how I want to make each picture and I take lots of pictures while things like opening presents are happening. I always use a flash and shoot wide with the intention of cropping for the most dramatic effect later. I sometimes think setting up a couple lights on stands would be great, but my family will only put up with so much, and anyway a stand might get knocked over in all the excitement.

Always use a flash for family stuff and go for as much depth of field as possible. My lens of choice for the past few years has been either my 18-200mm or 18-70mm, either one works fine in the confines of my house. They both focus fast and close and that’s all I need.

My family is used to my photographic demands as I expect most photographer’s families are. When we are at the table there isn’t a bit of hesitation when I get up and move in with my camera, everyone knows what to do. Even my son’s young daughters pose. Please don’t embarrass people with pictures. Good photographers shouldn’t be the kind of picture taker that crouches down in everyone’s face as they eat.

My family and friends know that I’ll delete those that don’t live up to my personal expectations. Well, I think they know. Maybe my family and friends think I only take good pictures. Yes, lets go with that. They don’t need to know how long I spend editing in post-production.

As I began, Christmas is only a couple days away. Give that camera’s sensor and lenses another cleaning and make sure flash and camera batteries are charged up.  Yes, I am already having a good Christmas and that’s going to continue with lots of holiday picture taking that I’ll extend into the New Year.

From my wife, Linda and me, have a great Christmas and take lots of pictures.

My website is at www.enmanscamera.com

Printmaking – 10 Tips to Make Better Prints

Last week a previous PhotoShop student of mine stopped by my store to discuss printmaking. We talked about a lot about techniques, papers, and one of my favourite topics, how to make black and white prints.  Consequently, for this week I decided to pass along a summary of that discussion in the form of 10 tips for readers that should help them to make better prints.

1. I’ll begin with the most important tip for getting a good digital print, which is a good quality image. You will need a good original image in order to get top quality digital photography printing. It’s like the old saying, “garbage in, garbage out.”

2.  Learn to white balance your camera. Proper camera white balance means the camera’s sensor reproduces the “colour temperature” of a light source, or the relative warmth, or coolness of white light. Setting the camera’s white balance corrects all the colours in your pictures, taking into account the light in which they were shot.

3.  If you are using a DSLR (digital single lens reflex) camera be sure to clean the sensor regularly. Even if you never remove the lens, dust will get in and show up on your prints.  Some cameras have self-cleaning, but that doesn’t remove all the dust from the camera, it only shakes it off the sensor and it will eventually find it’s way back, so to make sure I regularly clean my sensor with a clean blower.

4.  Calibrate the computer monitor. Do this about every two weeks with a new monitor, and then every month or so after it is a year old.  Adobe Photoshop provides the Adobe Gamma Wizard or use a more a specialized product by Color Vision, Monaco, Digital Light, or other manufacturers.

5.  Choose a colour space for the camera’s image files.  The two most common with digital images are sRGB and Adobe RGB 1998.   Check the camera’s menu for that initial selection.  If you are making enhancements to your images in PhotoShop you will do better with Adobe RGB 1998; it covers a wider colour gamut.  Wider range of colours mean more precise colour adjustments. These are subtle.

6.  Improve contrast.  Photographs from digital cameras are sometimes pretty flat and lack the contrasts that were once provided by films like Velvia and Ektachrome VC.  If shooting JPGs learn how to use levels and curves. With RAW it’s easy using the sliders in Adobe’s RAW converter.

7.  Resize your image.  Choose a resolution from 250 to 300.

8.  Sharpen.  All digital images whether scanned, or direct from the digital camera, require sharpening for a satisfactory print. I leave my camera at normal and do the real work in PhotoShop. Sharpening isn’t all that hard, there are many ways. Just spend some time searching the Internet and choose a method that isn’t complicated. I like sharpening to fit easily into my printmaking workflow.

9.  Choose the right paper.  Just like traditional photography, the paper you choose to print with will make a big difference. In Photoshop select print with preview and choose your surface – matt or glossy.  Be sure to go on-line and download the correct profile into PhotoShop for the paper you are using.

10.  Set your printer’s driver.  To maintain the colour accuracy of your image, it is essential to set your printer driver correctly. When you are ready to print, select the print preview option in your file menu.  There are several steps – you should learn them by reading your instruction manual for your printer.   It is important to let your printer know the amount of ink for the type of paper and surface.

And lastly, after printing save those images on archival CDs, DVDs or on external hard-drives. Don’t make the mistake of leaving all those image files on your computer, that’s the best way to loose everything.  Cheap bargain discs will degrade with time. Don’t store them in the sun and don’t write on them.

I really appreciate your comments.

And my website can be found at www.enmanscamera.com

Grab your camera and go to the Rodeo

                                                                                                    I had finally reached Olympic games overdose. I enjoyed watching the Olympics, but in British Columbia, Olympics coverage was everywhere. Every radio station, television network, newspaper, and conversation had something about what was happening and I couldn’t get away from it. However, now they are over and I expect many (ok, I guess I’m included in this) might be going through some sort of withdrawal.


Well, for those who enjoyed watching and applauding athletes at their best I found a great way to get out of that withdrawal, however, they just need to be willing to get up off the couch and leave the comfort of their air-conditioned home.  Happening right now all over North America there is that time-honored tradition of the western Rodeo. Each year I look forward to the annual Prichard Rodeo. There are others all over BC that are worth attending, but I’m lucky because, “just down the road apiece” from my country home is the Pritchard Rodeo grounds.

As I strolled down the dirt lane to the bleachers, concessions, and rodeo arena, I looked around and could see some of my neighbors lounging in the fenced off beer garden, and others with their children waiting in the shaded bleachers. Then, of course, I checked out the photographers standing at the railing readying their equipment.  The first friendly face was local news photojournalist Hugo Yuen; we exchanged greetings, talked a bit before he left to get some of the participant names. He had a list to cover for his paper, so he was shooting fast and leaving.

I wandered on, watching photographers positioning themselves along the railing, I wanted to see what cameras they were using, and waved at the arena manager, Don Swift, as he readied participants and turned to see professional rodeo photographer Bernie Hudyma striding towards me. I knew I would see him there. He’s a good photographer and I always like to hear what he has to say. I’m sure many of the rodeo participants were also glad to see him arena side because of the pictures he will have waiting for them.


For those that haven’t yet photographed a rodeo, I’ll begin with the words, “Grab your hat and camera and do it!” You will have fun and get enjoyable pictures to share with friends and relatives.

Here one can see drama, explosive action, anticipation, heartbreak, defeat, excitement, athletic prowess, both male and female physical excellence, teamwork, sportsmanship and, of course, triumph. Then there isn’t, in my opinion, anything much better than attending a rodeo. And for those of us that are dedicated photographers, the action of a rodeo is the perfect way to spend the day.

My advice for first-timers is to get a DSLR. Little point and shoot cameras are great for taking pictures of family groups, and subjects moving slowly in one direction, but you won’t find much of that at the rodeo. When you shoot with the DSLR take the camera off the “P” mode and select  “A”, or  “S” mode if you own a Nikon, or on a Canon select AV or TV. Aperture priority means the photographer selects the aperture and the camera chooses the shutter speed. In shutter priority, it is the other way around, the photographer selects the shutter speed and the camera controls the aperture.

Fast moving, quick changing, rodeo subjects jump into the sky, quickly increase or close the distance from where the action began and, of course, constantly change the exposure by bouncing in and out of bright sun and deep shade.  While following the constantly changing scenarios it all happens very fast, and all one really needs is to control one part of the exposure equation.  Whether that is the shutter or the aperture really depends on what is important.

For example, when I am photographing the directional motion of horse racing or drag racing I prefer shutter priority. When at the rodeo I want more depth of field. That’s the field of focus in front of and behind my subject. Those horses and bulls move fast and I don’t want one moving out of my area of sharpness before I can refocus.

I suggest a zoom lens that goes to at least 200mm. Most modern lenses focus fast enough, following the action, and setting the focus takes a bit of practice, but there is lots of time to experiment at a rodeo, so just shoot and shoot and shoot. As I wrote, if you haven’t yet photographed a rodeo, grab your hat and camera and do it! Find a rodeo near your home and have fun.

My website is at www.enmanscamera.com

Cleaning Photographic Sensors and Protecting Lenses

I have been talking to photographers that have new DSLRs (digital single lens reflex) cameras from Christmas, and some that have even upgraded to newer models.

Those that are now out and about doing photography and tromping around in the already dry and dusty backwoods and fields nearby are wondering what they can do about the small black specks that are showing up in their pictures.  Those tiny specks mean there is dust on the camera sensor and it needs to be removed. My quick statement is don’t get upset, you don’t have to send the camera to the manufacturer’s repair centre. Dust is no big deal.

There has been lots of confusion, fear, and misinformation about removing specks of dust from DSLR cameras. I even had a fellow tell me that removing the dust would void a camera’s warrantee. Well, yes, that is so if he did anything to damage his camera’s sensor, but in most cases cleaning the sensor is pretty easy, takes only a few minutes, and since one rarely needs to come in contact with the sensor there isn’t much chance of damage.

Even those cameras equipped with vibrating sensors that are intended to remove dust from the visible shooting area could still have dust accumulate in the chamber behind the lens mount and it takes almost no effort every now and then to just blow them out with a large blower.

Many photographers (and I was among that group) thought it was OK to go on using old blower brushes, that have been languishing in the bottom of our camera bag for the past several years, which are designed to get dust off a film camera’s reflex mirror. However, what we discovered is that we were blowing years worth of old dried up bits and particles from a deteriorating blower onto our sensors. My advice is to discard them. Modern blowers like the Gittos Rocket Blower are inexpensive, work great, and are a good addition to everyone’s camera gear.

As I just wrote, it is easy. I give my camera a quick once over before every important photography event.  My personal method is to remove the lens, and turn the shutter dial to the lowest speed until the word “bulb” appears. Then hold the shutter release so the shutter will open showing the sensor. I hold the camera mount side down and using my large rocket blower, blow into the opening in every direction. Then replace the lens that I have also gone over, blowing off dirt and dust with the blower. Next, go outside aim at the blue sky and make an exposure. (I put the lens on manual so it doesn’t hunt for something to focus on.)  Then I check that exposure on my computer, and if there is still dust visible, I do everything again.  Please note that many cameras have a cleaning feature that will lock the shutter open. Check the camera’s manual to use that. I guess I am just lazy; selecting “bulb” is quick and easy.

There are special brushes and procedures for cleaning sensors that have particles that are stuck. I have two brushes from http://www.visibledust.com. However, during the years I have been using digital cameras I have rarely needed to use them. For those that do worry about continually doing photography in dusty locations and want the latest cleaning technology check out VisibleDust’s website.

There also are photographers looking for accessories like protective filters and lens hoods.  Protective filters have come a long way. At one-time photographers attached UV (ultra violet), or skylight (or haze filters) onto our lenses to not only prevent scratches on the front glass, but to change the way the light affected the film. There were several levels of UV and skylight filters depending on how much one wanted to reduce the blue light of early spring or high mountain locations. Today’s digital cameras and post-production programs easily correct the colour balance of different lighting conditions, so photographers really don’t have as much requirement for the colour correcting filters that were a must when using film.  I think those old filters aren’t used so much as filters as they are for protection of expensive lenses from damage.

Depending on where one receives advice they may be told not to put them on lenses because they aren’t up to the “quality of our lens glass”.  I recall the quote that has been around for as long as I have been making pictures, “Don’t put a ten dollar filter on a thousand dollar lens”.  That sounds like good advice, however, it usually comes from those who have a lot more money to spend on new lenses than I do.  However, I keep protective UV, skylight (or haze), or clear “filters” on all my lenses as I have seen too many photographers walk into my shop with scratched lenses that they cannot afford to replace.

As I write about these things, I urge readers to consider providing additional protection (other than a padded case) for lenses. For that, another useful apparatus to protect lenses is a lens hood.  The lens hood not only takes the front impact of a dropped lens, it blocks the glare from the sun and other reflective objects.  I recommend using a lens hood because of that light-blocking feature.  Light coming from the side, above or below can either cause a flare, or actually reduce contrast in pictures. Some lenses come with lens hoods, and that’s great because it means they are fitted so they don’t vignette (darken) the corners of wide-angle lenses.  Most lens manufacturers have lens hoods that are optionally available for an additional cost, but also there are non-specific, inexpensive, rubber hoods that fit the front of the lens filter threads. The rubber type folds back out of the way when it is packed away in a tight fitting camera bag.

I recommend that readers purchase lens hoods, filters, and blowers. The protection from dust, scratches or even broken lenses is worth the investment.

www.enmanscamera.com

Talking about cameras

I am still a bit surprised when people inform me they have decided to keep using film cameras in this day and age of high-quality digital camera image output, and that is just what I was told by a couple last week.  Of course, my response was that they should use whatever makes them comfortable. 

 I find that many photographers using film want to offer a rationale for using film and make statements like “this camera has always taken very good pictures”. I suppose that’s a rational statement, however, but the difference between digital and film is like driving an old 1970 Ford sedan and the newest Ford hybrid model across Canada.  There is a lot more performance, comfort and options available for the operator of the newer model so that the experience can be more pleasurable and certainly more efficient.

 This couple were so emphatic about how great their old film cameras produced pictures that I assumed they do their own darkroom work, but they take their film into a lab that processes it, then scans it to a computer, then with predetermined settings the computer makes the desired print sizes. Hmm, not much photographer input there and most of the process seems to be digital technology. Oh well, at least they are taking pictures.

 I do believe that digital camera users become better photographers faster because of the instant reinforcement of their camera’s LCD, then again because it is so easy and quick to check images on a computer display.  Last Thursday my shop was filled with people discussing equipment. I have to mention that just before I talked to the film camera couple, I had been discussing digital cameras, but the question was “ What’s the best digital SLR camera, what do you like?”  Well, I like them all.  I haven’t had the chance to try every new camera out, but from my reading I think Nikon, Canon, and Pentax all have excellent products.

 My advice was they should first decide what they had available to spend, and then decide on how they like to shoot: sports, landscapes, family and so on. Of course any camera will do everything, but some are better for sports and some won’t hold up to the elements if packed on your horse or bounced around getting cold on the back of a snowmobile. My suggestion was before they choose to do some research before they buy.

 But film? Well if one is into “retro” or likes to experiment with technology from the past picking up an old film camera and the equipment for processing and printing doesn’t cost much and might be lots of fun.  However, for those like me that are dedicated to producing quality photography I would, of course choose a DSLR (digital single lens reflex) camera.

 
www.enmanscamera.com


The photographer asked, “Is it time to upgrade my camera?”


In the previous era of film cameras many serious photographers would come to a point when they would consider whether to upgrade from an automated point and shoot type camera to a 35mm interchangeable lens SLR (single lens reflex), or trade in the 35mm SLR for a medium format 120mm camera, and maybe even to take the climb to a 4X5 view camera.

For film-based cameras it was all about the size of the film and bigger was better.  I recall feeling bad for those people that had friends photograph their wedding with a 35mm camera at a time when quality wedding photography was really only produced by photographers wielding medium format 120mm film cameras.  If one wanted a colourful, sharp, grain free enlargement then 120mm or larger was a must.

What do I now say to a photographer that is considering a more serious approach to photography?

I will always begin with the question, “what are your interests and what subjects do you like to photograph?”   My short answer for digicam users is if sports, fast action, wildlife or enlargements bigger than 8×10 are the goal, then, yes, get a DSLR. DSLR cameras don’t have shutter lag when the release is pushed so sports photography is easy. Fast action demands a camera that can adjust shutter speed and aperture. Wild life photographers prefer a selection of super telephoto lenses that can be changed at will, and printing quality 11×14 or bigger enlargements are best produced with sensors that are considerably larger than what digicams provide.

Digicams are perfect for intimate, candid shots of family and friends. The compact size lets one put them in a pocket and go, and if used correctly and within their limits they will produce excellent images.   However, if photographers feel they have reached their camera’s limits then it is time to move on. So the question is what is the best choice for a first time DSLR?

For this discussion I will put DSLR cameras in two simple categories, amateur and professional.  The difference between amateur and pro cameras has surely become hazy. If I were to offer a short comment I would say the most obvious difference is durability.  Pro cameras feel sturdy, are heavy and sealed against the elements. When dropped, they bounce and usually don’t break, and even with hard use will last a long time.  The amateur camera generally has lighter weight and smaller size.  When the first DSLRs came onto the scene there was definitely a difference in the quality of the images between entry level and professional level cameras, but that is not as distinct now. The technology for sensors and in-camera processing has rocketed.  The latest entry-level model may well have the same sensor as the previous summer’s expensive pro model as the technology is transferred over.  The main difference is in the weight, substance, durability, and controls.

The new models are always being introduced, with that many previously great camera models will be reduced in price, or discontinued, and very soon there will be some great opportunities to purchase at reduced prices.  As always there will be a flurry of megapixel chasers that change their camera with every new model upgrade, making used cameras available. There are those people who will not buy a used digital camera and that is OK, however for those who are interested how does one know what is a reasonable price?  The easiest way is to go online and check out the sale prices at the big photography retailers for their new and used equipment. Know your prices before buying that camera from a good friend or family member and remember the money that you save can be put towards equipment like lenses and a good flash or tripod.

Whatever the camera availability, my advice to those photographers asking the “upgrading” question is to consider what kind of photography they want to do. Talk to other photographers about the cameras that are interesting, go on line and check out the many photography forums to find out what others with that same interest are using, and attend some classes. 

Using a new camera is always fun and I believe learning how to control the technology a new camera offers is like a shot in the arm that gets the excitement going and helps ultimately to make better photographers. 

www.enmanscamera.com