Photographing Small Towns

1.The main street 2. town clock 3. out to dinner 4. barber shop 5. gallery 6. church

The pictures I see of cities and towns are usually of exotic locations, and show glamorous and architecturally interesting buildings. I admit that I enjoy photographing cityscapes and easily loose track of time when I am left to wander about on my own in just about any high-building packed city.

Recently, I have been fortunate enough to view the colorful building photography by Australian photographer, Leanne Cole, at http://www.leannecole.com.au and French photographer, Mathias Lucas’ architectural work at http://mathiaslphotos.wordpress.com.  Both photographers got me to think about winter building photography, but, for me, it is a drive of many miles from my rural home to a city with tall buildings.

I wondered about small communities that are scattered along the Thompson River valley. Most aren’t glamorous, or exotic, and although there might be some architecturally interesting buildings left from bygone times, they are often treated by most travelers as convenience stops on the way to somewhere else.

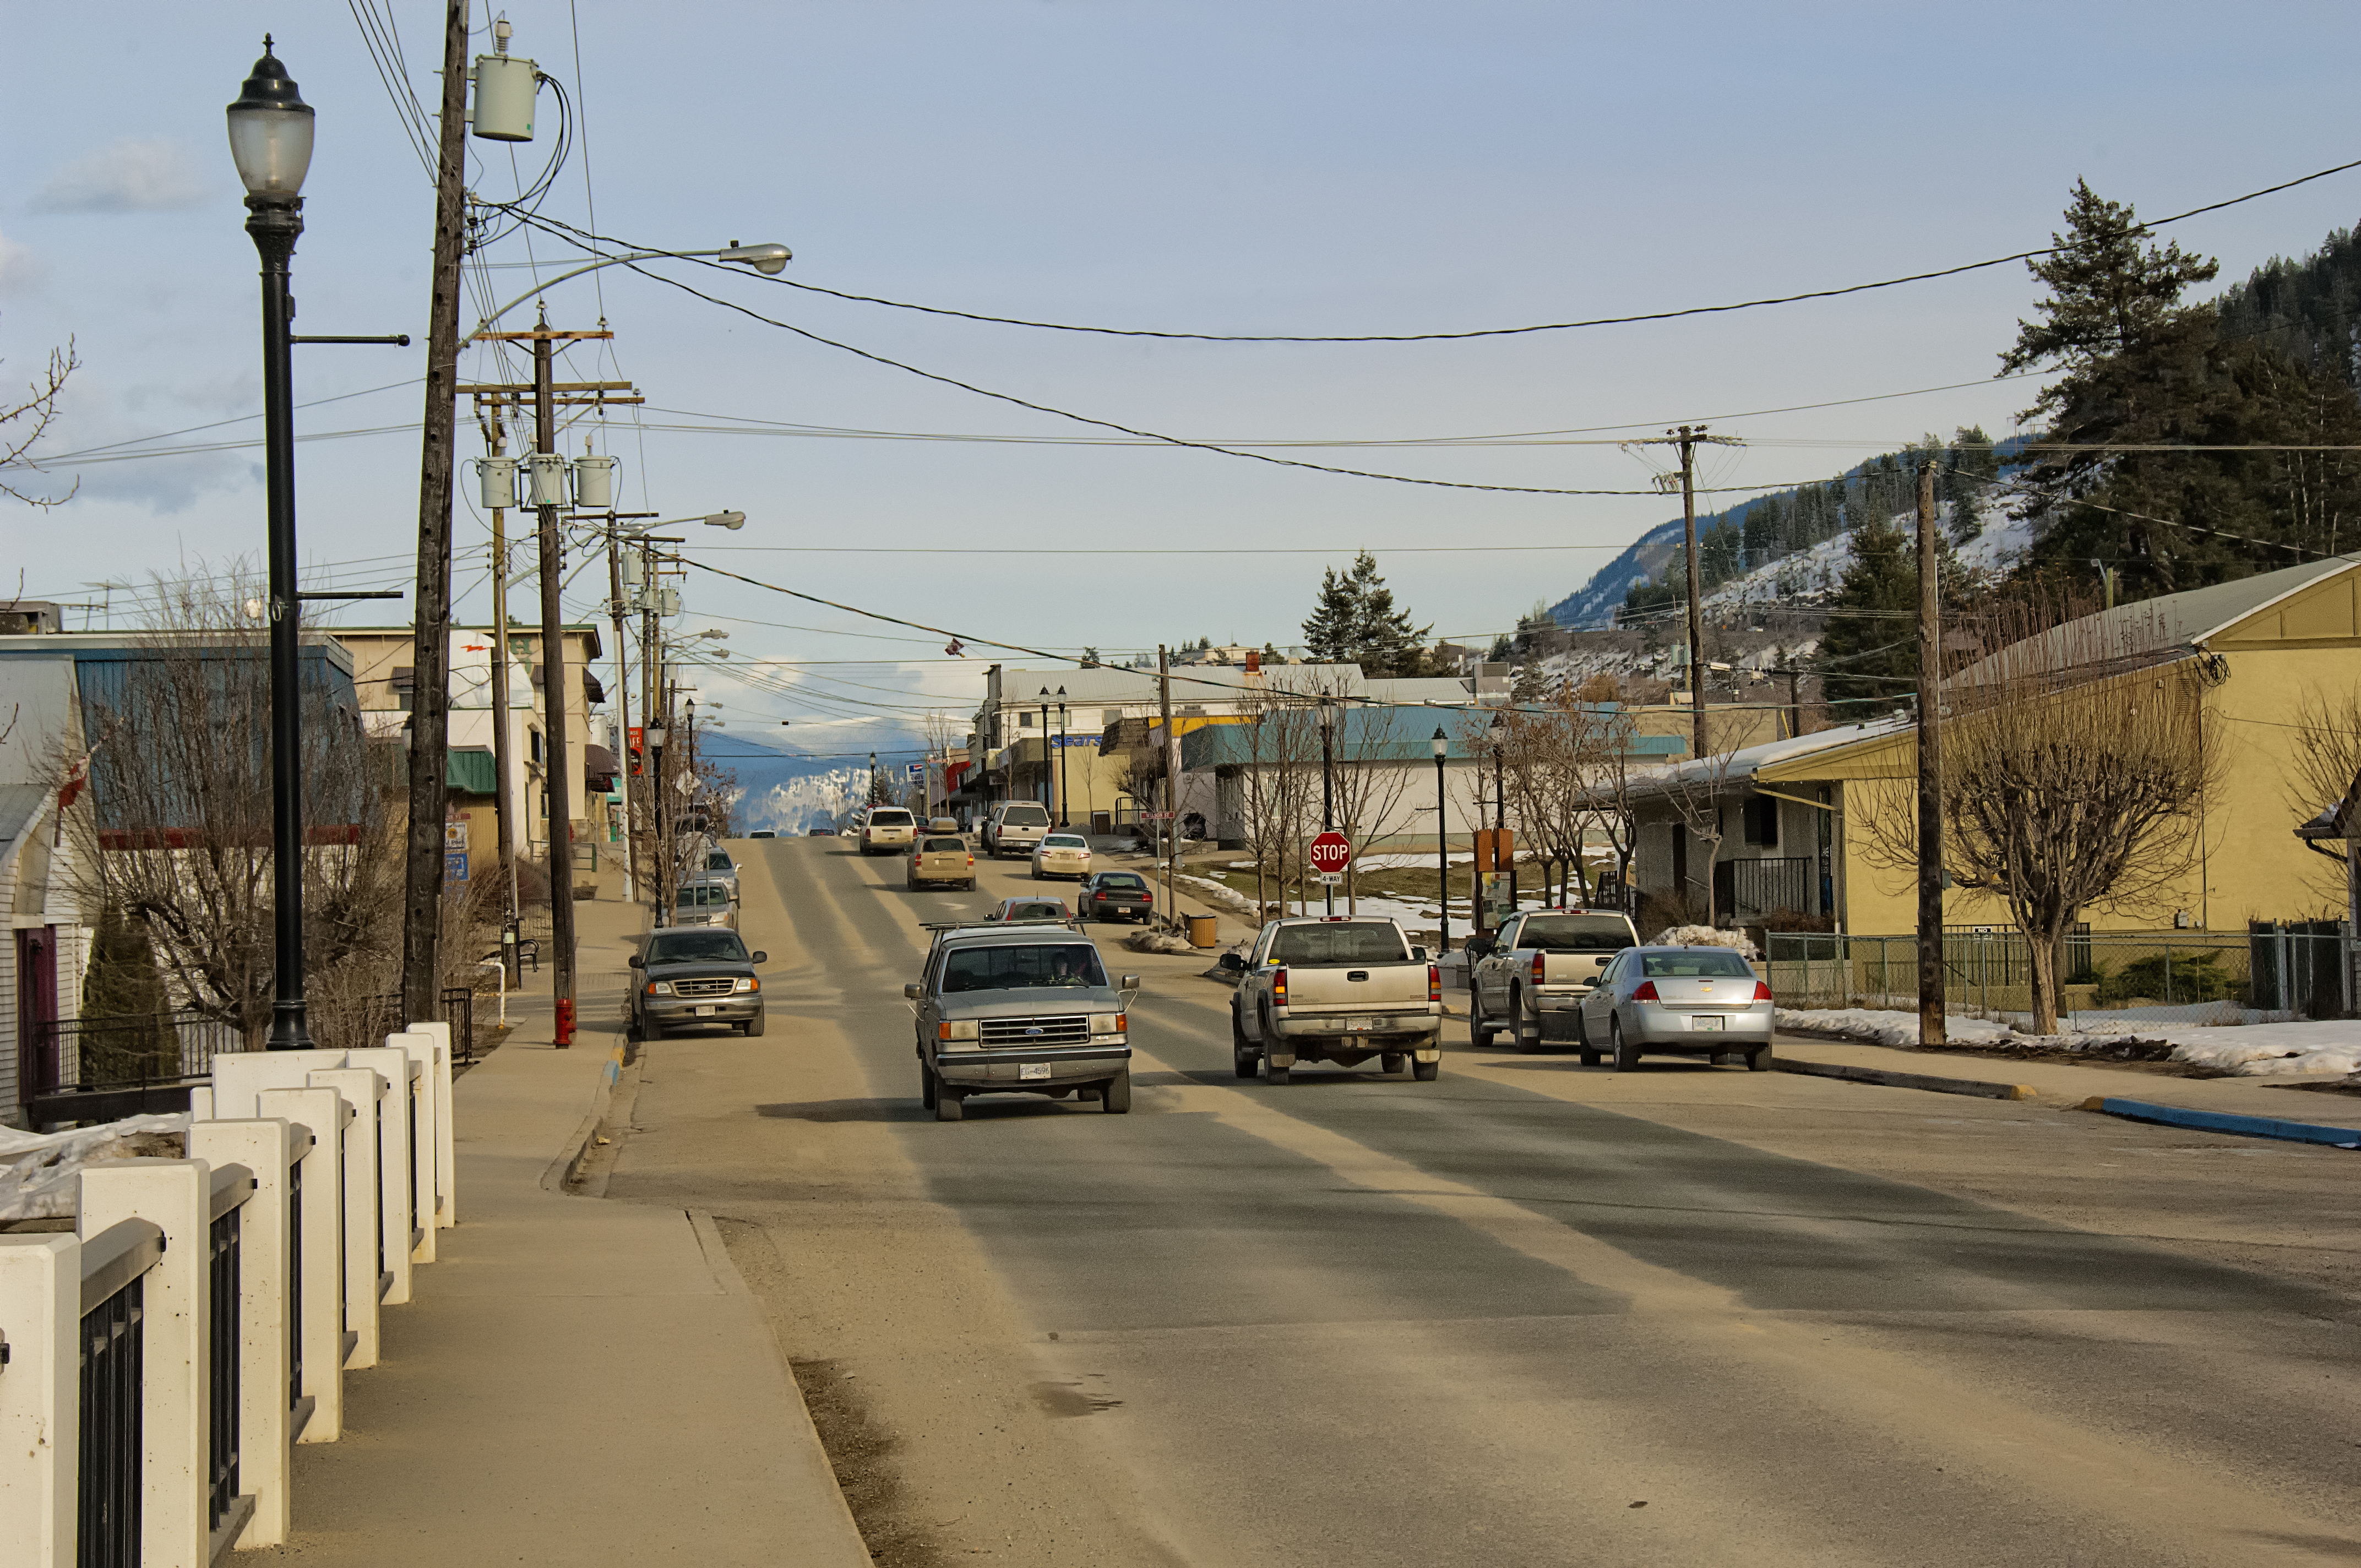
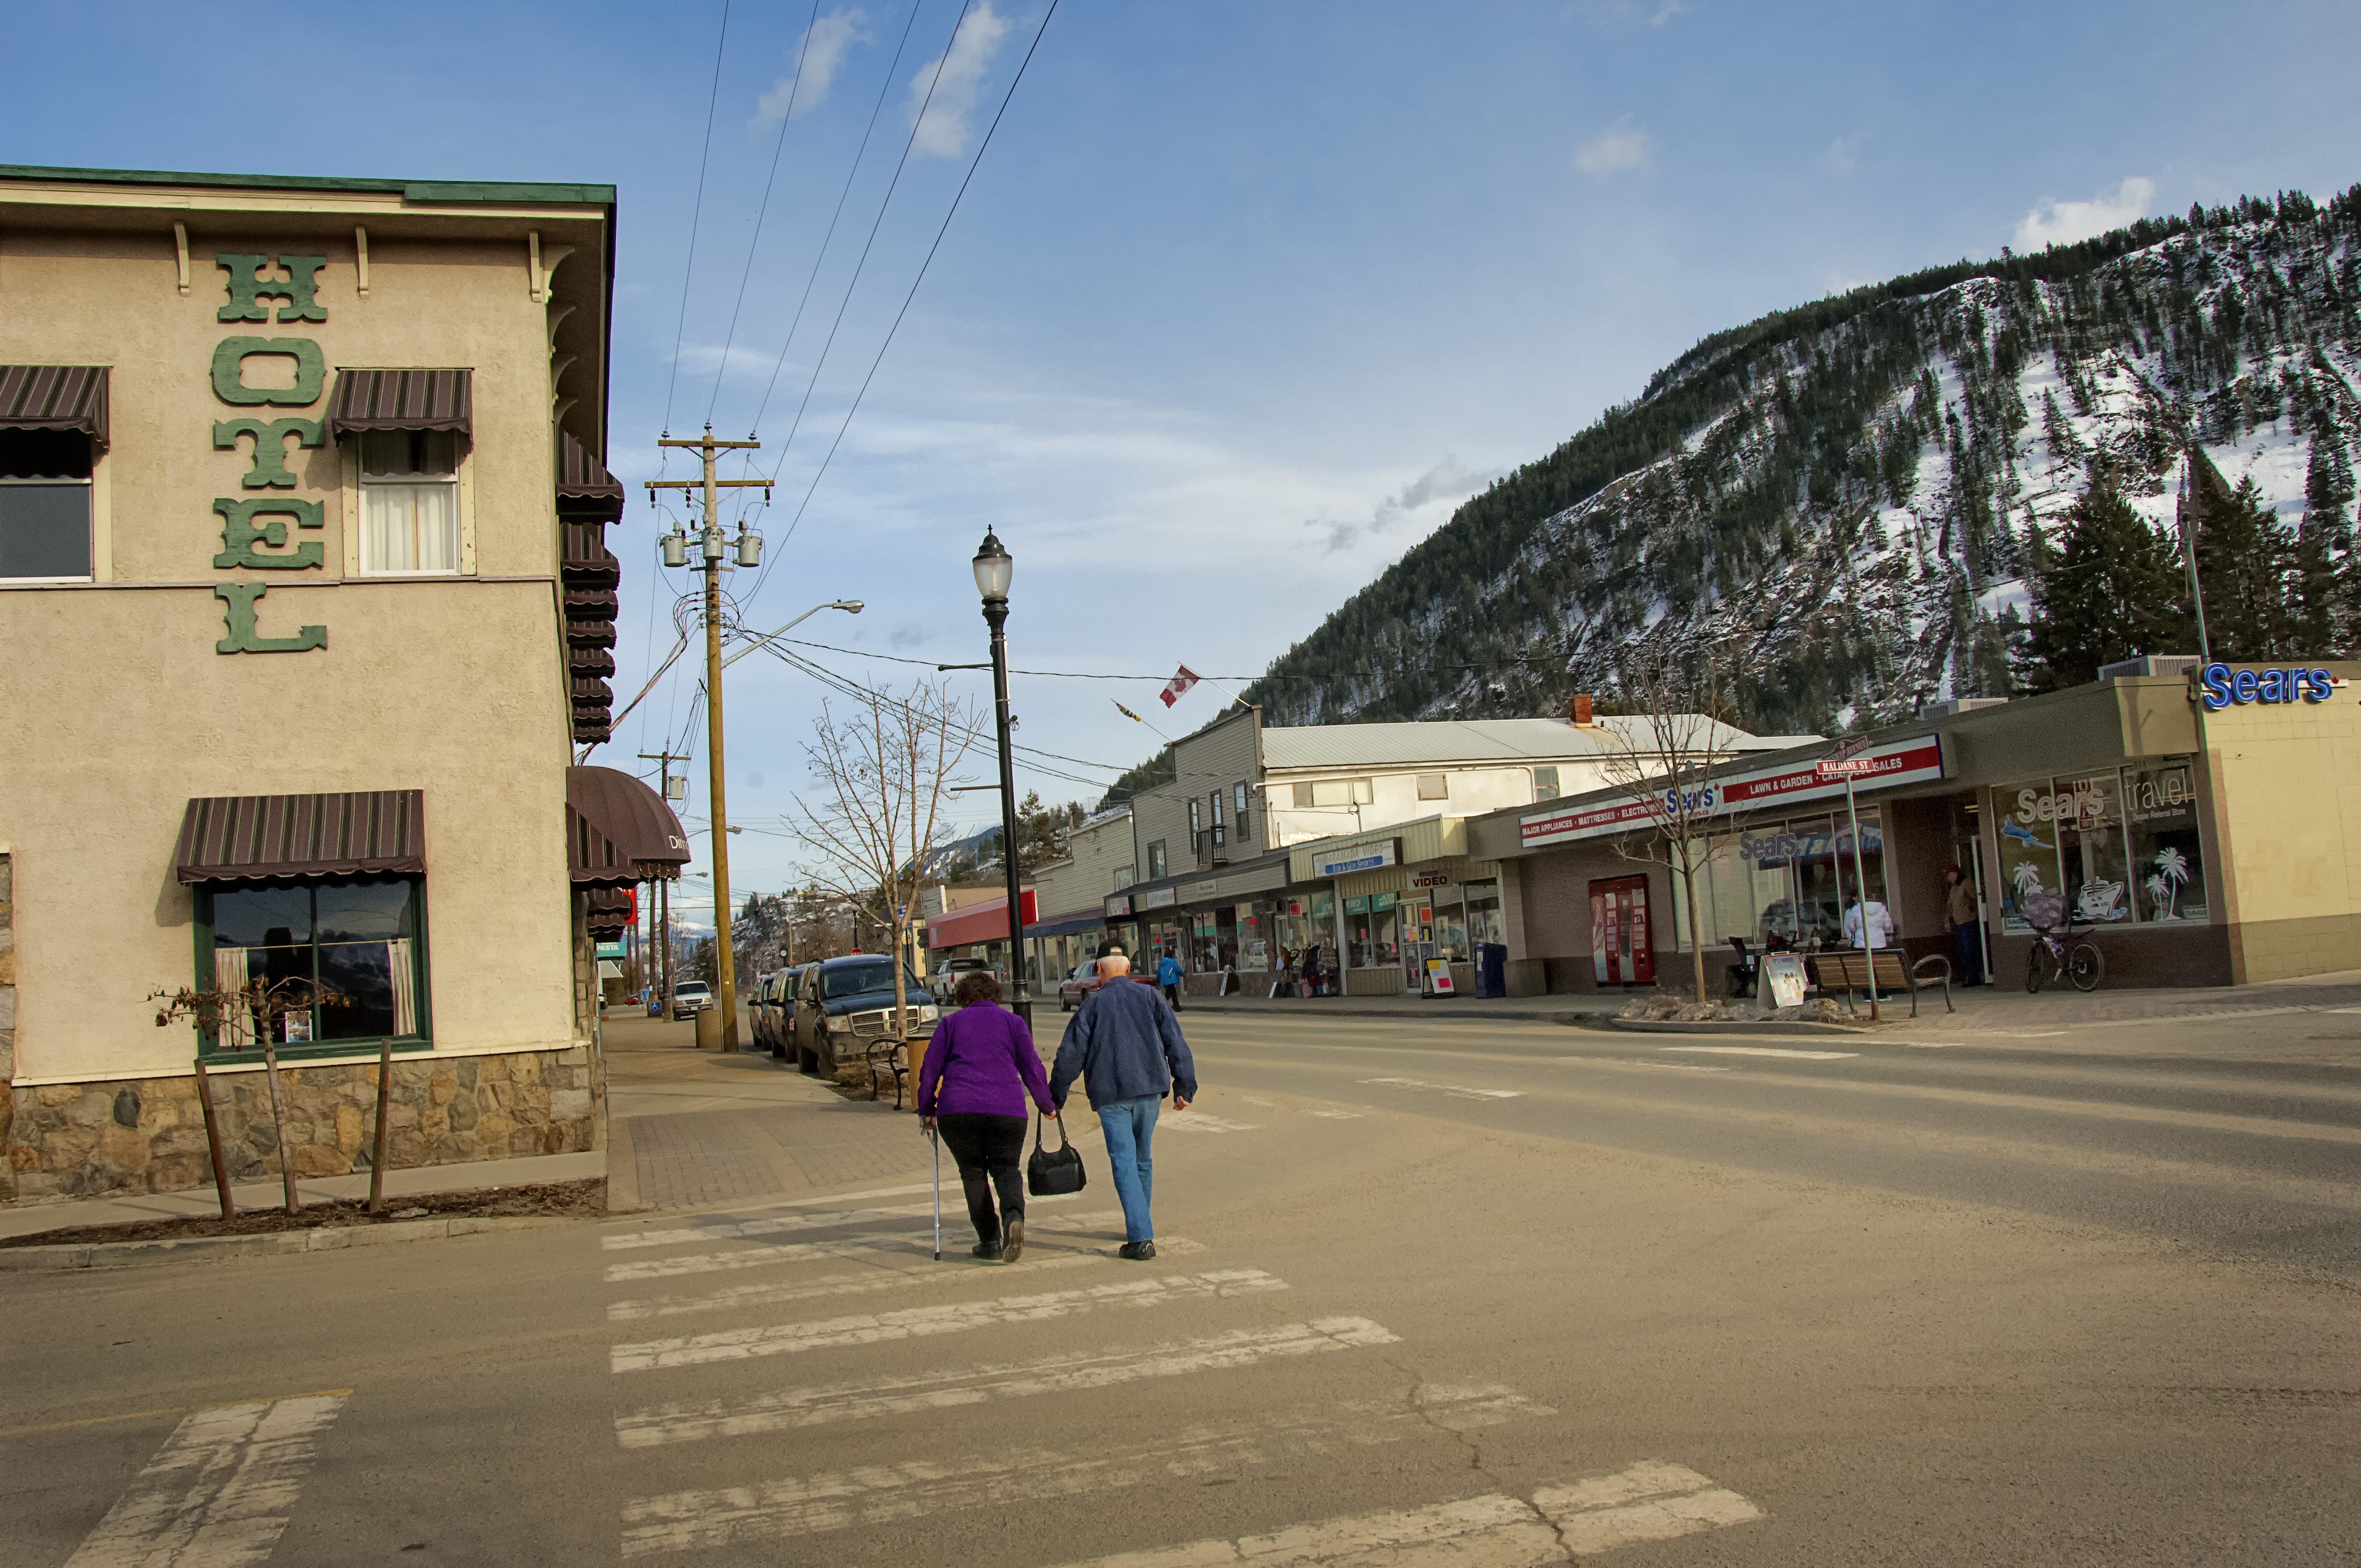
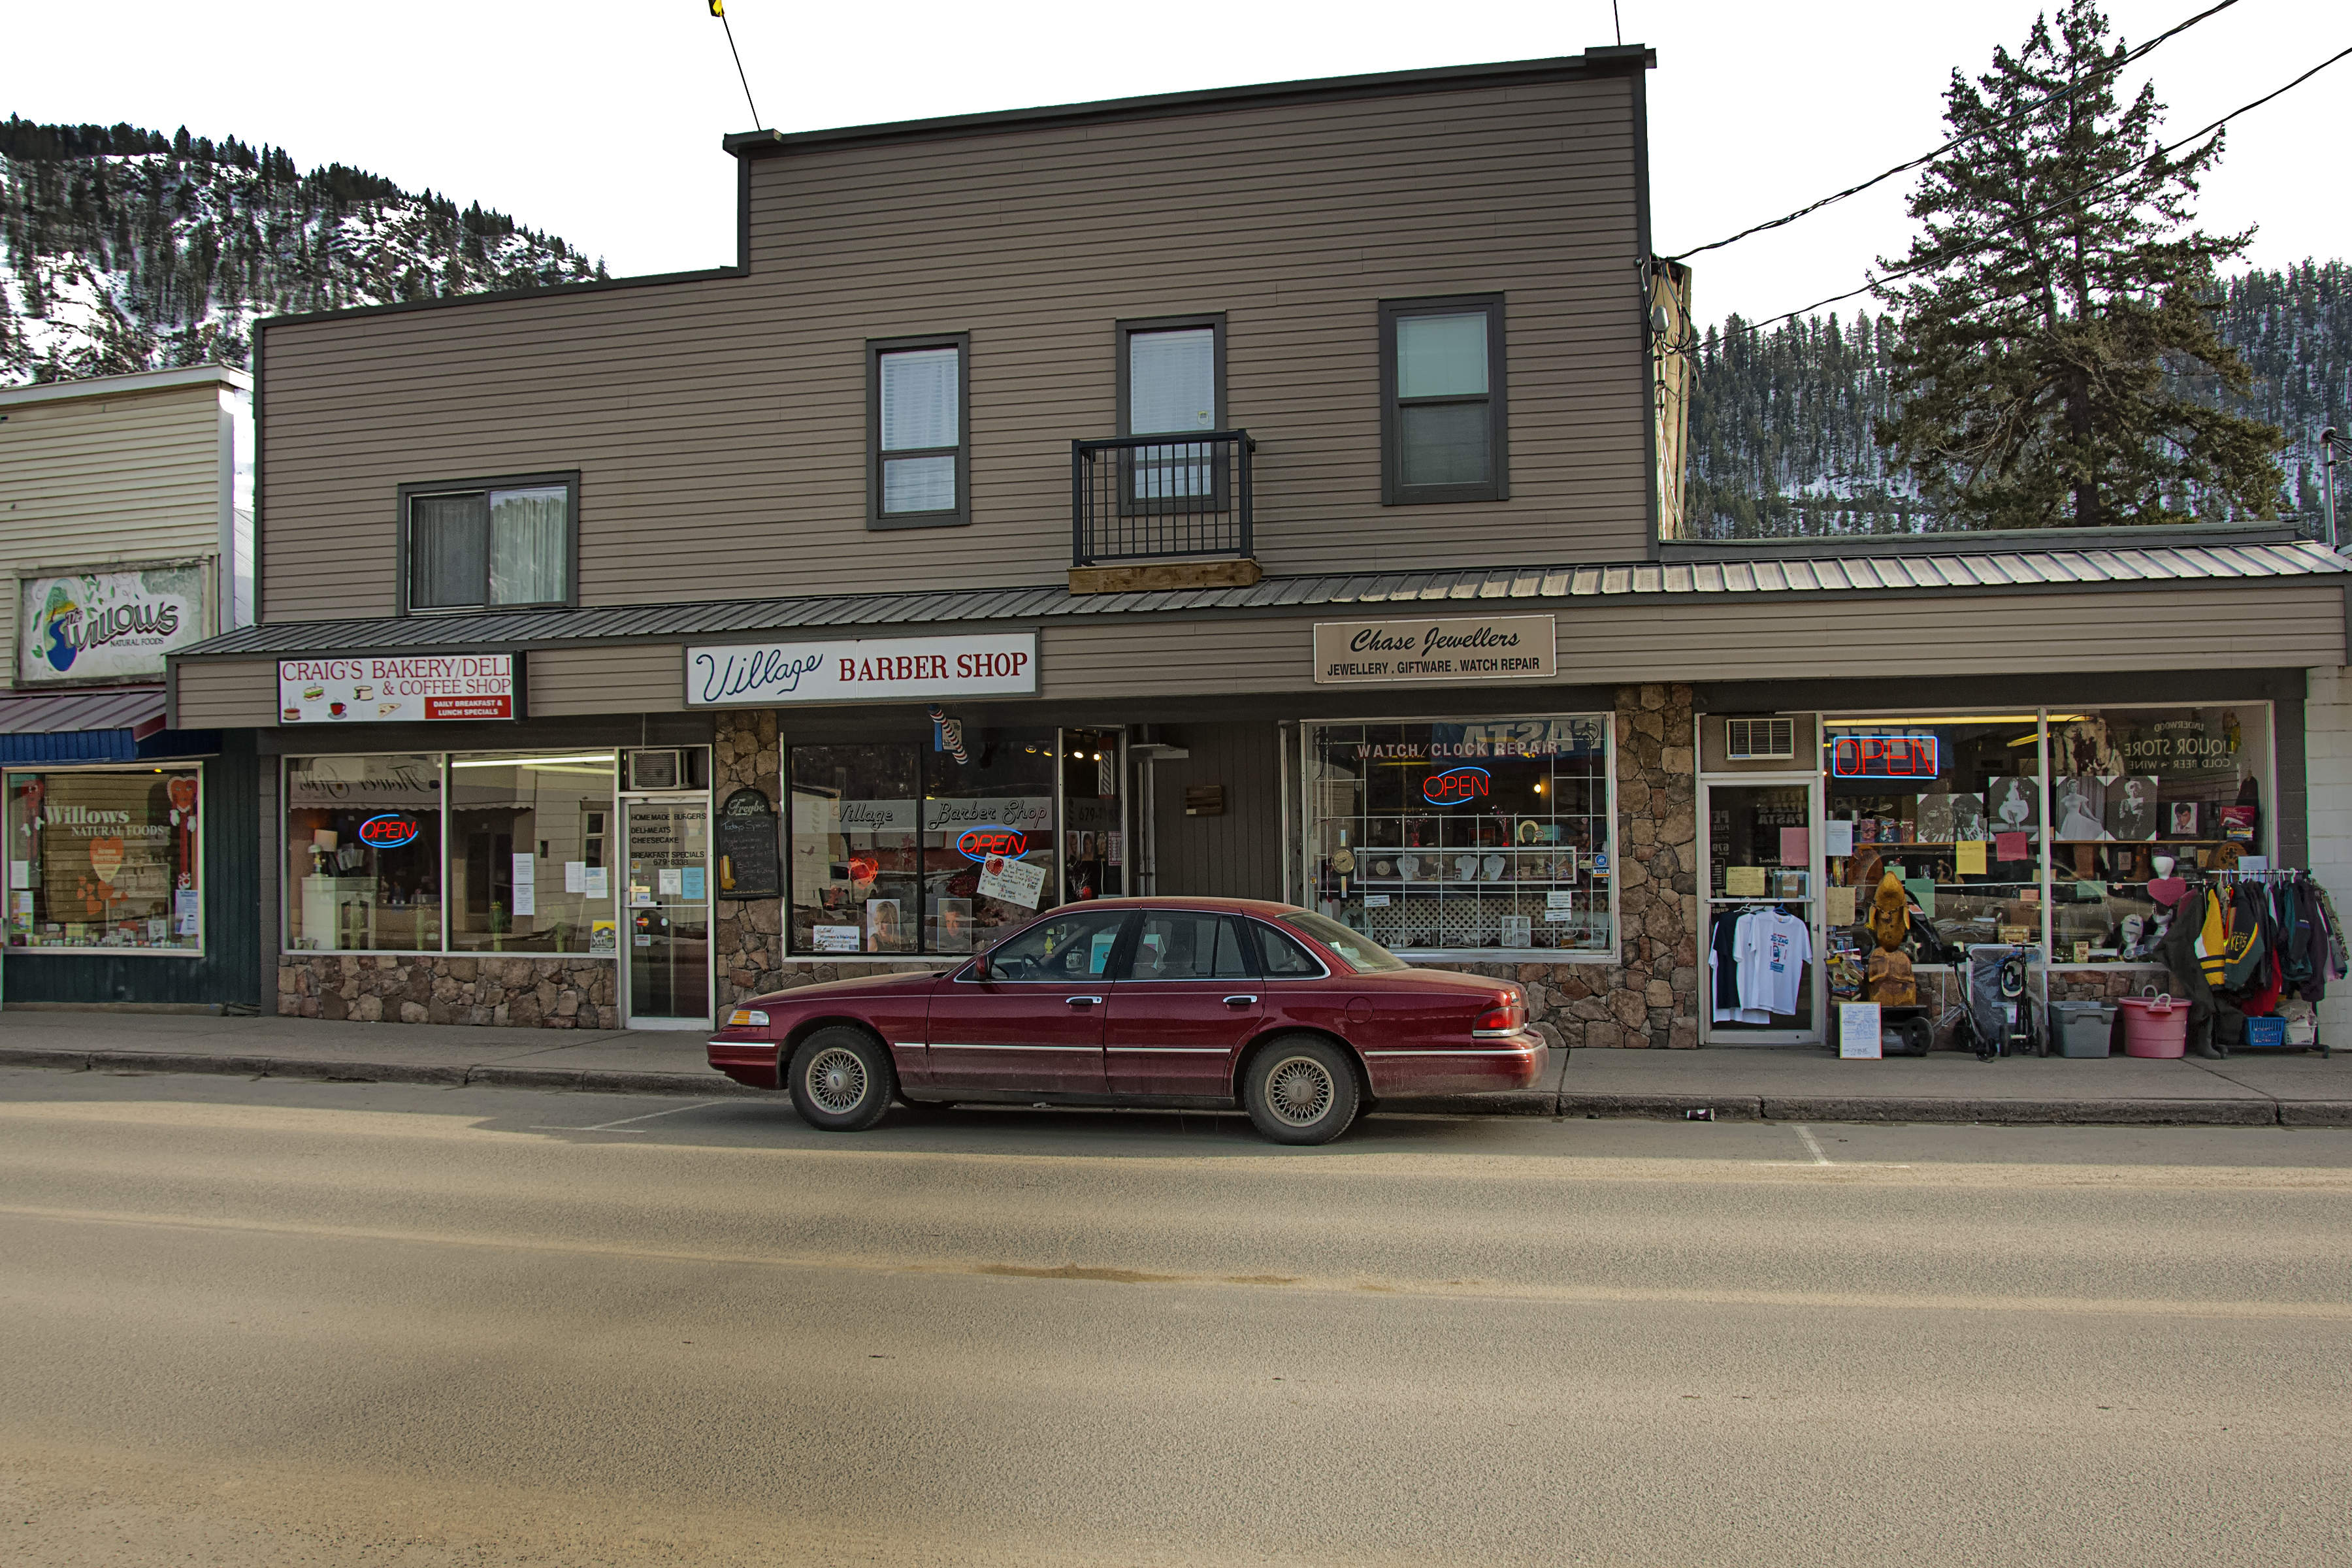
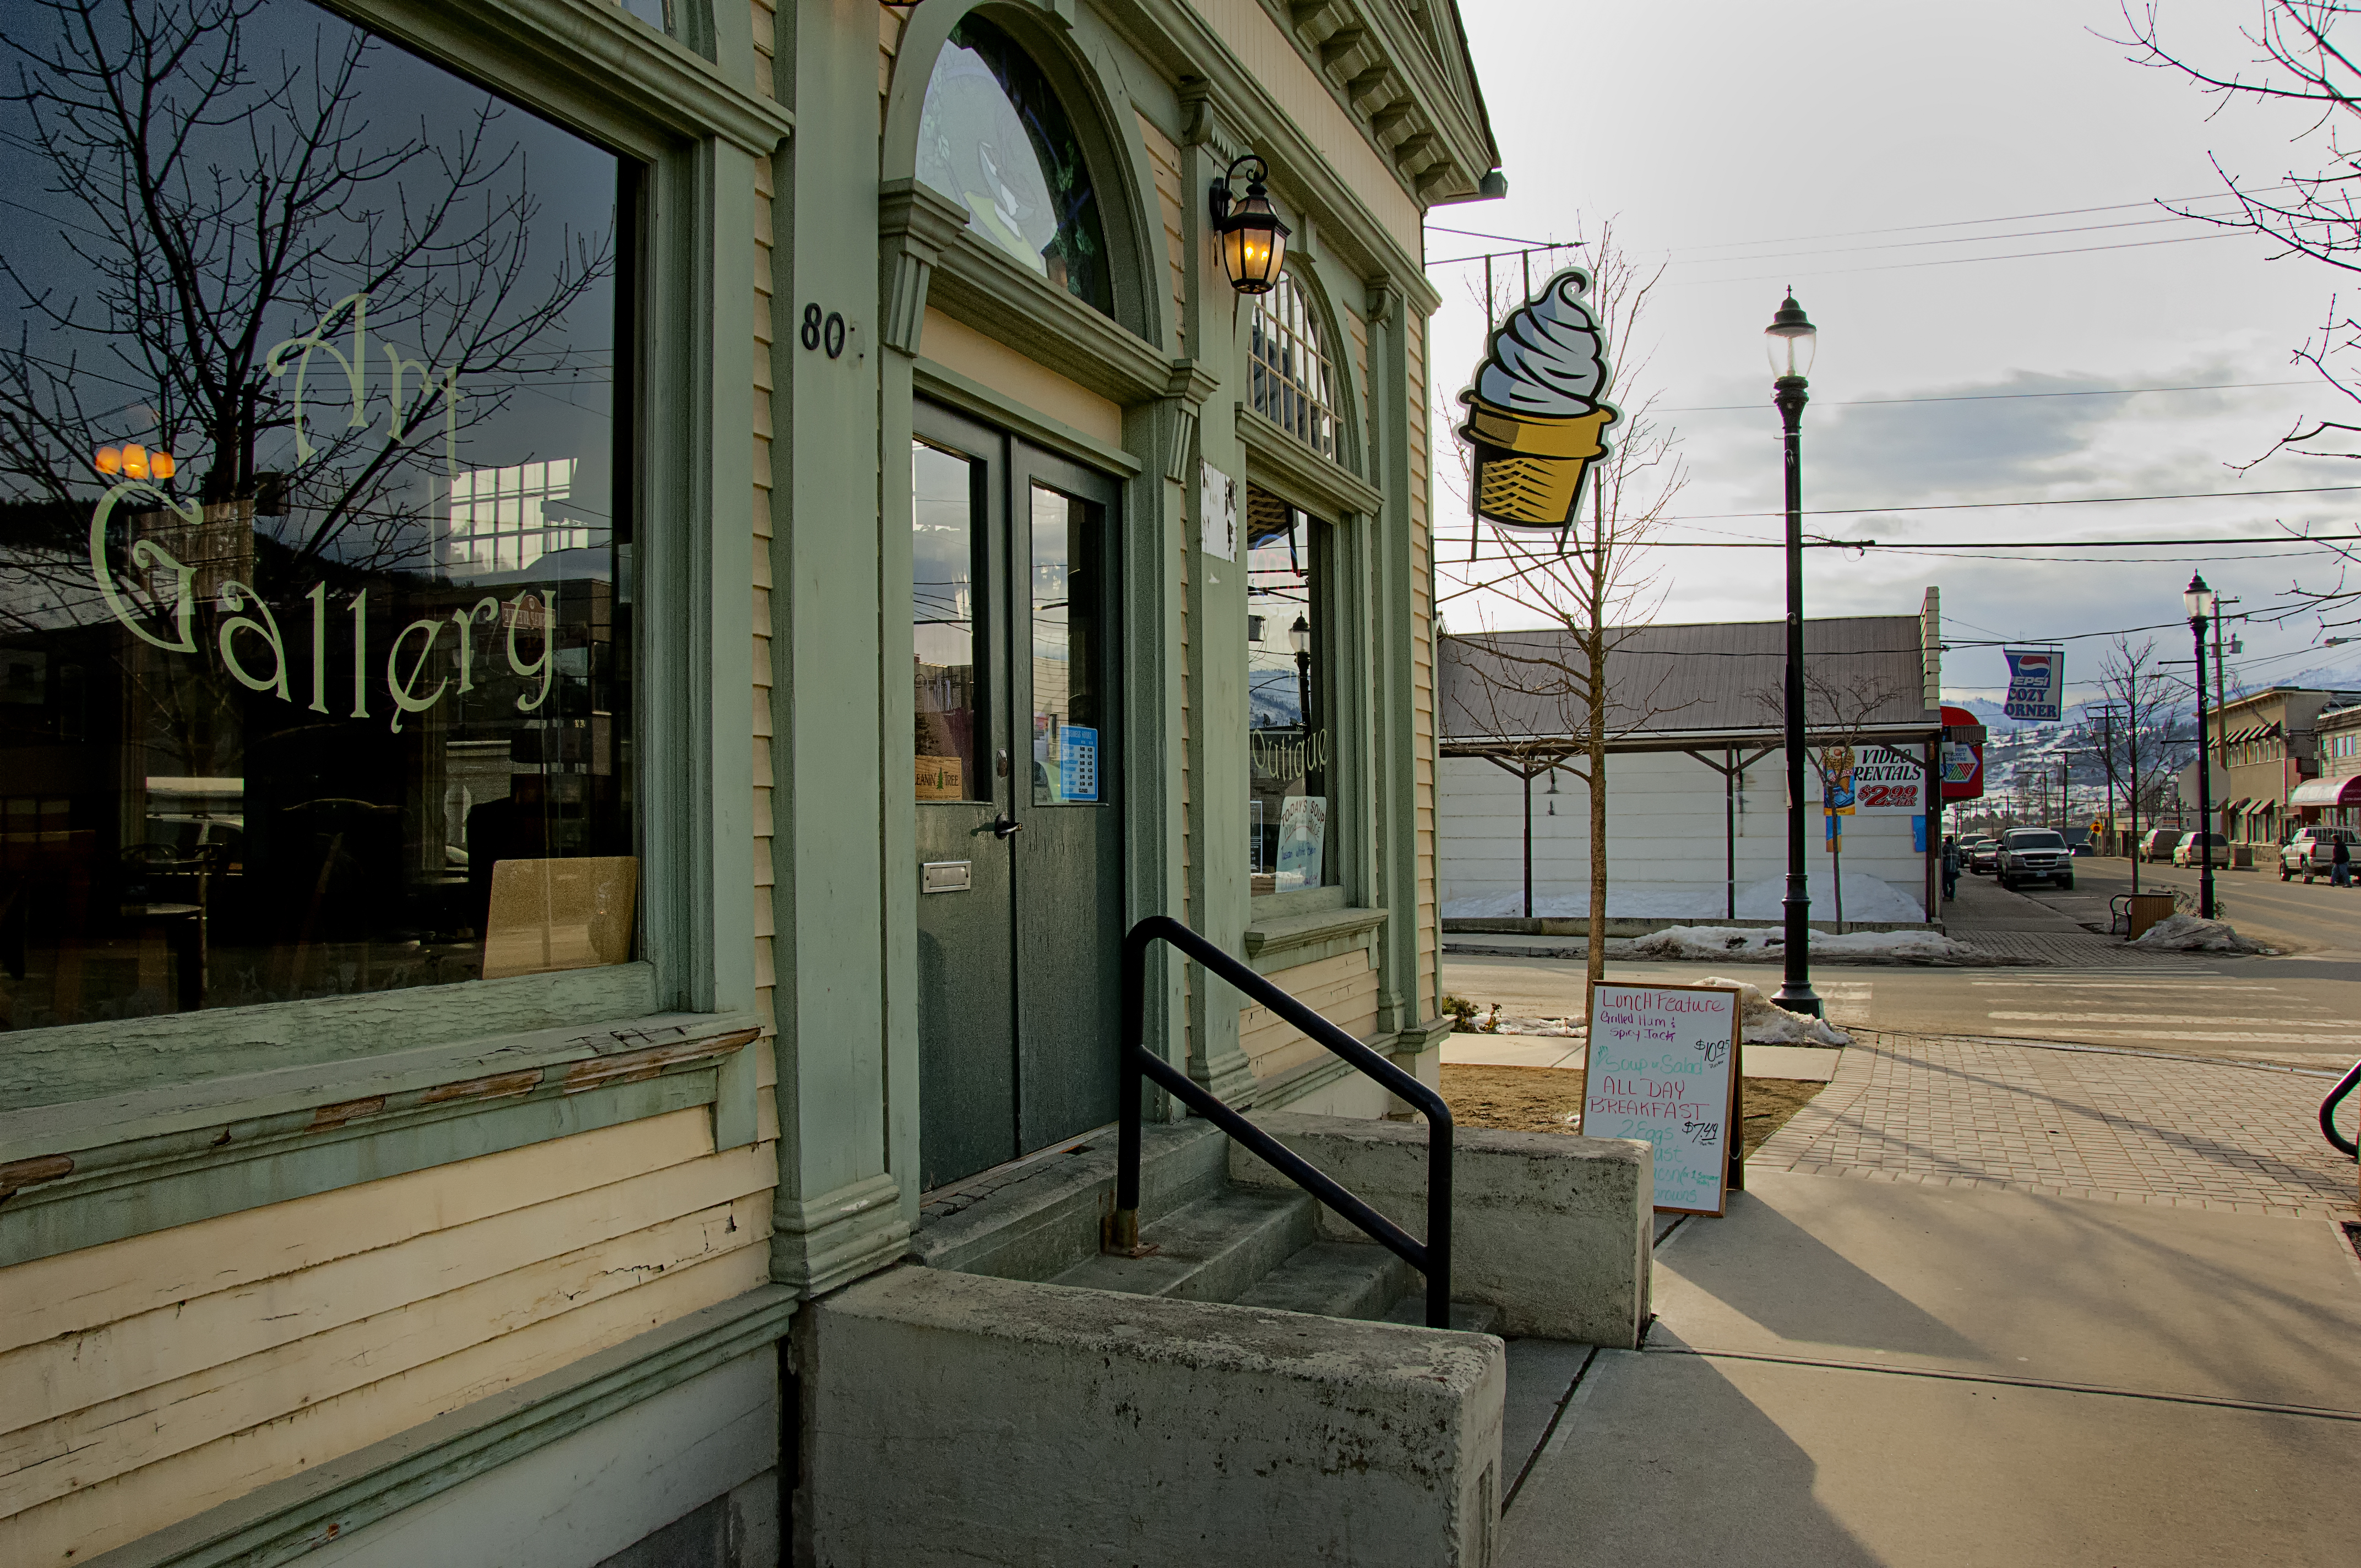
Not far from my backwoods home is the small lakeside town of Chase. When photographers go there they pass through the town center  with barely a glance on their way to the park beach and boat pier. The single-street town isn’t really significant to view with its single story, flat-topped, mostly featureless buildings, and I go to Chase as a place to get something forgotten from my main shopping trip to the larger city of Kamloops where I work.

I sat looking at Lucas’ and Cole’s engaging building images, and even searched out some of my recent files from my October trip to Victoria, British Columbia, and wondered if I might be able to make some interesting photographs of that little village up the valley.

The day had climbed above freezing with some patches of blue sky. I mounted an 18-200mm lens on my camera and headed off on the short drive along the Thompson River to Chase.

My choice of an early afternoon, midweek day was perfect. There were a few vehicles parked at the city curbs, the traffic (unlike on a weekend) was light, and I could easily walk across the street anytime, and I even stood center-street for a few shots.

I took my time wandering along trying different angles, exposures and took more than one shot of each scene choosing different cars, trucks, people and buildings in my quest to make interesting images of the village. I always can tell local residents. They are the ones that don’t mind a photographer, smile, and say hello as they pass. Tourists seem impatient, avert their gaze, and quickly walk past as if my camera is stealing something.

Photography in larger centers is easy, sometimes overwhelming, and always exciting. However, one has to get in the mood and culture when photographing small towns like Chase. I suppose it’s all about trying to observe the town with a thoughtful attitude.

I found a quote by iconic documentary photographer Elliott Erwitt that seemed to fit what I hoped to accomplish as I made images in that small town, “To me, photography is an art of observation. It’s about finding something interesting in an ordinary place… I’ve found it has little to do with the things you see and everything to do with the way you see them.”

I made lots of pictures of that small town for this article and included only those that showed the village in its valley location. In any event, I was pleased with the results of my adventure in Chase. In my experience going over ones pictures with a fresh look days later is always a good idea and I intend to do that and may post them sometime later.

I know there are many photographers living in the towns along the British Columbia, Thompson River valley; yet, I rarely see creative work showing the places they live. For years I have attended local art shows that always include local photographers who try their best to produce art-worthy images, but I can’t remember seeing any depicting Chase or any other small city here in the interior. I suppose we become too familiar with our homes and don’t take the time to observe and photograph an interesting view that comes from an ordinary place.  I encourage readers to take a new look.

I always appreciate your comments, Thanks

My website is at www.enmanscamera.com

Metering to Achieve the Right Exposure

I was leading a workshop about off-camera flash and had been discussing lighting. I paused and to make sure everyone was following and asked if there were any questions. One participant responded, “I don’t know what you mean by metering each light differently?  What is a meter?”

Caught off guard, I replied, “It’s how you get a proper exposure”.  He blankly looked at me, but fortunately, before I confused him more, another in the class said, “no, he means in his camera”.   I realized he had just asked a question (maybe one of the most important of the day) I should have anticipated early in my lecture.

Today’s high tech cameras are wonders at balancing all the light in a scene and many photographers unfortunately choose one of the programmed modes, point their cameras, release the shutter, and never look at anything on the camera but the LCD again.  Even using a flash, just the right amount of light almost always seems to be perfect. However, if we want to control and master light, whether it’s the sun, a reflector, a camera mounted flash, or off camera lights, we need to understand how that light is bouncing off the subjects we are about photograph.  Why would we bother when these newfangled cameras are marvelous?

That photographer in my lighting workshop had never used his camera on anything but the Aperture priority mode. That means he selected the aperture and the camera’s computer selected the shutterspeed.

In this workshop we were directing one flash to brighten the background, one to create a highlight on the subject’s cheek, and another high to the front as main illumination. Each of those lights had different intensity, and it’s the meter (consider it a tool) in the camera that we use to easily tell us what each individual exposure is so we can control the image.

Here is an example of critical metering I wrote about on 6 September; “The guest had a perfectly good camera, but criticized it, and said he wished he had a better one because the backlighted couple we were photographing were being recorded as silhouettes.”  That photographer had his camera set on a program mode and was of the belief the camera was capable of solving the high contrast lighting.

The camera’s computer couldn’t determine correct exposure with a strong changing backlight, and since he didn’t know how to use the camera’s meter all he could do was claim it was the camera’s fault.

On that day I began by metering to determining the overall exposure. I started with an ambient exposure, and by reading my camera’s meter, I decided to stop down enough to make the ambient backlight an underexposure, then added a flash slightly off camera which brought up the luminance of my subject so that, unlike that confused photographer that didn’t use or pay attention to his meter, I ended with a very usable photograph that didn’t need to be saved in postproduction.

I prefer using my camera on manual, but in both situations those photographers could also have used their camera’s Exposure Compensation (EC) feature. EC works great, and worth reading the instructions to learn, but for the application at my workshop, and at that fast moving outdoor wedding I prefer the “M” or manual mode. However, I must admit that although I like using exposure compensation, as it is fast and efficient, I get involved thinking about other things and forget to reset the EC. Staying on manual, and using the meter display at the bottom of my viewfinder helps me to remember.

Using the metering tool determines how the camera sets exposure, and today’s cameras make it easy for the photographer to choose a metering mode for the shooting conditions. Understanding the meter tool allows for control over the different exposure modes that determine how the camera will set the shutter speed and aperture.  I can only stress that readers who have DSLR cameras learn to use the meter.

Everyone’s comments are welcome.

My website is at www.enmanscamera.com

Eulogy for Chuck the Rooster

This past week Chuck the rooster died. I don’t think my neighbors will feel too sad because, if that rooster was anything it was a loud talker. I called it talking and everyone else called it crowing. But, to me he seemed like he had something to say and anyway I am going to miss him and his point of view.

Why would I write a eulogy for a silly bird? It should go something like, “Chuck kept the hens together, crowed lots, and then he died.” Surely a rooster isn’t worth more words of praise than that. He had a good pedigree; he was a Buff Orpington rooster with striking colouring and handsome spurs.

In May I wrote an article titled “Pets make Great Photography Models”.  In that I wrote, “Got a new camera or lens? Want to try out that studio lighting technique? Or just bored and want someone ever ready and able to pose for a photograph? Call the dog, or coax the cat. I can’t even begin to count the pictures I have taken of the horses, dogs, cats, parakeets, hamsters, chickens, fish, and frogs I have taken in my life”.

Those pets never complained when the pictures didn’t work out, and even waited for another blast of the flash without blinking. And I continued saying that Chuck, my rooster that guards the hens, doesn’t seem too interested in standing still for his portrait.

So, other than not having Chuck to keep a bunch of chickens on the straight and narrow, I’ll miss having an ever ready, constantly moving subject to practice my photography on. That rooster never stood still for long. He was always guarding, herding, searching for interesting stuff on the ground, then telling us all about what he found, flapping a lot and was always running around.

Sometimes I would set the lenses I wanted to try out on the rickety old wooden picnic table that sits in the back meadow and then open the gate to the chicken pen so Chuck and the girls could get out. They always want to get out, and eyeing my wife’s flower garden would clumsily run out and across the unmowed field grass with Chuck guarding the perimeter like some soldier on patrol.  I would sit, crouch, and lay in the tall grass, making exposure after exposure until they trundled past and into the overhanging bushes of the garden. In retrospect I should have been more serious about the pictures I took, and now I wish I had kept more of that silly old bird. But I seem to only have one or two stashed on my hard-drive.  Anyway, who wants a picture of a chicken hanging on their wall?

I tested cameras, lenses, flashes, and my ability to light with flash outdoors, stop movement and focus properly on quick moving subjects. I would walk out in the yard, find Chuck and the chickens, try something out, dump the images from my memory card to the computer, check them out, make a decision about what I wanted to try next, then delete them and go out and start again.

I couldn’t have thought of a better photographic test subject. Yep, that rooster never stopped moving and I am going to miss our time together.

My website is www.enmanscamera.com

On the Subject of Film

When the subject of film comes up my first impulse is to flippantly say something like, “Oh, film was nice, but no serious photographer would use film.”  Well, that’s not right. And should any of us be putting a definition on what a “serious photographer” is?

In my opinion, film, and those photographers that use it have positioned themselves in a new place among image-makers. These days most photojournalists and commercial photographers employ digital technology, but I think those that are interested in pushing this medium into a creative place are increasingly becoming aware of the unique characteristics of film.

A film purist can easily set up a home lab with an enlarger and complete chemical process, but there are also those that have embraced both digital and film and the results of the technological cross breeding can be exciting. Film has, in my opinion, a tactile quality that is different than digital capture.

Let’s not get into the boring discussion of film vs digital. That’s become wearisome. Film is different than digital. I think it depends on how one wants to show a subject to viewers. And as I wrote, I think the technological cross breeding of film and digital is exciting and rewarding.

The dialogue now may be about computers, monitors, and software. With film we wanted the best enlargers, and enlarger light sources. What lens was mounted on the enlarger was as important as the lens on our cameras. I had a cabinet filled with many different kinds of enlarging papers from around the world, and another stacked with a wide assortment of developing chemicals for both film processing and printing. All this is still available if one is willing to take the time searching out suppliers.

Serious digital photographers are faced with expensive computers and Photoshop’s steep learning curve. Those serious practitioners of film photography will still be dealing with lots of learning. However, quality film cameras, and quality film processing equipment is cheap and the required processing and printing equipment can easily be found languishing at garage sales. I think one needs to search out the best film equipment in the same way as the best digital hardware.

I don’t use, or even think about, film much, but in the last two weeks I have had several conversations with different young photographers that are making images with film cameras and starting to accumulate the equipment to process film and print pictures.  I will admit I enjoy talking about all that. I liked film cameras and same as with today’s photographers, I thought about and researched those cameras in my quest for what would fit my needs the best.

On the subject of using film photography and digital photography, this week has also found me reproducing a client’s very old photographs. (some easily over 100 years old) I photographed each image, loaded them into my computer, then using PhotoShop corrected the fading and discoloration, added contrast, retouched cracks, and finally sharpened and saved them on a CD.  Most photographs were over 40 years old will start to fade soon, if they haven’t already. And those boxes of family history may be lost as people move them to damp basements or garages when additional space is needed.

Making a quality digital image from the negatives or slides of those wonderful old family photographs and saving it on a space saving CD is ideal.  As I mentioned these two mediums work just fine together and a matching print can be made it the future.

I welcome the chance to exchange thoughts with those photographers who are using film in this day of digital technology. Many see it as a “retro” kind of thing, but maybe it’s not that at all. Including film in the creative and artistic process of photography is just one more factor in the continuing evolution of this exciting medium.

My website is at www.enmanscamera.com