Remembering those Great Portrait Photographers that influenced me.

Mike and Shannon Moyer's wedding in Kamloops.

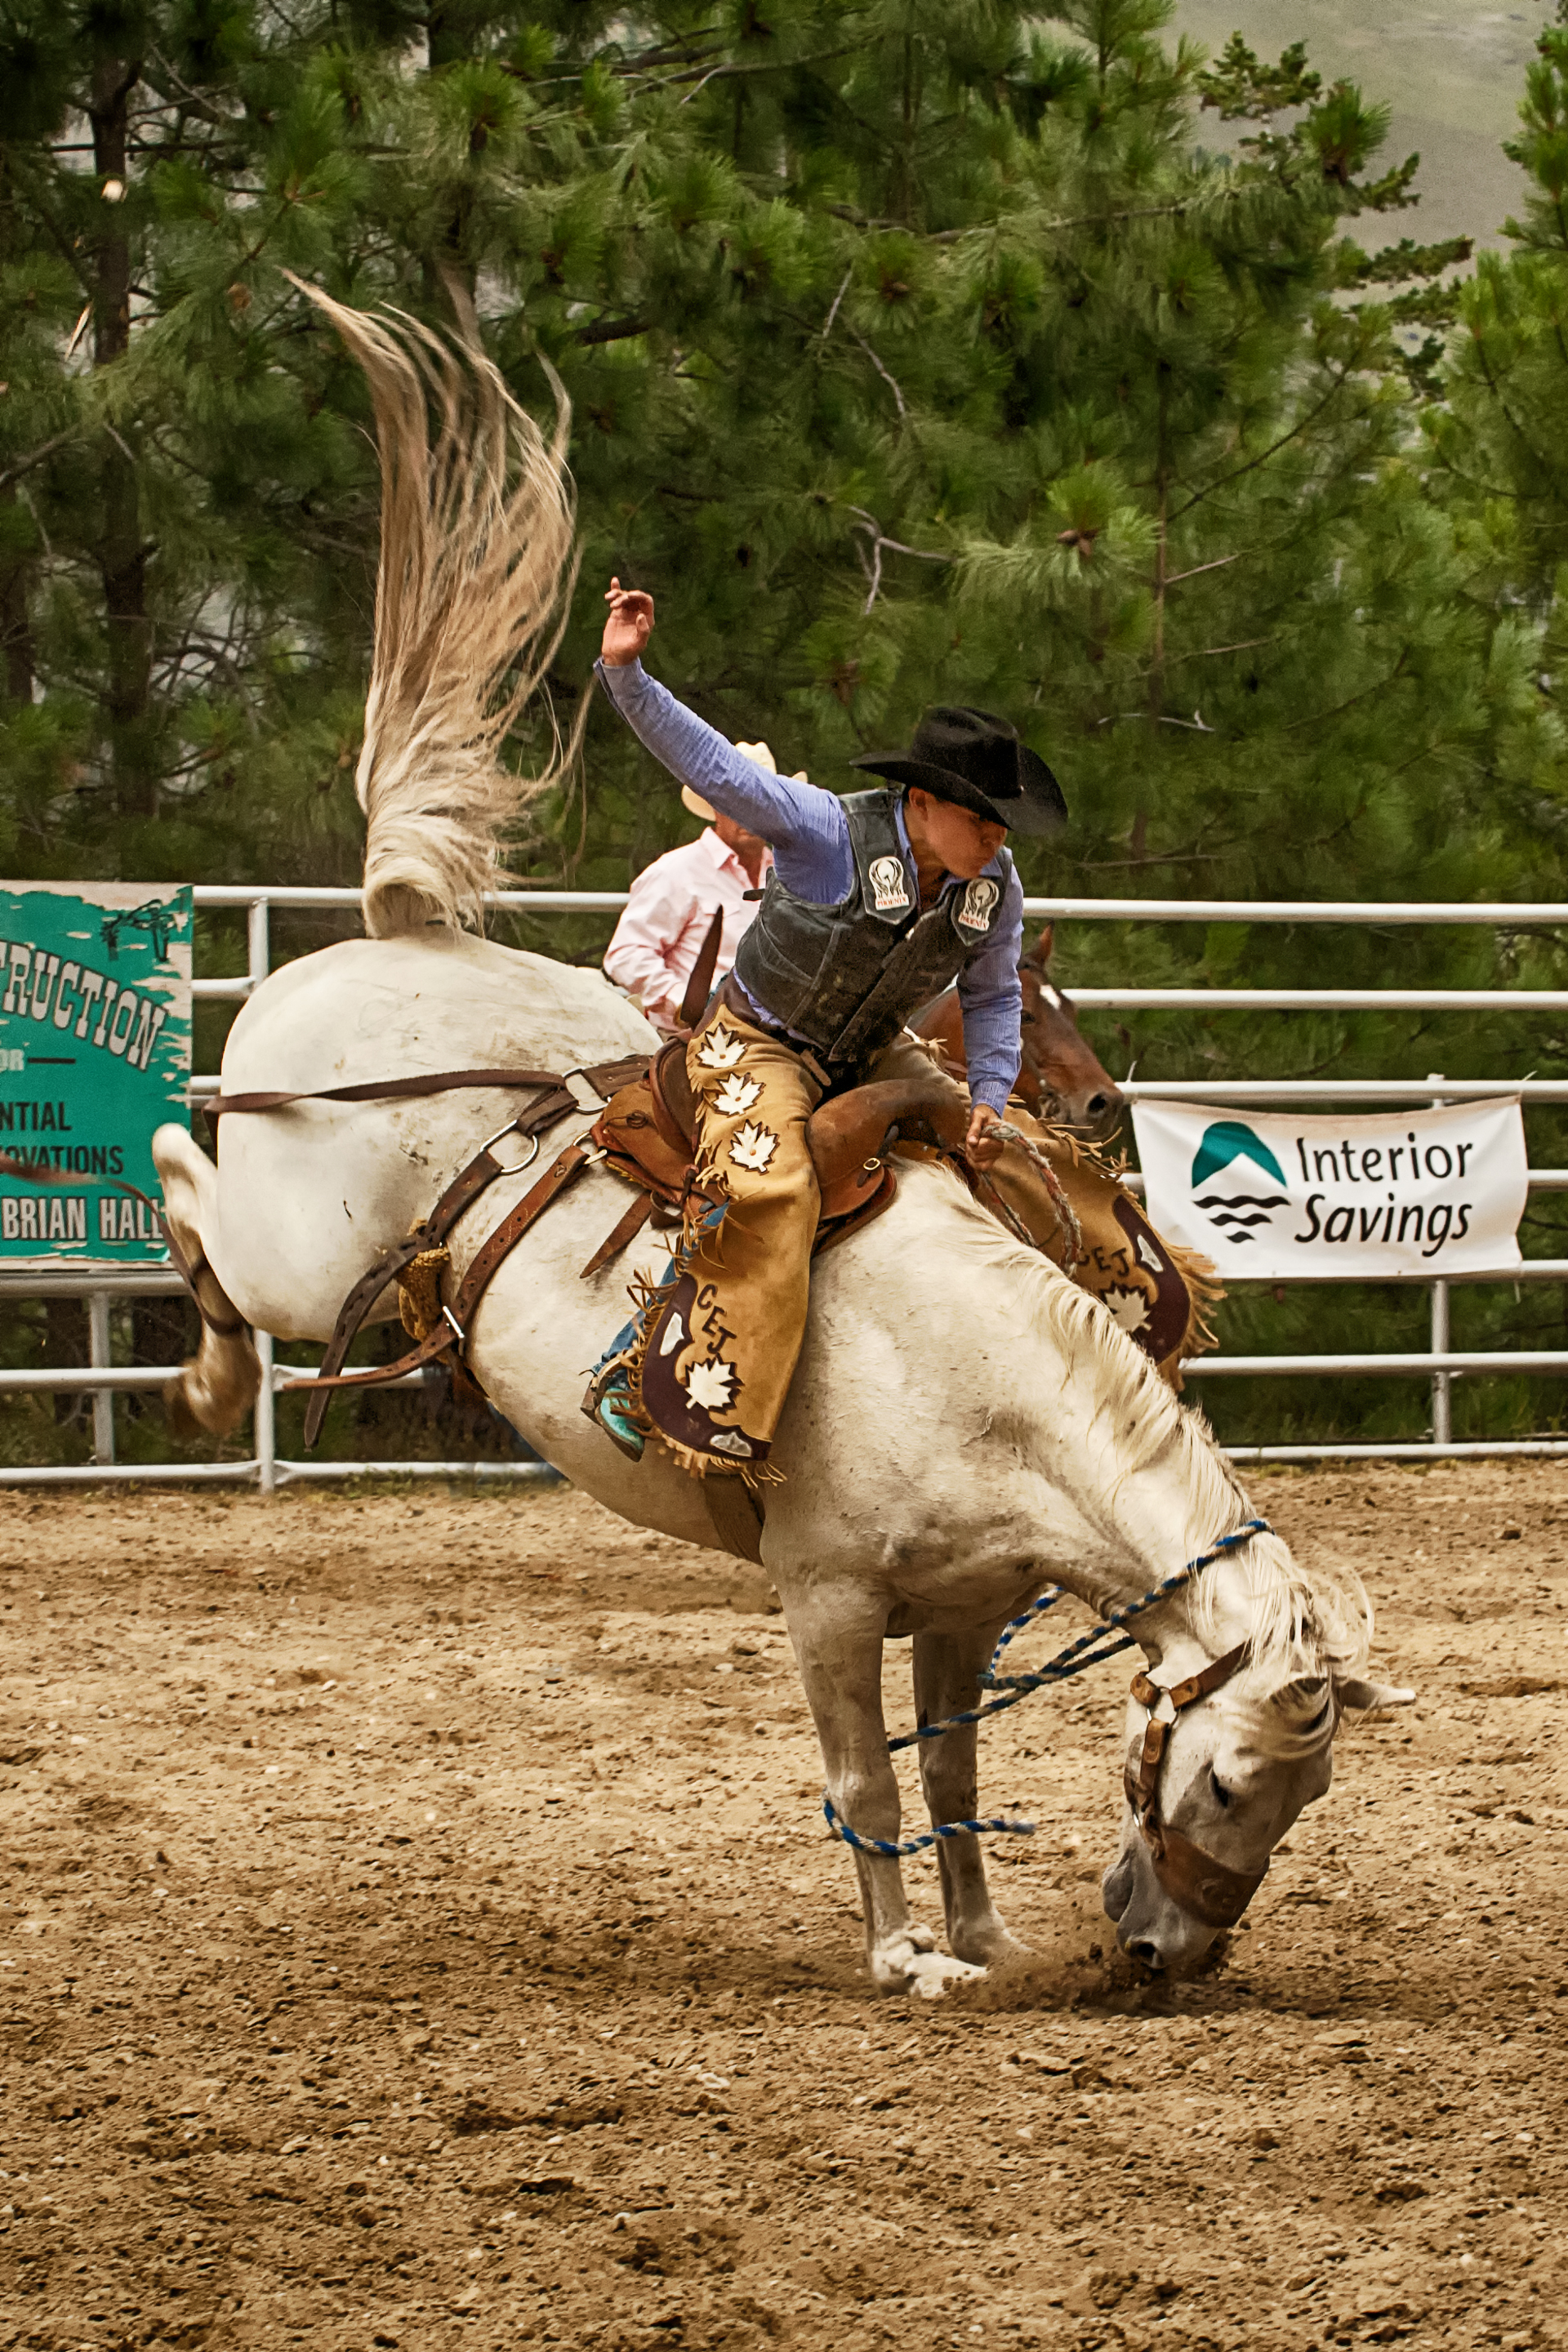
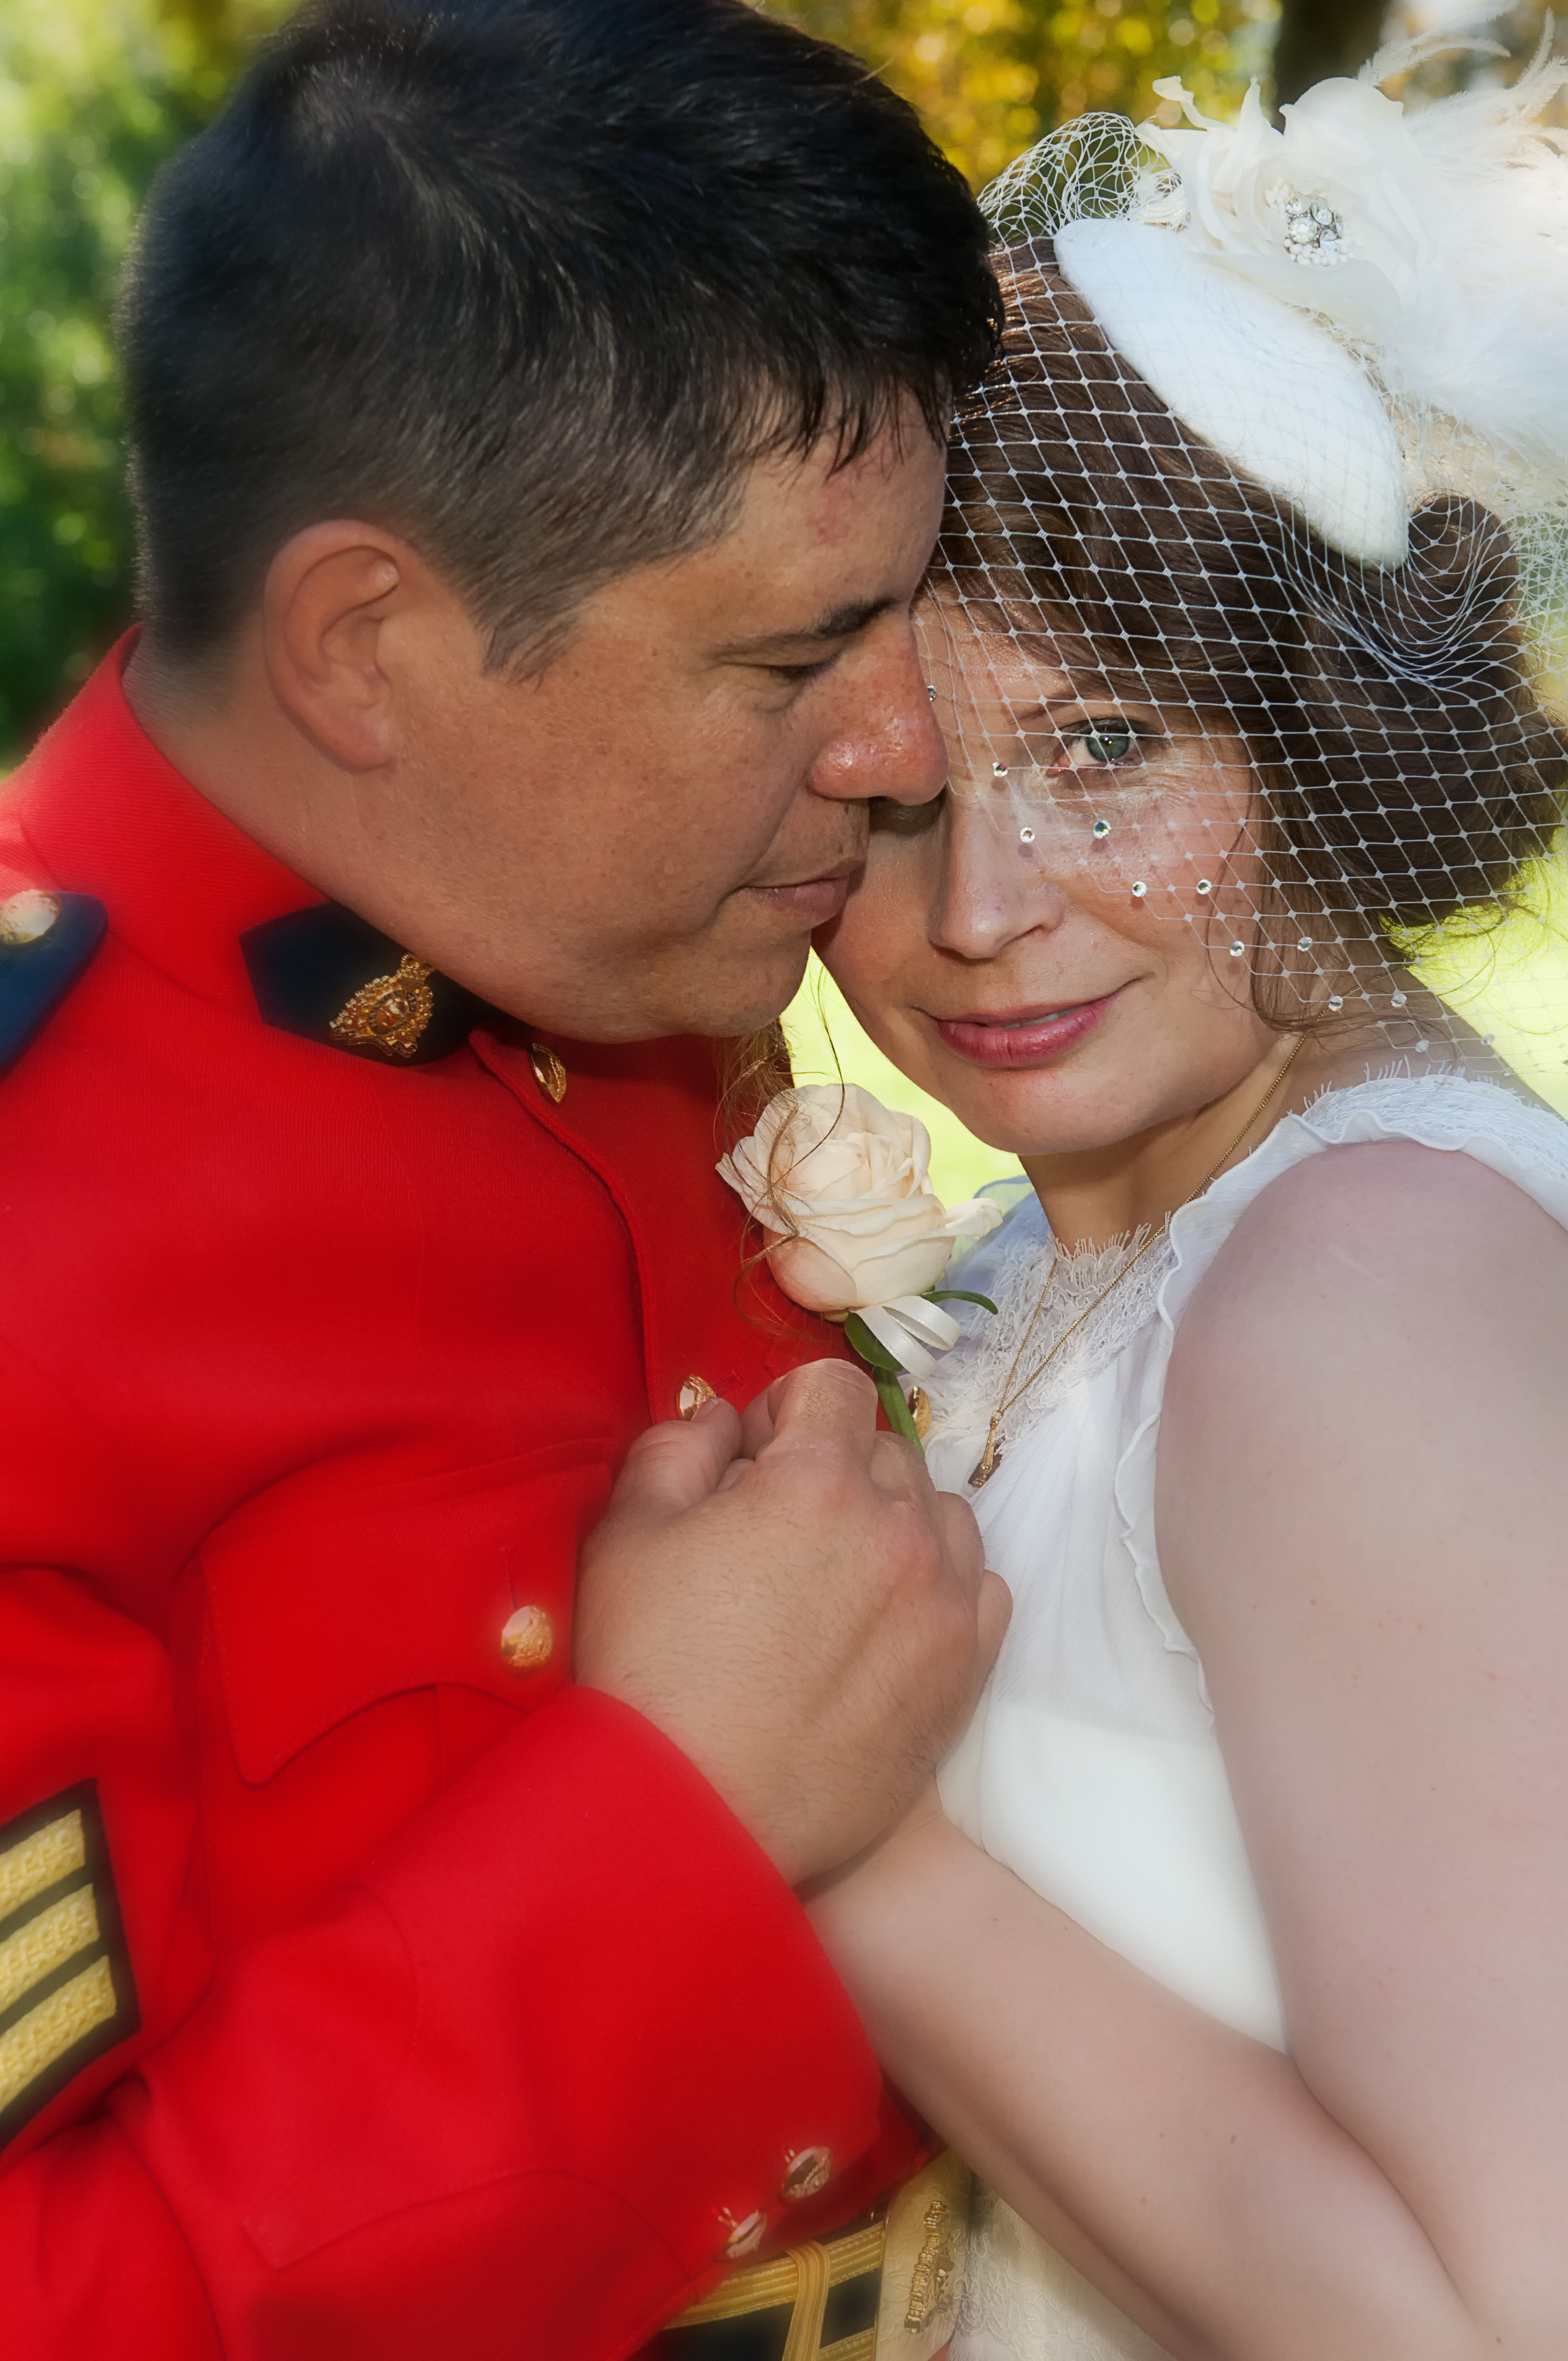
Mike and Shannon Moyer’s wedding in Kamloops.

I had been editing images from a wedding (pictured) I photographed on the weekend and decided to take a break, and settled down to watch a documentary that my wife had recorded on television about photography-great Annie Leibovitz.

Leibovitz made a name for herself with her collaborative style of portrait photography in the 1970s as a photographer for the Rolling Stone magazine and, of course, if you’re my age you may remember the incredible photos she made while touring with the actual Rolling Stones rock band.

The program was a walk down memory lane for me, and I thought about how she and other successful photographers had influenced my approach to photography, and as I watched I considered some other great photographers that impacted my view of portraiture.

The first photographers I became aware of while living and beginning my study of photography in Los Angeles so long ago were the co-founders of Group f/64, an association of west coast photographers.  I would go to exhibitions of their work and irritate my friends because I would ignore them to sit for long periods viewing each photographer’s work; I was amazed with the way they dealt with light and shadow. Ansel Adams and Imogene Cunningham, although not especially portrait photographers, were among those that changed the way photography was approached. Adams is well known to most, but Cunningham’s controlled photography of patterns, detail, and texture is worth viewing not only for her portraiture but also in her botanical work.  On portraiture she was known to comment, “The thing that’s fascinating about portraiture is that nobody is alike.”

Discovering Arnold Newman stopped me in my tracks. Newman photographed the world’s most influential people and his portraiture was termed “environmental”.  Unlike many of his contemporaries at the time, he might include tables, pianos, and other elements he deemed structurally important to a portrait and when interviewed about his style he said, “I am always lining things up, measuring angles…. I’m observing the way you sit, and the way you fit into the composition of the space around you.”

Another woman that challenged the way photographers approached portrait photography at that time was Sarah Moon. Her photographs were mysterious and surreal, sometimes in weirdly muted colours, or nostalgic with diffused grain. Her comment as to her portraiture was, “I never photograph reality.”

One of my favourite portraitists that I have mentioned and quoted many times is Richard Avedon, and his minimalist style with stark white backgrounds. The provocative three-foot high photographs from his exhibition entitled “In the American West” were an important hallmark in 20th century portrait photography. When talking about photography he said, “if a day goes by without my doing something related to photography, it’s as though I’ve neglected something essential to my existence, as though I had forgotten to wake up. I know that the accident of my being a photographer has made my life possible.”

There are many more that made me want to spend time making portraits in my early days with this medium, but the last I’ll mention is Irving Penn.  Truly an artist, his portraits are more than images depicting beautiful people and his prints take on the mantle of works of art in themselves. He said, “I myself have always stood in the awe of the camera. I recognize it for the instrument it is, part Stradivarius, part scalpel.”

Photographing people and stopping their lives for a fleeting moment is pure enjoyment, and for those photographers that want to become more proficient I recommend spending time searching out the famous photographers I have mentioned, viewing their works, and applying the lessons learned to their own portrait photography.

To complete my tribute to those portrait photographers that affected my photography, and that of many others. I will end with Imogene Cunningham’s famous quote “Which of my photographs is my favourite? The one I’m going to take tomorrow.”

Don’t hesitate to leave me your comments. Thanks, John

My website is at www.enmanscamera.com

Photography at the Pritchard Rodeo

This father and son are watching the action at the Pritchard Rodeo.

This father and son are watching the action at the Pritchard, British Columbia Rodeo.

I never know who is going to win.

I never know who is going to win.

I think that horse is smiling.

I think that horse is smiling.

Root for who ya want...

Cow one, cowboy zero.  Root for who ya want…

I called this "Defying gravity"..I have never seen 'em fall..

I called this “Defying gravity”..I have never seen ’em fall..

Concentrating and holding on.

Concentrating and holding on.

I don't think riding sidesaddle is appropriate.

I don’t think riding sidesaddle is appropriate.

I'll call this, "Quick Dismount"

I’ll call this, “Quick Dismount”

Maybe this is why they call bull riding dangerous. Ya wouldn't this that big fell could jump that high.

Maybe this is why they call bull riding dangerous. Ya wouldn’t this that big fell could jump that high.

Thats what I call a high kick !

Thats what I call a high kick !

“When photographing fast-paced, erratically-moving subjects like those at a rodeo I would select Shutter priority. I like shutterspeeds of 1/500th or more and one always needs to be aware of depth-of-field, and balancing the shutter speed and aperture for that. Wide apertures reduce the field of focus in front of and behind your focus point, so leave room for the moving subject; something like f/8 or better yet, f/11 would be safest.”

That was part of a discussion I had with a fellow photographer while standing beside the arena at the Pritchard, BC Rodeo last Sunday.  I had been laughing about the not-so-successful attempts two wranglers were having as they tried to lasso a wily bronco.  As we talked I was quickly pointing my camera at the action, and the other fellow wondered why I wasn’t paying attention to my settings in the changing daylight.

I asked how he set his camera and his response was he first tried his camera on Manual mode and had just switched to Aperture priority.  I am sure either of those would work well, and I have no doubt that some photographers who shoot rodeos professionally will have their own advice to him.

I was there to have fun, socialize with friends, and still get as many shots (that were keepers) of the rodeo as I could. Shutter priority assured that I’d always have a shutterspeed that would stop the action.

My first goal was to get the light correct and keep it correct without constantly resetting the camera. The only “chimping” (a term used to describe the habit of checking every photo on the camera LCD immediately after capture) I would do was to check my camera’s Histogram every now and then.

Shutter priority was as close to point-and-shoot as I could get in an environment where my attention might stray. Fortunately this was a local rodeo and I was very familiar with the grounds and where the action would take place. When an event was about to change I would casually walk around the arena to where I had in the past found the best place to photograph that particular activity.

My favorites to photograph are Saddle Bronc, Bareback, Steer and Bull riding.  The action is explosive and I think the participants (horse and rider, or bull and rider) pitted against each other are well matched and one can never be sure who will win. I am of the opinion that both animals and humans know it’s a game. For example, I watched a large black bull crashing around in the bucking chute, giving the handlers a hard time as the rider tried to get mounted. The gate opened, rider and bull exploded into the arena with the bull bucking, rearing, kicking, spinning, and twisting. Although he did his best to hang on for the required eight seconds, the contest ended with the cowboy being thrown.

Bullfighters rushed to help the rider, possibly expecting additional aggression from the bull, but at that moment that large, black, dangerous bull’s attitude immediately seemed to change from “death incarnate” to, well, a nice fellow out for a stroll. And that’s exactly what he did, casually walked back to exit the arena to brag to his buddies.

My photographs didn’t show that mellow conclusion, that’s not what we expect at the rodeo. Instead they are great action photos of what has been called, “the most dangerous eight seconds in sports”.

The Pritchard Rodeo grounds are perfect for photographers. The arena is enclosed with a strong metal fence that’s safe to stand close to and doesn’t restrict the view.  Of course, one has to be careful when excited horses are getting ready for the Barrel Race, but heck, it is a rodeo and one must remember that the animals, like any other athletes, are focusing on what they are about to do, not some silly person with a camera.

I’ll mention that Barrel Racing is also a great subject to photograph, and trying to perfectly capture what seems like a gravity-defying moment as horse and rider, fast and furiously, circle the barrel is exciting.

I know there are more rodeos scheduled for the British Columbia rodeo circuit ahead and interested photographers can expect an enjoyable, energy-packed day of photography that, at times, will test their skills.

I always appreciate any comments. Thanks, John

My website is at www.enmanscamera.com

Photography in Wells Gray Park

Helmkin Falls  LLW_6435a BailysShoot(1)  Clearwater falls  Homestead WellsGrey shed WellsGrey Infrared                                                                                                       The very first time I visited Wells Grey Park was back in the early 1970’s. The road wasn’t the wide, smooth, asphalt-surfaced thoroughfare, with lots of easy viewing pullouts that it is now. At that time it was a rough, winding, sort-of maintained, dirt passage with narrow, metal bridges reminiscent of those quickly constructed by military engineers during the Second World War.

I had been traveling across Canada east to west and was told by a fellow traveler that there was a mountain park somewhere in British Columbia that was great for hiking. https://en.wikipedia.org/wiki/Wells Gray Provincial Park.  I had no information at that time about the park, and all I could get out of the few people I asked about the park was that there is a big waterfall there, and I could camp there. So with a map I had purchased at a gas station along the way that first lead me first to the small town of Clearwater, after which I turned at a sign that said Wells Gray Provincial Park.

The first thing I recall about that trip along the dusty route into the park was a blockade across the road. There may have been ten or more women, and although friendly, they had a look that said, “We are serious and you better do as we ask”. We stopped, and were presented with a petition, and asked to sign, to the government to have the road paved.  I guess it worked, because by the time I moved to Kamloops five years later, and started to frequent Wells Gray Park, there was the well-maintained road that park visitors now enjoy.

Our rural home in Pritchard is a two-hour drive from the park. Just after breakfast on Sunday morning, when my wife, Linda, suggested we go to Wells Gray for lunch, I got the cooler out, made some sandwiches, and packed our cameras and tripods in the car.

My excursions into Wells Gray these days are pretty much as a roadside photographer.

I could dig out my back pack and tent and head off on one of the well-used trails up into the lush alpine meadows of the Cariboo Mountains, or I could borrow my son’s comfortable travel trailer and stay at one of the excellent campsites along the fast moving Clearwater river or at Clearwater lake itself.  However, there are lots of places to stop and photograph the park that don’t include the need for hiking attire, and anyway, as I wrote, Wells Gray is perfect for roadside photography.

There is so much to photograph; waterfalls, majestic river views, mountain vistas, old homesteads and, of course, lake panoramas. There is lots of wildlife there, but the park has so many visitors that other than a few birds and chipmunks, most forest inhabitants prefer to hide from view, although I have, on occasion, seen a bear or two, and one snowy winter I saw moose after moose walking along the road.

On Sunday’s lazy excursion we first stopped at a dilapidated, old building with amazing longevity, that I have photographed many times over the years. Each time I visit I expect it to be gone, but it just rests in a grassy meadow alongside the road waiting for another photographer to make a picture. This time I wondered if there was an angle, or season, that I haven’t pointed a camera at that once proud home. I have made pictures of it using every type of film and camera format, as well as infrared. I also expect I am one of those rare visitors that has never ventured inside that old house in the past 30 years. I guess I like to keep some mystery.

Our next stop was for lunch at the Helmcken Falls picnic area. As we sat talking and eating lunch I could overhear people at the nearby tables and along the guardrail speaking different languages. Wells Gray gets tourists from all over the world and I will say that it is a rare park visit that I don’t meet people from other countries.

Linda and I didn’t join the happy picture takers on the viewing platform. It is a nice place to sit, or stand, and enjoy that impressive waterfall, but for me it’s the wrong angle for a good shot. After lunch we picked up our cameras and tripods walked through the windfalls to my favorite spot, although this year there were so many downed trees that it was harder to get to our favourite spot along the canyon edge, Neither of us could use a very wide focal length without including a foreground of dead trees, however we persevered and finally left the Falls after a good half hour of photography, satisfied with what we were able to photograph.  All in all it was a very good day.

Wells Gray Provincial Park is a great place to wander about with a camera and worth the short drive from Kamloops. A summer photo excursion is fun, but my favorite time is the fall and readers can be sure this roadside photographer will be there again in a few short months.

Don’t hesitate to comment – I always appreciate comments. Thanks, John

My website is at www.enmanscamera.com

Deadman Junction Photographs – A Great Time

view of deadman junction buildings

view of deadman junction buildings

mining office and jail

mining office and jail

an old mining cart

an old mining cart

an old cargo wagon in the street

an old cargo wagon in the street

view from deadman's main street to buildings.

view from deadman’s main street to buildings.


a wall with saws and a photographer's sign

a wall with saws and a photographer’s sign

an old cargo wagon in the street

an old cargo wagon in the street


Cigar store sculpture in front of saloon

Cigar store sculpture in front of saloon

  walking down Deadman Junction main street

walking down Deadman Junction main street

Photographers driving about an hour west of Kamloops British Columbia, along the Trans Canada Highway 1, past Savona, and past the turn to Deadman’s Creek, will discover a neat, little gem situated just off the road.  All they have to do is watch for a big, home-made sign positioned on the side of the road, amidst the wide, low, rolling-hilled, sagebrush-filled landscape that declares, “Deadman Junction”.

At first glace that sign marks what looks like the remnants of an old town. There are already plenty of decrepit structures left decaying along that stretch of highway and travelers might be hesitant to stop because it looks like it might be, like so many others, private property, and I expect many readers have been run off occasionally by landowners intent on preserving their privacy. However, my suggestion is to slow down and stop because this is a camera-waiting, ready-made, western movie set that is definitely not restricted to private invitation and where everyone will be welcome.

Owned by dedicated wild-west enthusiast Matt Sandvoss, the partially constructed old-west replica is a perfect place for any respectful photographer that wants to work with western lore and old buildings.

Sandvoss, an enjoyable storyteller, guide, and visionary in his pursuit to construct this copy of an Old-West town in a remote part of British Columbia, is an eager, willing, and immediately likeable host.

When I arrived there were motorcycle travelers from Alberta, and a family from England, with both groups enjoying his commentary on the movies that had been filmed there and his ideas for the town’s future. He was pointing out features, western items he had collected, and was adding interesting anecdotes on each.

Although I was mostly involved in my personal photographic quest through the photogenic location, I did hear him mention the movie “The A-Team”, and that actor Harrison Ford had been there. I think that is great, having just found the place I’d hate to see in fall into disrepair, and movies will give Mr. Sandvoss the funds to not only maintain it, but also to add more buildings (for us to photograph).

Photographically the location is almost captivating. The landscape is wide and rolling with almost none of the modern trappings like wide parking lots, concession stands and electrical power poles that usually come with roadside attractions, and when one does see a power pole or something else that gets in the way, it is easy to find a different view.

I wandered back and forth, there was so much to photograph that I found myself continually returning for another look or angle. I was able to capture wide, picturesque images of a row of buildings with appropriate sagebrush and tumbleweed in front of, and around, rickety-looking old wagons, and even iron works close-ups on what I am sure were authentic mining carts.

Those travelers of Highway 1 between Kamloops and Cache Creek might want to stop to cool off at the Juniper Beach Provincial Park nestled in a shady, treed spot along the river, and if the Skeetchestn Indian Band rodeo is in progress, that’s a neat event also. However, for me I know I’ll be taking the scenic drive again along the mighty, winding Thompson River to spend some time listening to Sandvoss’ stories and a whole bunch of time photographing Deadman Junction.

I always appreciate your comments. Thanks, John

My website is at www.enmanscamera.com

Photography Excursion in the Garden – After the Rain

Red Mahonia/ Oregon grape  Rose bloom

Crab apple tree after the rain

Crab apple tree after the rain – Infrared.

Oregon grape on a rainy day

Oregon grape on a rainy day

Close up of an Iris on a rainy day

Close up of an Iris on a rainy day

Mahonia in black and white

I have heard complaints recently from photographers that they haven’t been able to get away from the wet weather this month and have only been offered a few rain free days to plan photography events.

The last three days has seen rain, sun, and shortly thereafter, rain again; nevertheless that needn’t be a reason to be depressed about the weather. Of course, the rain meant delaying a trip to the mountain waterfalls; and landscape photography might not be as dramatic unless one is willing to wait for the clouds to part. But, in my opinion, one doesn’t need to stray far from the back door to pursue that insatiable need to make pictures.

I have heard of groups having photographic challenges and I suggest that because of the rain that they have a challenge in their own back yard.  My goal this week was to get out during the rain to make pictures of the wet plants in my wife’s garden. I had planned to attach two small umbrellas to light stands, one for a flash and one for my camera and me. However, when the rain came down the last three days it really came down hard. So even though I don’t mind getting wet, there was no way I could be successful in the kind of deluge I faced each day.

The rain would come fast and hard, then abruptly stop. Next would come a strong breeze and bright hot sun that quickly dried the leaves. All perfect if one wanted to go for a walk, but I wanted wet leaves and water drops that I could add sparkle to by using a flash.

After waiting three days I put my umbrellas, light stands and flash away, slipped on rubber boots, and dashed out into the still wet garden as soon as the rain began to ease up.

As had been the pattern for the past few days, the sun came out quickly, hot and bright, and, as usual, the breeze began. Fortunately, the bright sun allowed shutterspeeds of 1/600th of a second and above, and, in most cases, made up for the plants moving with the light wind.

I used two cameras; one converted to infrared with a 70-180mm macro lens and the other shooting normal with a manual focus 200mm macro.  Some plants looked as though they might be perfect for infrared while others were so colourful that I knew I wanted the image to end up as close as possible to natural, although some would be converted to black and white. As I mentioned I wanted something unexpected and that also meant I photographed some plants taking into consideration that I might do some altering in post-production.

Wandering around the home garden is relaxing. My intention is to find something unexpected in the familiar plants. When I’ve chosen my subject, I look at it from all angles paying attention to the background so that whatever is behind won’t interfere, and I want the shadows, colours, and other plants to add interest to my composition.

I know many photographers may be content with aiming their programmed, little point and shoot cameras straight forward at some particular flower or foliage, and that is acceptable if all one wants is a life-like representation for a club’s plant catalogue, however, I find much more interesting photographs are from photographers with their DSLRs who are more intent in creating artistic representations of the flowers and other plants.

I think photographers get themselves all tied up with a need to have inspiring subjects, and ignore the commonplace subjects just outside the door.  When I want to try out some new piece of equipment, or software, I don’t wait for an excursion; I just walk out in my yard and make pictures of anything and everything. I can easily return to the computer to test some recent exposure, then go out again; and on days like I just wrote about it is easy to change out of wet cloths immediately at home, instead of driving home uncomfortably for several miles.

I always appreciate your comments. Thanks, John

My website is at www.enmanscamera.com

Photographing Old Buildings

Customs house Forgotten lane Homestead Neglected barnBarn field forgotten in the storm b WellsGrey Homestead neglected churchyarderghost residencese old house & chair Last sentinal

There are many camera-wielding travelers that cannot drive past an old barn, house, or an aging storage building standing and deteriorating in a field without stopping to capture a picture. And I admit that includes me.

I can’t begin to, or even try, count how many wooden relics of the past I have made photographs of since I acquired my first camera so long ago; or for that matter how many different types of cameras I have used in that pursuit.

I must wonder at my reason for stopping on the many roadsides, camera-in-hand, to take a picture of some rotting clapboard structure. For a moment as I look inside I wonder about the lives of those who lived there.  My wife likes to look for survivors of old plants and gardening that took place, e.g., rhubarb, and lilacs.  She says the fondest thing she ever discovered was some poets’ eye narcissus (daffodil) that had survived over fifty years on their own.  Very few photographs have ended as prints, and I suspect many readers will, like me, just file the memories away, because the act of documenting that old barn, or homestead, seemed important at the time, but when we developed the film, or downloaded our memory card, we didn’t have a plan that included dealing with the picture.

Hanging on my wall I have a very large (3’x5’) print of an old mining structure I had made using a 4×5 Speed Graphic camera; and once, in the late 1970’s I had a calendar made of buildings I found locally, in the interior of British Columbia. Sadly, as one might expect, none of those structures featured in that calendar still remain. However, most of my images like that languish in files, as forgotten as the structures they were made from.

What is it that makes it so exciting to discreetly, and precariously sometimes, to scramble over the barbed wire fence, onto some farmer’s private property, in spite of the “No Trespassing” signs nailed to the fence?  Our images rarely depict unusual subjects that haven’t been seen before or those of some architectural masterpiece; they are just of some decaying wood structure. However, those buildings are still intriguing and make us wonder about the life that was lived beside, around, and inside them, and why we need to make an exposure of that story on our camera’s sensor.

I don’t believe there is any one lens, or one particular way, to photograph a building. I think the words “whatever moves you” fits best.  Sometimes it’s the structure, sometimes the way it fits in the landscape. There are occasions that demand a long lens, others that call us to get close with a wide angle. My post-production might be some over-the-top effect, black and white, sepia toned, infrared, or a documentary as close to reality as I can make it. There isn’t a right or wrong way to make a picture, and in my opinion, almost any way one wants to present an image of an old building works.

No matter where the discussion goes regarding why so many photographers select dilapidated old buildings for their subjects, I think it is as photographer Elliott Erwitt says, “… I’ve found it has little to do with the things you see and everything to do with the way you see them.”

I always appreciate comments. Thanks, John

Check out my website at www.enmanscamera.com

Excellent Photographic Adventure with old cars in the Palouse

Resting in deep grass In a field of green  In the shade of a tree GMC grill   the trunkJRE_4530bJRE_4529b

Last week I wrote about my photography adventure in the Washington Palouse area, with its undulating landscapes and picturesque dunes.

For me, the most satisfying moments of that trip was photographing the patterned fields from the top of Steptoe Butte as the sun came up in the mornings, and, finally, at day’s end standing at a canyon edge capturing the falling light on the spectacular Palouse Falls.

However, during the day our group’s leader, Aaron Reed, offered the opportunity to photograph old derelict vehicles he had located on dusty back roads, and we spent our mid-day driving to several different locations.

I have always enjoyed photographing old clunkers left resting, rotting, and rusting in forgotten fields. Even though where I live in British Columbia they aren’t that hard to find, when we stopped and wandered out into some field when an old car was spied, I was as just as eager as the others.

My approach isn’t very formal and while the others strategically placed their tripods, and selected filters; I would kneel in the deep grass, or lie down in the dirt, and start shooting. Grass stains and dirt clung into my clothes as I shifted, rolled, and dragged myself along on the ground making photographs from low angles.  For me, it’s all about the picture, right?

My lens of choice usually is a 24-70mm used at the 24mm focal length, which on my camera’s ¾ frame sensor is equal to about a 35mm. I will add that in the days of using film cameras, a 35mm was what I liked the best then, same as now for photographing derelict vehicles.

I know many photographers prefer dramatically distorted images created with ultra-wide lenses, but even a 35mm has distortion, certainly not as much as the 11mm lens one person of our group on that trip was using on his full frame Canon, but distortion enough for me.

I usually place a polarizing filter on my lens when photographing automobiles. Not because I am concerned with controlling the sky as I would in a scenic shot, but because a polarizer allows me to reduce the glare on chrome and glass. And I prefer to photograph reflection-free windows, if I can get it, as opposed to those that mirror the sky and surroundings.

As I stated, my approach isn’t that formal. I usually operate my camera in manual mode, and I don’t use higher ISO like over 400, unless the lighting conditions demand.  Normally, I take a meter reading off the ground, get just as low as I can by sitting, kneeling, or laying down, depending upon the high grass or other obstacles in the way, then focus on the old vehicle, making both horizontal and vertical images, and then move on to the next.

I admit I also like close-up views and select features that interest me on the rusting clunkers, so I would set the focal length of my 24-70 lens to 70mm while looking through an open window, open door, or when I found an interesting hood, or trunk, ornament.

Photographing those dilapidated old automobiles was, in my opinion, the icing on the cake for what was already an excellent photographic adventure.

I always appreciate comments. Thanks, John

My website is at www.enmanscamera.com

Photographing the Washington Palouse

White tower  Dunes 2 Dunes 1  Farm truck Truck  Palouse falls 3 Palouse falls 1  Palouse falls 2

Here’s the situation.  It is 3:00 am and the motel was buzzing with photographers packing camera bags and tripods in vehicles. Even in my tired fog caused by the long, eight-hour drive the day before, and a late evening talking with photographer Andrew Wozniaka till midnight.  I identified at least three other groups from the one I was with heading off for the Steptoe Butte overlook to wait for sunrise to photograph the patterns on the picturesque dunes of the Palouse.

Located south of Spokane, Washington, the Palouse (pe-looss) region of northwestern United States encompasses parts of southeastern Washington, north central Idaho and extends south into northeastern Oregon.  The peculiar and picturesque dunes, which characterize the Palouse prairie formed during the ice age by soil blown in from the glacial outwash plains to the west and south, the Palouse hills are now mostly actively farmed random humps and hollows.

I had joined four others for an Aaron Reed photography workshop, “The Palouse – Exposure Northwest”.  One could just visit the Palouse and wander around without an organized group, but having a leader that knows the area extremely well, if nothing else, will save time wandering from site to site.

Our excursion began early in the morning with a drive to Steptoe butte. Other photographers that had traveled there from all over North America joined us and some even came there from other parts of the world, although I am sure I was the only Canadian on that morning.

There were toe-to-toe tripods waiting for the sun to work its way across the manicured rolling dunes of the Palouse. As the sun rose a colourful landscape was illuminated, shutters were released, and the excitement began. It took me a while to really look into the landscape and isolate patterns. I am used to photographing landscapes that include mountains, trees, lakes and rivers from my part of the world, and it took me a while to watch and see just the patterns of the undulating landscape.

The interesting light only lasted for about an hour, then the patterns caused by the sun’s low horizontal light were gone and it was time to look for other subjects. Reed had picked out other places to go and until late in the afternoon we spent our time photographing deserted buildings and derelict cars and trucks.

While we stopped I saw a tractor plowing the miles of fields. I liked the dust clouds surrounding it so I ran out in the field and made several exposures. When the farmer finally drove to our location he stopped (covering us all with a thick coat of dust in the process) and got out to say hello.  We had been photographing a particularly distinctive old clapboard building and I asked him how old it was. His comment was, “Well, the house I live in was built in 1901 and my aunt lived in this house long before that”.

Our final destination of the first day was Palouse Falls State Park and the spectacular Palouse falls with its 186 feet (57 meter) drop.  The scenic and impressive falls can’t be seen until you are nearly on top of it. The broad, broken plateau of black basalt that stretches out to the horizon falls away and there they are: the thundering waters of Palouse Falls pounding down into a circular bowl carved out of the cinder-black rock.

We wandered along the precarious edge making pictures till the sun dropped below the horizon around 9PM. Actually the best time to make images of the falls was just as the sun went down because the contrast between the bottom and the top was pretty drastic.

The itinerary of sun up to sun down photography was repeated on the second day. I will say the long days were tiring, but I’d do it again. Well, after a good long rest.

Spending time getting tips on landscape photography from a photographer of Aaron Reed’s caliber was great as was the camaraderie of the others I met on those two days.  And the opportunity to photograph the Palouse was an exceptional experience.

I always appreciate any comments. Thanks, John

My website is at www.enmanscamera.com

Photography and Light

back lite Frog Ferry ride Helmkin Falls tree fogcolor car 1Sky view

“Light makes photography. Embrace light. Admire it. Love it. But above all, know light. Know it for all you are worth, and you will know the key to photography.”  That is one of my favorite quotes by George Eastman, American innovator, entrepreneur and founder of the Eastman Kodak Company that popularized the use of roll film and was one of the major forces that brought photography to the mainstream.

Photography is really all about light. When photography was first invented it was called heliography, which means writing or drawing with the sun.  Scenic or landscape photographers should be concerned with the quality of the light they are capturing, and portrait photographers definitely should be involved with the light they apply to make flattering portraits of their subjects.

We use terms like intensity of light, reflected light, backlight, and horizontal light when describing the details of a photographic composition.

When I refer to the intensity of the light, I am considering the harsh light in the middle of summer when I struggle to retain detail because of the contrast between the shadows and highlights in a scenic, or when in the studio I determine the number of lights, their individual output, and how to position them for the best portrait.

Our camera’s sensors see reflected light.  Two factors that I take into consideration are the amount of reflection that comes off different surfaces and how much colour I can actually capture. Both reflection and colour are subject to the different textures of surfaces, and governs how much light and colour I can actually capture for my final photograph.  Colours change as they reflect off different surfaces.

Backlight provides the drama that separates a spectacular image from an even-toned, ordinary image as it builds a rim of light around a subject and draws the viewer into a picture. The horizontal light of morning and evening can make a composition dazzle. When the light is soft as on thinly overcast day it sometimes is especially colourful, and appears to even be three-dimensional.

Most people I know are concerned about the weather, but to me weather, such as rain, snow, or even the hot, clear, cloudless days we get during the summer here in Kamloops can be dealt with.  When I say that, depending on the subject I have chosen to photograph, I am selective of the light I want.  I get up early in the morning to photograph the geese on a nearby pond, and I want the light sunny and bright so I can see the sparkling colour of their eyes. When I set out to capture a broad landscape I want blue sky with appropriately placed white, billowy clouds. For scenes of a waterfall I hope for some overcast clouds, and when I prepare to photograph a wedding I hope for an overcast day with high clouds.

I have been told that the problem with photography, as apposed to mediums like painting, is we must take whatever light and subject matter we have available and make it work.  Because we don’t always get everything in a scene just as we want, photography is also about problem solving.  However, if we choose another perspective when dealing with the light in our composition, then we shouldn’t look at light as a problem to sort out, but as an opportunity to work within a particular light range that will allow for unique moments as we make each of our images very personal.

I will finish with a quote, I think I have used before, by noted wilderness photographer Galen Rowell. Rowell was one of those scenic masters whose books, writing, and photographs are a must for those studying the art of landscape photography. Although Rowell was talking about landscape photography, I think his words apply to every type of photographic endeavor, “I almost never set out to photograph a landscape, nor do I think of my camera as a means of recording a mountain or an animal unless I absolutely need a ‘record shot’. My first thought is always of light.”

I always appreciate any comments. Thank you, John

My website is at www.enmanscamera.com

Thinking about, Just what is a Great Lens for Portraiture

Model 1,   Danielle, 24-120lens at 105mm  Ms. Perault

This past week a friend of mine dropped off his lens for me to try. After talking about the lens’ quality, he added that it was a great lens for portraiture. Now there is a lingering question, “What is a great lens for portraiture?”

Although I hadn’t given his Tokina 50 -135mm a run through yet, I expected he was right regarding it being a good portrait lens.  On my cropped sensor camera the lens would have an effective focal length of approximately 75-202mm.

I mentioned this to another photographer, and he paused for a moment, and then said, “Oh, it acts like a 75-202”. I realized he had no idea what “focal length” meant and although I didn’t go into it at that moment, I’ll mention for those few readers that aren’t familiar with the long used photographic term. A lens’ focal length refers to the distance between the imaging plane, or the sensor, and the point where all light rays intersect inside the lens. A longer focal length leads to higher magnification (telephoto) with a narrower angle of view. A shorter focal length lens has less magnification and a wider angle of view.

The longer focal length, as in my friend’s 50 -135mm will have a pleasing effect on a subject because the minimally curved surface of the lens flattens the perspective between the eyes and ears. The wider the focal length is the more the front element (lens glass) is curved making the distance or perspective between the eyes and ears more visible.  A wide angle enlarges the nose and reduces the size of the ears.

Personally, I want as much focal length as I can get. The longer a lens is the better, and my choice then depends the ratio of length to weight, as in my big 70-200mm would be a perfect lens in the studio, but it’s weight becomes a liability when following a couple around at their wedding.

I have heard photographers say that the 50mm lens is a good portrait lens. Well, that’s 70mm on my cropped sensor camera, but still has too much curve in the front element for my comfort. An actual 70mm lens acts like a 105mm on my camera and that’s much nicer.

I can remember going to a Dean Collins’ workshop. I had worked hard to get an invite to one of his limited participant sessions. Collins demonstrated his shooting techniques on both a medium format (2 ¼ in film) and 35mm cameras. He used a 350mm on the medium format, and 300mm on the 35mm, and with the addition of a slide presentation he discussed how the longer lenses flattered the features of those he made portraits.

Information on Dean Collins can be found at: http://strobist.blogspot.ca/2006/08/review-best-of-dean-collins-on.html

A three hundred millimeter lens is spectacular to use for portraits and I think there are lots of fashion photographers that might be using 300mm and longer lenses, but I have to use a tripod or at least a monopod when using longer than 200mm or I have camera shake, so I defer to a lens that is much easier with which to move around. I have used that 50-135mm for some staff portraits I made for a local business and I must say it was fun to use; most of my shots were at 105mm and longer.

I recently read a post by a photographer who stated that only lenses with an aperture of f2.8 or wider were good for portraits, and his reasoning is because the background should always be out of focus.  I don’t really agree with that. A wide aperture just means one can reduce the depth of field. To me it depends on how far away, or how busy the background is, and I know how to control depth of field when required. The length of the lens, and how it affects my subject, is much more important.

A longer focal length, or telephoto lens reduces the effect of lens distortion and helps keep facial features in proportion. The longer lens also creates a more shallow depth of field that helps one’s subject to stand out from the background. I think those photographers that regularly do portraiture all have their preferred lenses that they are comfortable using. Photography is a creative medium and the final answer as to what is the best is up to the photographer and, of course, whether or not the subject is happy with the result.

I always appreciate your comments. Thanks, John

My website is at www.enmanscamera.com