Photography in the October Garden       


Echinops 2

grass 3

Yellow leaf 4

Oregon grape 5

Pink leaf 6

Salvia 1

I have written before that I find wandering around our home garden with my camera relaxing. Unlike photographing people, animals, scenics, sports, or almost any other subject, garden plants are just waiting to be looked at, and it’s not necessary to pack the car with equipment to search for some secluded or exotic location. Most of us can find an easily accessible and welcoming garden close by.

I know that spring’s brightly coloured plants, or the mature flowers bathed in light on a damp morning in early summer are what most photographers are interested in. I admit that I am not very savvy when it comes to the names of flowers. Plants are more my wife’s interest than mine. Her time is spent designing, planting, and coaxing her sprawling garden. Sure, I do much of the heavy lifting, but my time in her garden is mostly with a camera and unlike those photographers that I mentioned that do most of their gardens’ photography in the spring and early summer, I don’t really care about the season, weather, or the condition of the flowers for that matter.

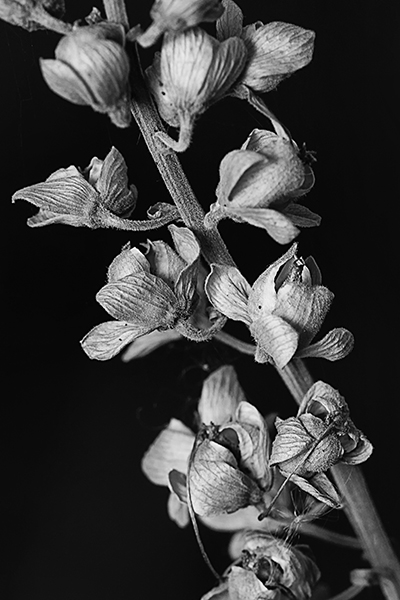
My intention is to find something unexpected in the familiar plants. When I’ve chosen my subject, I look at it from all angles paying attention to the background so that whatever is behind won’t interfere, and I want the shadows, colours, and other plants to add interest to my composition.

I think some people get all tied up with a need to have inspiring subjects, and ignore the commonplace subjects just outside the door. I just walk out in my yard and make pictures of anything and everything. I guess the difference is between making and taking pictures.

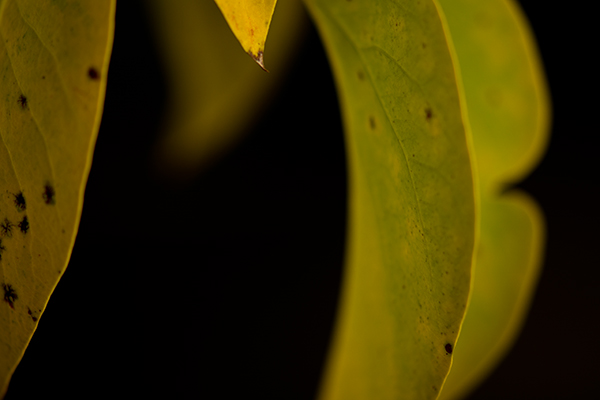
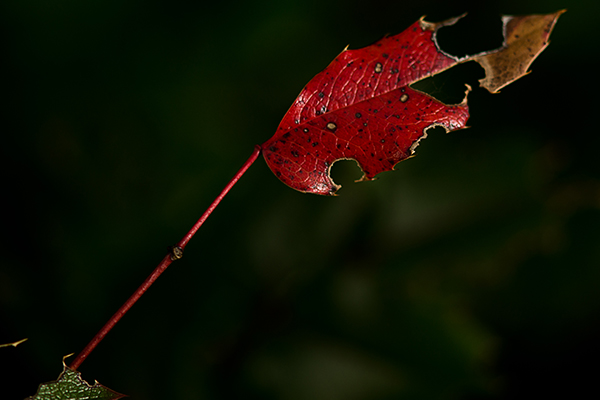
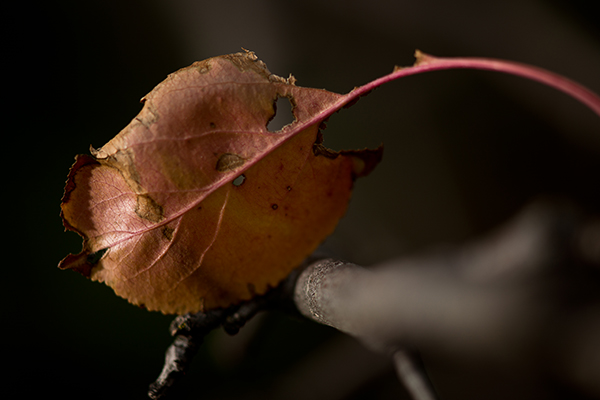
My sojourn into the October garden was a bit about the colour and a whole lot about the shapes. I waited for late afternoon and lucked out when the sky clouded over just a bit. I like what photographer, John Sexton calls, “quiet light”, that as he says, “fades toward the darkness of evening.”

The light at day’s end allows me to underexpose the background and to add a “pop” of light on a specific subject from an off-camera flash.

I don’t really have a plan or a specific subject that I want to work on. I just wander and look. Figuring out the exposure and balancing the fading light with my flash only takes a moment as I choose an interesting plant and search for a creative angle.

It is that quiet and calming time on an October afternoon that welcomes me to the garden, and to quote Sexton again, “I feel quiet, yet intense energy in the natural elements of our habitat. A sense of magic prevails. A sense of mystery – It is a time for contemplation, for listening – a time for making photographs.”

Photographing the Lights of Christmas Holidays

Kelowna-Tree-2014

Kelowna tree 4

Kelowna-5

Kelowna tree 2

Kelowna-tree-3

Well, it has been a wonderful Christmas holiday and I have enjoyed everything about it; the bright colours, gaudy decorations, the sentimental music, silly TV programs, and I especially like the Christmas lights in the city.

A drive this time of year through any town or city neighbourhood is an exciting visual presentation of festive bright lights and another opportunity for, at least a few weeks, to have fun experimenting and photographing the season’s sparkling subjects.

Photographers that want to make pictures of Christmas lights usually wait until dark and end up exposing for only the lights, and the resulting photographs show lots of colours, but don’t say anything about the location or environment; and a photograph in daylight doesn’t show the lights at all.

The photographer’s goal should be to balance an exposure for ambient light (existing environmental light) to and the electric lights. So to provide help and clarification to my readers here is my quick holiday how to for photographing their city or town’s Christmas lights.

As I suggested when I wrote about photographing the CP Holiday Train, begin by choosing the location well in advance, before it gets dark, and prepare to begin when the electric lights are first turned on, when there is still some light in the sky, yet dark enough for the lights to be bright.

Place the camera tightly on a tripod so it’s nice and steady because the exposures can be long. I like using a cable release, but if you don’t have one available, use the camera’s self-timer. The idea is to stop camera-shake.

Photographers can experiment by setting the white balance to “tungsten”. That setting will correctly balance the different lighting types; and as a bonus it will deepen the blue in the sky. I then control the final intensity with PhotoShop.

The composition should also include reflective subjects in the foreground like snow, sidewalks, cars and anything else that adds to the viewer’s attention.

Expose for the sky or buildings and make several test shots and keep checking the camera’s LCD. The lights will become more and more exciting as the sky light fades and as pictures are captured. There will be some length of time between your first images just before the sun sets and the last when everything gets very dark. I also do this in reverse, starting before the sun comes up in the morning.

Dress warm, so you aren’t uncomfortable and rush things. I expect the whole “shoot” should last less than 15 minutes if one is prepared. When the images on the camera’s LCD look too dark everything is finished and its time to rush home, excitedly transfer the images to the computer and have a warm drink.

Most importantly, the quality of light in a photo comes down to balancing the light; it creates the whole look of your photo and now is a good time, with all the added decorative illuminations, to learn about controlling the light around us. If your goal is a black and white image you will need an exposure that shows detail in all the subjects.

In summary, select the correct time of day just before everything is too dark or too light for a composition with sky, foreground, and bright lights. And be sure to leave enough time to experiment. Readers should be able to successfully photograph their own towns, or any favourite location.

I look forward to any comments. Thanks, John

My website is at www.enmanscamera.com